Creating delicious-tasting pastries is just the first step; to truly entice your customers, you need to get creative with unique shapes that make your baked goods more appealing and attractive. Let’s explore some fascinating techniques for shaping buns, bread, and pastries.
1 Bun Shaping Techniques
Rose-Shaped Buns
Divide the dough into equal smaller portions and roll them into balls. Then, roll out the dough into 10cm diameter circles; repeat this process until you’ve used up all the dough.
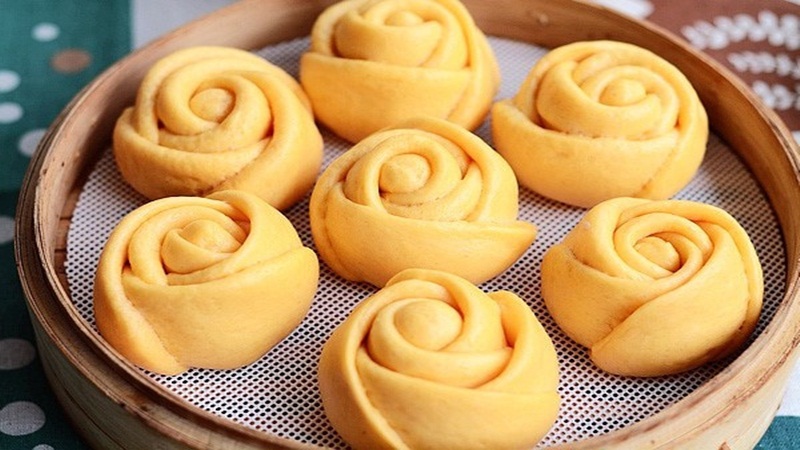 Rose-Shaped Buns
Next, stack five dough circles on top of each other and gently roll them up together. Use a dough cutter to slice the roll in half and carefully shape the dough to resemble rose petals.
Twisted Buns
Again, divide the dough into equal portions and roll them into balls. Then, roll out the dough into thin, elongated shapes, approximately 12-15cm long. Add your choice of filling—sweet or savory—and roll the dough up into a circle.
 Twisted Buns
Cut the rolled-up dough in half and intertwine the two halves, twisting them together to form a circle.
Peach-Shaped Buns
For this shape, simply divide the dough into equal portions and roll them into balls. Then, using your palm, flatten one side of the ball to create a peach-like shape.
There are plenty of other eye-catching bun shapes that you can experiment with to delight your guests.
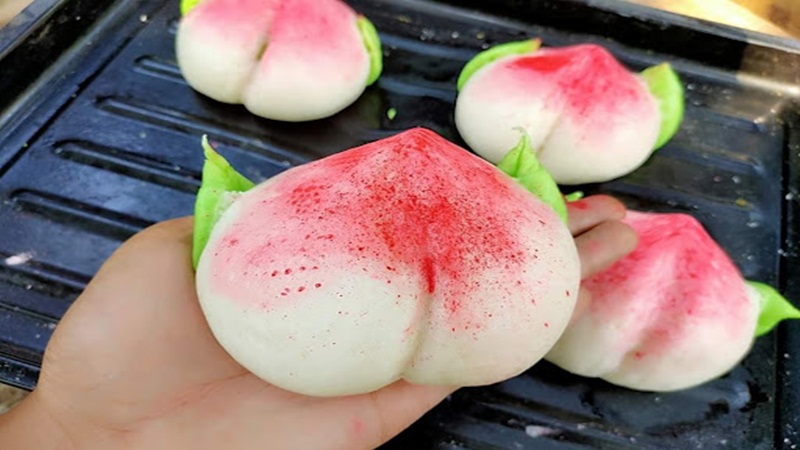 Peach-Shaped Buns
2
Daisy-Shaped Bread
Take a portion of the dough and divide it into three equal parts. Roll each part into a long, thin rope and then flatten the ropes with your palm. Start braiding the ropes together, similar to a three-strand braid, and join the ends together when finished.
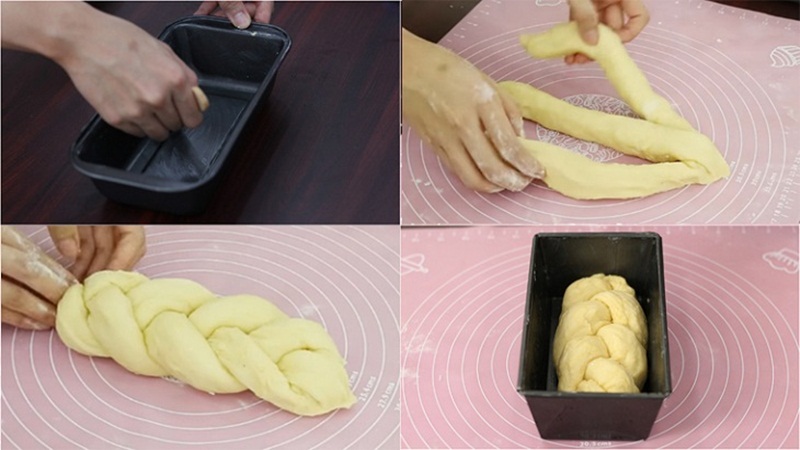 Daisy-Shaped Bread
Pumpkin-Shaped Bread
Divide the dough into equal portions and roll them into balls. Gently flatten the balls and use a dough cutter to create grooves around the edges to form a pumpkin shape. If you don’t have a dough cutter, you can use thread to create the grooves.
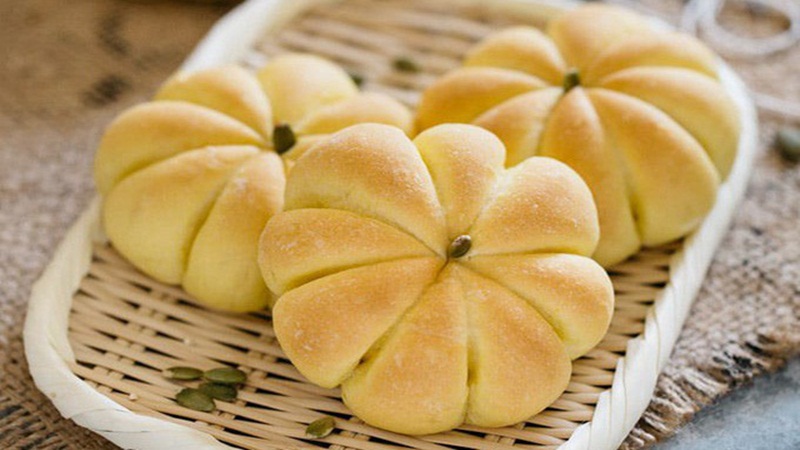 Pumpkin-Shaped Bread
Snail-Shaped Bread
Use cardboard to create a snail shell shape and wrap the dough around it. Then, divide the dough into small, equal portions and roll them into long ropes, which you’ll coil around the snail shell shape.
This shaping technique allows you to fill the bread with cream, custard, or your favorite fillings.
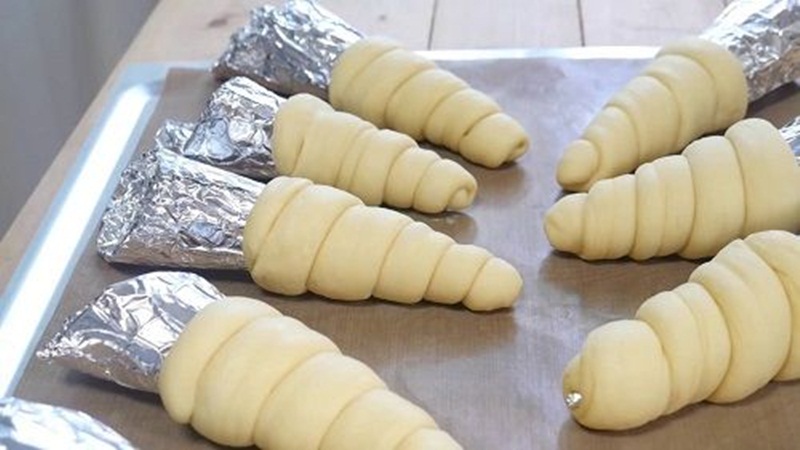 Snail-Shaped Bread
3 Pastry Shaping Techniques
Bow-Shaped Pastries
Divide the dough into equal portions and roll each one into a ball. Then, roll out the balls into flat circles with a 7cm diameter.
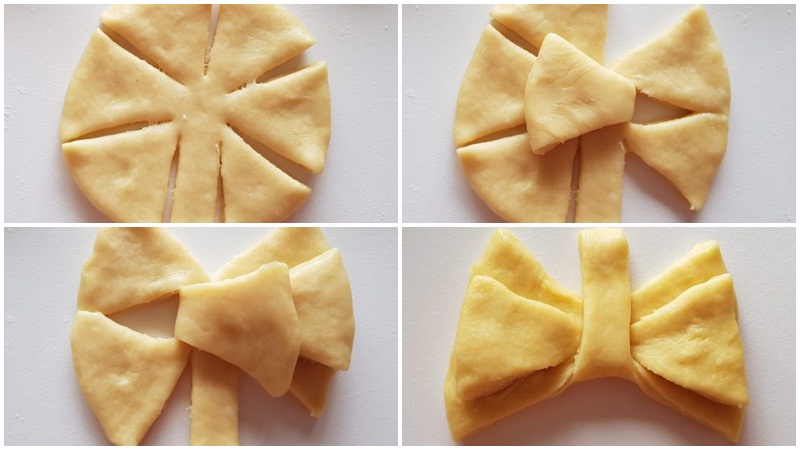 Bow-Shaped Pastries
Use a knife to cut strips around the edges of the circles, leaving approximately 2-3cm of space in the center. Stack two “bow” shapes on top of each other, leaving the center strip free. Fold the strips up and then back down, attaching them to the back of the pastry to complete the bow shape.
Crab-Shaped Pastries
These pastries are loved for their delicious flavor and adorable shape. To create them, divide the dough into small portions and roll them into elongated triangles with a rolling pin.
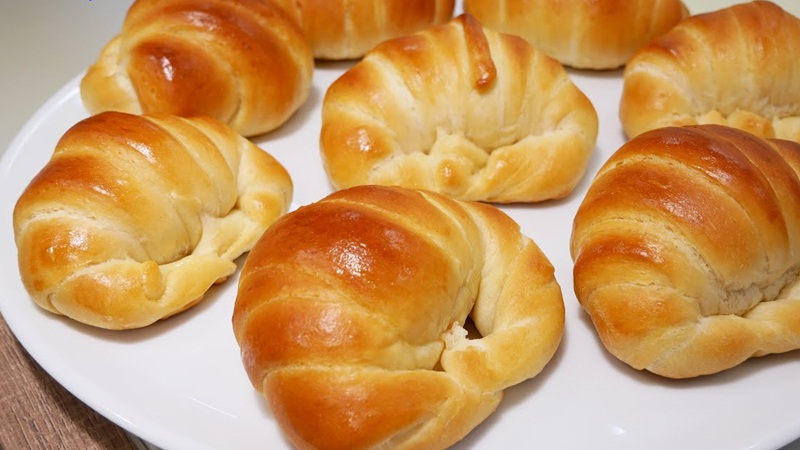 Crab-Shaped Pastries
Use a knife to cut the dough at the center of the wider end and roll it towards the narrower end. Gently shape the pastry to create a slight curve.
Bird-Shaped Pastries
Divide the dough into small portions and shape them into two unequal parts. Use twine to tie a knot at the larger end to create the bird’s beak. Attach two chocolate chips as eyes, positioning them symmetrically on either side of the beak. Finally, press the smaller end to form the bird’s tail.
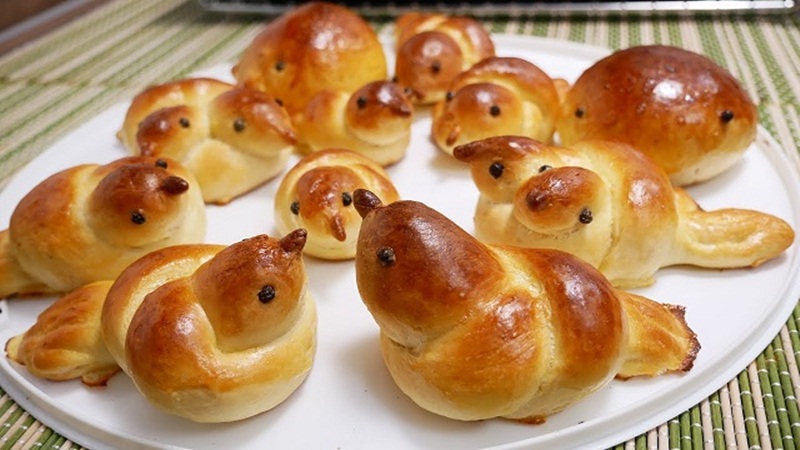 Bird-Shaped Pastries
These are some captivating ways to shape buns, bread, and pastries. We hope these ideas inspire you to create delightful treats that will charm your guests.


