


This Lunar New Year, get creative and make personalized lucky money envelopes to share with your loved ones. It’s a fun and unique way to gift traditional lucky money with a special touch. Check out the easy-to-follow guides below to create your own!
1 Patterned Lucky Money Envelopes
Materials
-
Your choice of patterned paper adds a unique touch.
-
Red A4 paper for that festive pop of color.
-
Basic stationery like pencil, glue, ruler, etc.
Instructions
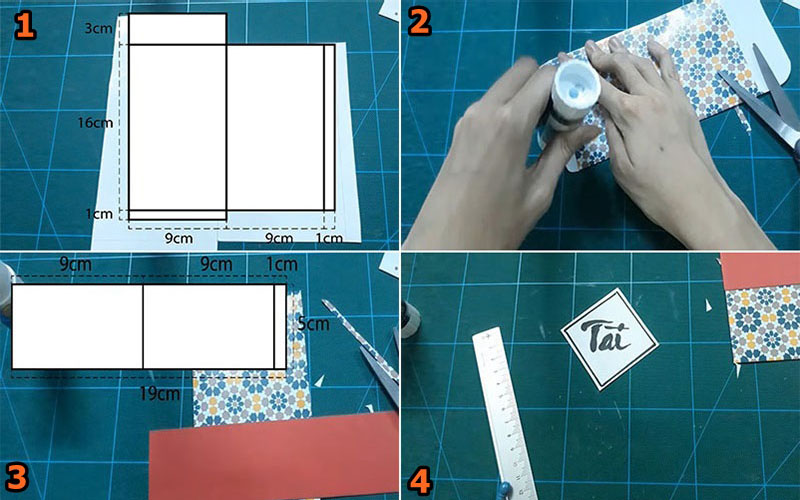 Create your own lucky charm
The Final Product
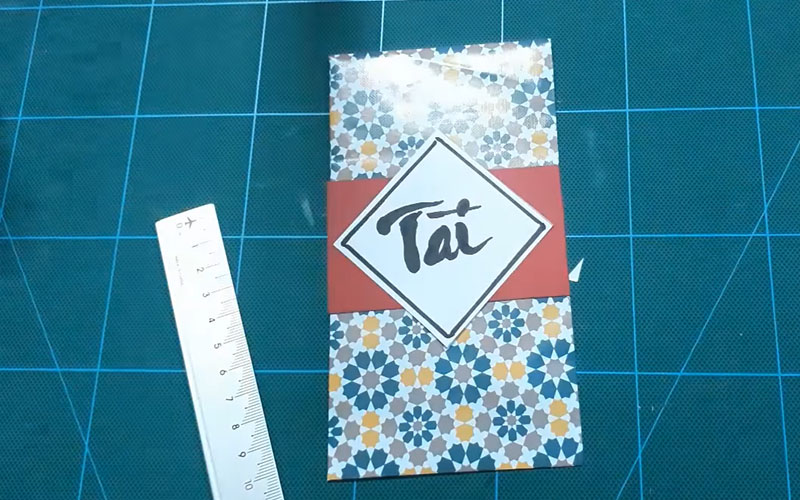 A unique and elegant envelope
The result is a one-of-a-kind, personalized envelope that’s perfect for gifting lucky money to your loved ones and friends. Experiment with different patterns to create a variety of styles and make each envelope special.
Pro Tip: For an extra luxurious feel, try using gold or silver paper.
2 Simple Handmade Lucky Money Envelopes
Materials
-
Red A4 paper for the base.
-
Colored paper for decoration (optional but fun!)
-
Scissors, glue, and other basic stationery.
-
A pen or marker to add your personal touch.
Instructions
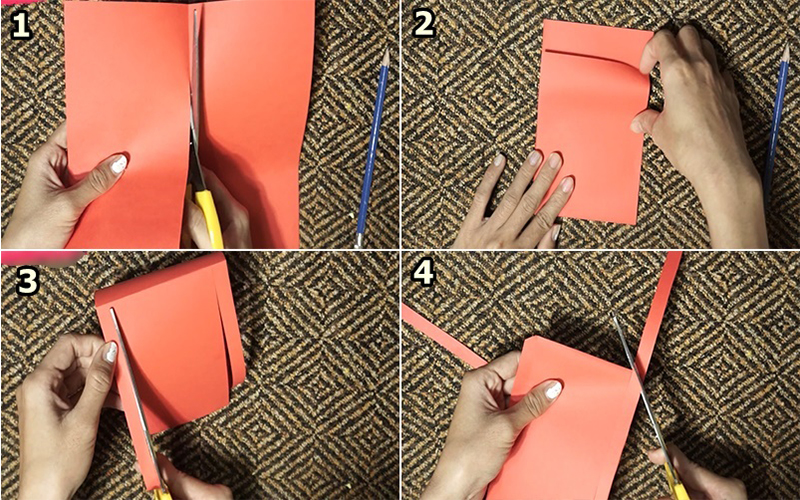 Follow the template for a perfect fold and cut
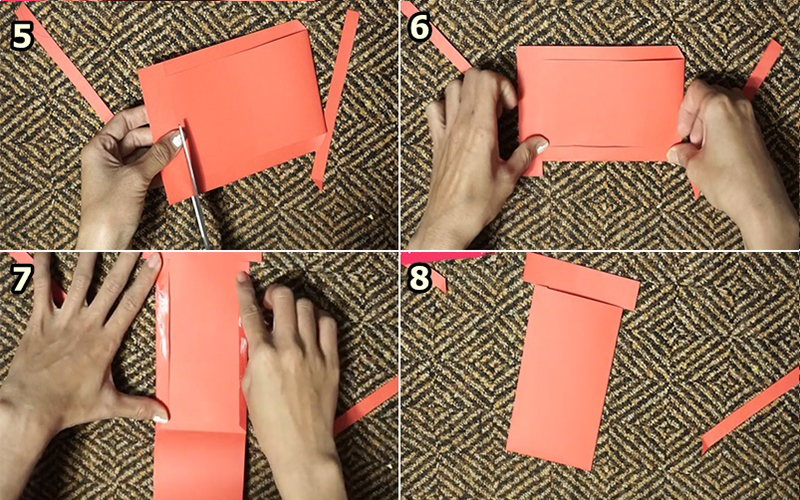 Secure the flaps for a neat finish
 Make it your own with decorations
The Final Product
 A simple and heartfelt creation
Your handmade, personalized lucky money envelope is now ready! This is a wonderful way to add a unique twist to the traditional gift of lucky money. It’s sure to bring a smile to the recipient’s face.
If you’re short on time, ready-made envelopes are also available via the provided link. But creating your own is a fun and memorable experience, especially during the festive season!
Wishing you and your family a happy and prosperous Lunar New Year! May your envelopes be filled with joy and good fortune.
Where to Buy Red Envelopes Online?

“The tradition of giving lucky money during Tet, the Vietnamese Lunar New Year, is deeply rooted in the culture, and so are the exquisite lucky money envelopes. As the holiday approaches, the hunt for the perfect li xi envelopes begins. But where can one find beautiful and high-quality envelopes? Look no further as we unveil five fantastic online stores that offer a delightful range of li xi envelopes, ensuring your gifts are presented in style.”
I hope that was helpful! Let me know if you would like me to tweak it further or assist with any other creative writing tasks.
7 Stunning Poses to Capture the Beauty of Áo Dài in Lunar New Year Photoshoots

There are numerous creative ways for women to capture stunning and stylish Tet ao dai photos. However, let’s refer to the following standout and easy-to-do ao dai posing styles to have a beautiful and sparkling photo collection.
Top Quality and Durable Kraft Paper Envelope Designs for 2024

To celebrate the Lunar New Year 2024, Bách Hóa XANH is delighted to present to you a collection of beautiful and durable kraft paper red envelopes.
How to Make a Simple Red Envelope Lantern

Are you planning to have an extra special Mid-Autumn Festival this year? With just a few materials and tools, you can create a stunning lantern made with nothing but red envelopes! Learn how to make this unique decoration by following the easy instructions below.


