Looking to enhance your images with vibrant brush effects? Learn how to easily add brush effects to your images and create a unique and engaging experience for your audience. Elevate the liveliness of your PowerPoint presentations by following these straightforward steps on your computer.
For a detailed video tutorial on adding brush effects to images in PowerPoint, check out the video below:
How to Add Brush Effects to Images in PowerPoint
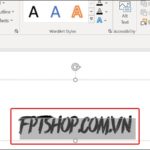
Step 1: Download and install the free brush-style font HERE. In this guide, we are using the font called Rush Brush.
If you are unsure how to install fonts on your computer, you can refer to this article on how to install fonts.
/fptshop.com.vn/uploads/images/tin-tuc/161327/Originals/cach-them-hieu-ung-co-ve-vao-hinh-anh-trong-powerpoint-13.jpg)
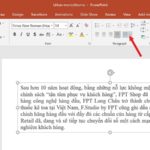
Step 2: Click on the Insert tab, select TextBox, and create a letter I inside the TextBox.
/fptshop.com.vn/uploads/images/tin-tuc/161327/Originals/cach-them-hieu-ung-co-ve-vao-hinh-anh-trong-powerpoint-2.jpg)
Step 3: Adjust the Font and Size to fit your requirements.
/fptshop.com.vn/uploads/images/tin-tuc/161327/Originals/cach-them-hieu-ung-co-ve-vao-hinh-anh-trong-powerpoint-3.jpg)
Step 4: Click on Insert, select Shapes, and choose the Rectangle shape as shown in the image.
/fptshop.com.vn/uploads/images/tin-tuc/161327/Originals/cach-them-hieu-ung-co-ve-vao-hinh-anh-trong-powerpoint-4.jpg)
Step 5: Draw a random shape that covers the existing shape, then select both objects.
/fptshop.com.vn/uploads/images/tin-tuc/161327/Originals/cach-them-hieu-ung-co-ve-vao-hinh-anh-trong-powerpoint-5.jpg)
Step 6: Click on the Shape Format tab, select Merge Shapes, and choose Intersect.
/fptshop.com.vn/uploads/images/tin-tuc/161327/Originals/cach-them-hieu-ung-co-ve-vao-hinh-anh-trong-powerpoint-6.jpg)
Step 7: In the Shape Outline section, select No Outline to remove the shape’s outline.
/fptshop.com.vn/uploads/images/tin-tuc/161327/Originals/cach-them-hieu-ung-co-ve-vao-hinh-anh-trong-powerpoint-7.jpg)
Step 8: Press Ctrl + D to duplicate multiple Shapes and arrange them randomly.
/fptshop.com.vn/uploads/images/tin-tuc/161327/Originals/cach-them-hieu-ung-co-ve-vao-hinh-anh-trong-powerpoint-8.jpg)
Step 10: Move the Shape to the desired position on the image, click on the Image, and then click on the Shape.
/fptshop.com.vn/uploads/images/tin-tuc/161327/Originals/cach-them-hieu-ung-co-ve-vao-hinh-anh-trong-powerpoint-12.jpg)
Step 11: Finally, click on Merge Shapes and choose Intersect to apply the desired effect to the image.
/fptshop.com.vn/uploads/images/tin-tuc/161327/Originals/cach-them-hieu-ung-co-ve-vao-hinh-anh-trong-powerpoint-11.jpg)
If you found this article helpful, feel free to share it with your friends and family. We wish you success in adding brush effects to your images in PowerPoint!
Create Stunning Image Composites with Photoshop in an Easier Way
Have you ever wanted to layer two or more images on top of each other using Photoshop? With this handy tutorial, you’ll learn exactly how to do this in no time! By the end of the article, you’ll be able to confidently utilize the powerful Photoshop feature to create a unique composition. Don’t miss out!


