


1. Identify the model of the timekeeping table
Before starting to create a timekeeping table in Excel, you need to understand in detail how to create a timekeeping table and its specific model. When creating a timekeeping table, you need to know exactly what content you need. If you still haven’t figured out the model of the timekeeping table, follow the hints below:
- 1 timekeeping file will include 13 sheets, including 1 sheet listing the list of employees to be timekeeping and the remaining 12 sheets are the 12 months of the year.
- Each timekeeping sheet will include about 20 employees or more depending on the number of personnel in each department of the company.
- The timekeeping symbols of each person will not be the same, each person has their own style and these symbols will be used throughout the 12 months.
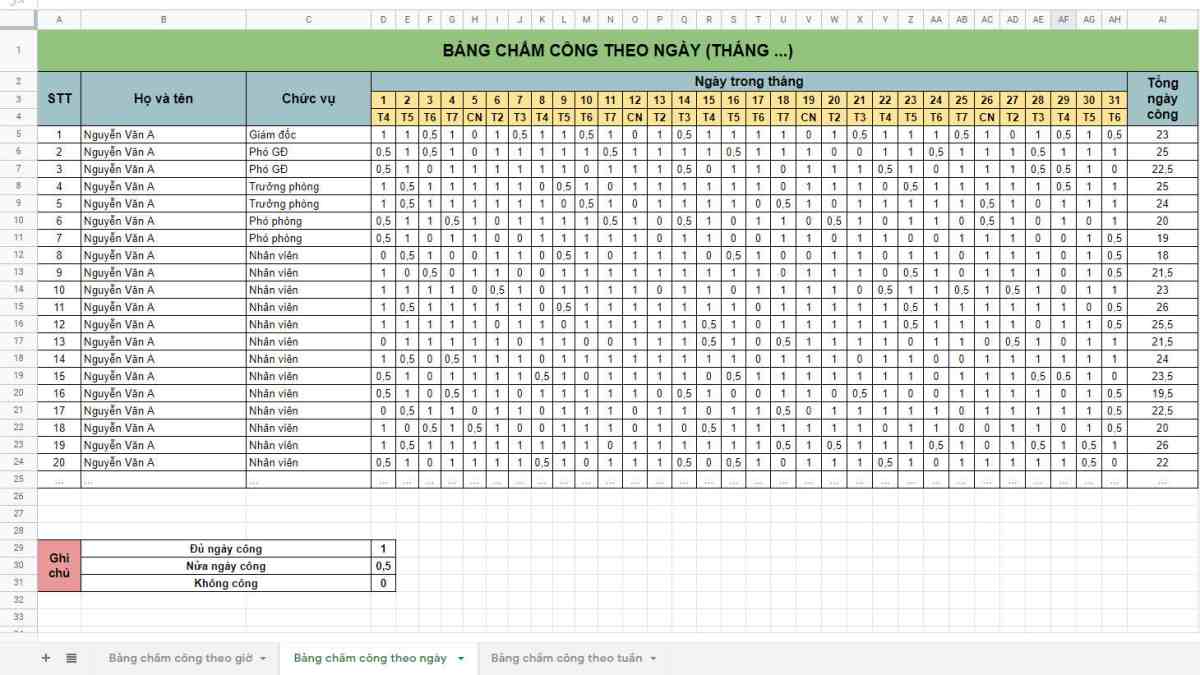
- The timekeeping table will have all the columns of the day, month, and year. In which, Saturday and Sunday will have a different background color to make them more prominent.
- The employee’s working hours will be recorded by day and summarized on the last day of the month.
- The names of employees in the timekeeping sheets will match the names of employees in the employee list sheet.
2. Create a timekeeping table in Excel
After completing the construction of the timekeeping table form, you can proceed to create the timekeeping table in Excel automatically. Below, FPT Shop will describe how to create a timekeeping table on Excel quickly and beautifully. It includes 6 steps:
2.1. Create the layout in each sheet
As mentioned above, the timekeeping table will include 13 sheets, but in this step, you only need to create two sheets, the employee list sheet, and the January sheet. For the sheets from February to December, you can use the Ctrl + C and Ctrl + V combination to copy the content from the January sheet. Therefore, the January sheet needs to be neat and professional to ensure high accuracy without requiring many revisions.
/fptshop.com.vn/uploads/images/tin-tuc/164583/Originals/cach-tao-bang-cham-cong-trong-excel-nhanh-chong-1.jpg)
2.2. Create the employee list sheet
The next step is to create the first sheet, the employee list sheet. In this sheet, you need to create columns such as order number, employee code, full name, date of birth, hometown, ID card number, date of employment,… Here are some notes to pay attention to when creating the employee list sheet:
- You should enter the content from column B and row 4 to link with other sheets easily.
- The date of birth column should have the same format by selecting the entire column, right-clicking, choosing Format Cell, selecting Custom, and choosing the dd-mm-yyyy format.
/fptshop.com.vn/uploads/images/tin-tuc/164583/Originals/cach-tao-bang-cham-cong-trong-excel-nhanh-chong-2.jpg)
2.3. Create the January sheet
In the January sheet, you need to create the framework and set the details for the timekeeping table. Specifically, you need to add the following items to the attendance sheet January:
- The table name – Timekeeping Table in the range from B3 to E3.
- The month and year of attendance in the range from B4 to E4.
- The department in the B5 cell.
- The attendance rate in the range from B6 to E6.
- Including columns for day of the week, date, month. Saturday and Sunday will have a different background color.
- The employee’s working hours will be recorded by day and summarized at the end of the month.
- The employee names in the attendance sheets will match the employee names in the employee list sheet.
After creating the columns with the above content, customize the width of the columns to fit the text in each column. To adjust, place the cursor in the middle of the column separator in the table.
/fptshop.com.vn/uploads/images/tin-tuc/164583/Originals/cach-tao-bang-cham-cong-trong-excel-nhanh-chong-3.jpg)
2.4. Create the dates in the timekeeping table
This is a very important step and the most complex implementation in creating a timekeeping table in Excel automatically. You need to pay attention to the following steps:
Step 1: Perform the steps as shown in the figure below: Enter the word “month” in cell B4, enter 1 in cell D4, enter the word “Year” in cell E4, and enter the year in cell F4.
/fptshop.com.vn/uploads/images/tin-tuc/164583/Originals/cach-tao-bang-cham-cong-trong-excel-nhanh-chong-4.jpg)
Step 2: Enter the formula =date(F4,D4,1) at cell E9 and press Enter. Then, right-click on that cell, select Format Cell, select Custom, enter “dd” in the Type box, and click OK.
/fptshop.com.vn/uploads/images/tin-tuc/164583/Originals/cach-tao-bang-cham-cong-trong-excel-nhanh-chong-5.jpg)
Step 3: Enter the formula =E9+1 at cell F9 and press Enter. Then, select the range from F9 to AI9 and press Ctrl + R.
/fptshop.com.vn/uploads/images/tin-tuc/164583/Originals/cach-tao-bang-cham-cong-trong-excel-nhanh-chong-6.jpg)
Step 4: Enter the formula =IF(WEEKDAY(E9)=1,”CN”,WEEKDAY(E9)) at cell E10 and press Enter. Then, select the range from E10 to AI10, right-click, select Format Cell, and select Custom. Enter “TGeneral” in the Type box, then click OK.
/fptshop.com.vn/uploads/images/tin-tuc/164583/Originals/cach-tao-bang-cham-cong-trong-excel-nhanh-chong-7.jpg)
Step 5: Select the range from E10 to E30 to AI10 to AI30 and choose Conditional Formatting, then click on New rule. The New Formatting Rule window will appear on the computer screen, you choose Use a formula to determine which cells to format, then enter =if(E$9=”CN”,1,0) in the blank cell and press Format. Finally, select Fill and choose a background color for the cell, then press Ok to mark Sundays with a different background color.
/fptshop.com.vn/uploads/images/tin-tuc/164583/Originals/cach-tao-bang-cham-cong-trong-excel-nhanh-chong-8.jpg)
2.5. Set the timekeeping symbols for the table
First, you need to set symbols for specific timekeeping cases. The symbols will differ between different types of work but remain consistent throughout the 12 months. You should create a small section below the table and write down the cases and their symbols. Then, enter each type of work into the cells in the small section “Quy ra công” in the table. Here are some timekeeping cases that you should refer to:
- Actual working day, full working hours, on-time: Symbol X.
- Half-day, one work shift and one off shift: Symbol V.
- Off work for half a day or a full day but still entitled to salary: Symbol P.
- Off work without pay: Symbol K.
- Cases of pregnancy, illness: Symbol O.
/fptshop.com.vn/uploads/images/tin-tuc/164583/Originals/cach-tao-bang-cham-cong-trong-excel-nhanh-chong-9.jpg)
2.6. Set the formula for calculating working hours
The final step is to set the formula for calculating working hours. You need to enter the formula for each type of work to calculate the number of full working days, on-time working, days off due to illness,…
- At column AI11: =COUNTIF(E11:AI11,G34).
- At column AK11: =COUNTIF(E11:AI11,G35).
- At column AL11: =COUNTIF(E11:AI11,G36).
- At column AM11: =COUNTIF(E11:AI11,G37).
- At column AN11: =COUNTIF(E11:AI11,G38).
/fptshop.com.vn/uploads/images/tin-tuc/164583/Originals/cach-tao-bang-cham-cong-trong-excel-nhanh-chong-10.jpg)
After entering the above formulas into row 11, drag the cursor from row 11 to the end of the table to copy the calculation formulas to other rows. Then, copy this timekeeping sheet to the remaining sheets from February to December.
3. Notes when making a timekeeping table
During the process of creating a timekeeping table, you will surely encounter challenges and mistakes. Here are some notes for you when creating a timekeeping table:
- Make sure that the sheets in the timekeeping table are synchronized with each other in terms of symbols, calculation formulas, and operations.
- Before dividing rows and columns, create criteria to create a large table. Then, divide the large sections into smaller ones one by one until all the content is filled in the table to avoid unnecessary mistakes.
- After entering all the information and completing the timekeeping, specify the date and time of completion for easy verification and to avoid confusion.
/fptshop.com.vn/uploads/images/tin-tuc/164583/Originals/cach-tao-bang-cham-cong-trong-excel-nhanh-chong-11.jpg)
4. How to make a timekeeping table with software
Creating a timekeeping table with Excel takes a lot of time and complexity. It’s only suitable for small and medium-sized businesses. Large companies prioritize using software to track timekeeping for employees. Here are two popular timekeeping software that you should use:
4.1. MISA AMIS software
MISA AMIS is a timekeeping software developed by MISA Joint Stock Company. This application has helped businesses reduce the workload of entering and timekeeping employee data. With MISA AMIS, your company can timekeeping on mobile quickly and conveniently.
This way of creating a timekeeping table in Excel automatically on your phone can record working hours in various forms such as fingerprint scanning or face recognition,… This allows companies to accurately track the dates and times employees go to work and their honesty.
In addition, MISA AMIS software provides reports on the attendance situation by department, leave status, tardiness list,…. This makes it easy for managers to monitor the personnel situation of their company and come up with the most appropriate solutions.
/fptshop.com.vn/uploads/images/tin-tuc/164583/Originals/cach-tao-bang-cham-cong-trong-excel-nhanh-chong-12.jpg)
4.2. CoffeeHR software
CoffeeHR software is also one of the solutions that companies often use for timekeeping. The timekeeping tables of this application are designed similarly to when you create them in Excel. To use CoffeeHR timekeeping, you need to download and install the software first. Then, connect the software to the attendance machines and fill in the employee list in the application.
CoffeeHR can use multiple timekeeping forms such as GPS, fingerprint, face recognition,… with accuracy to the second, minute. Through this, managers can keep up to date with all activities and come up with appropriate salary and reward plans. In addition, the software also has sections for analyzing and evaluating the attendance status of departments in the company.
Conclusion
Above are the steps to automatically create a timekeeping table for individuals and groups on a daily or hourly basis in detail for employees. How to create a timekeeping table in Excel is quite complex, so please perform each step carefully. Good luck!
5 Essential Excel Functions for Beginners
 Excel Functions for Beginners’>
Master the fundamentals of Excel with these 5 basic functions! Learn how to use SUM, AVERAGE, COUNT, MIN, and MAX in order to make calculating and analyzing data easier and more efficient.
A Simple Method for Adding Watermark to Excel for All Spreadsheets in No Time

Watermarking in Excel is a great way to mark your ownership and protect the content on your Excel spreadsheets. If you’re unsure how to do it, you can follow the steps outlined in this article.
How to recover unsaved or overwritten Excel files effectively: a sure-fire method

Knowing how to recover unsaved Excel files can be extremely helpful in cases when your computer unexpectedly shuts down or you accidentally click on “Don’t save” when Excel asks if you want to save your changes before closing. Follow this article to learn the step-by-step process of how to accomplish it.
5+ Effective Ways to Convert PDF to Excel Quickly, Useful Office Tricks

Knowing the ways to convert PDF files to Excel below will enable you to easily edit and add content inside. Office workers and students definitely must know this trick if they want to simplify their tasks.


