When drafting a document, there are many instances where you will want to insert images, drawings, and other objects. The group feature allows you to link them together and perform adjustments synchronously. Grouping in Word is relatively straightforward and can be achieved through a few simple steps. Additionally, you can also modify the size, position, and other attributes of the group or ungroup objects.
Grouping in Word and Its Benefits
Grouping is a built-in feature in Microsoft Word’s text editor. It is commonly used to link or group objects such as drawings, externally inserted images, or text boxes.

Once grouped, users can easily manage and edit these objects synchronously. Learning how to group in Word is an essential skill for students, office workers, and professionals who frequently work with documents.
How to Group in Word
To group objects in Word, follow these steps:
Step 1: Open your Word file and navigate to the page containing the objects you want to group. These objects can include text boxes, artistic words or shapes, drawings, or externally inserted images.

Step 2: Select the objects you want to group together. You can do this by holding down the Ctrl key and left-clicking on each object.
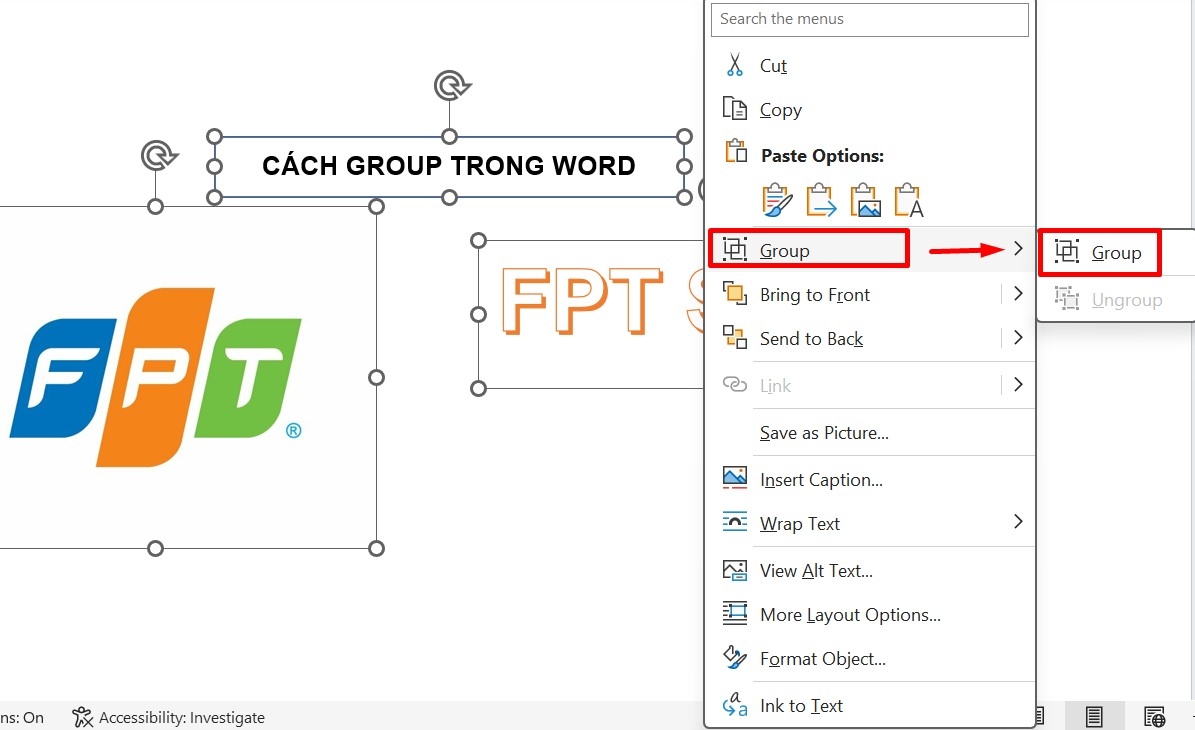
Step 3: Right-click on the selected objects and choose Group > Group from the menu.
How to Edit a Group in Word
Once objects like images, drawings, or text boxes are grouped, they become a unified block with fixed distances and positions relative to each other. You can perform various editing operations on this group, such as moving or resizing, which will apply to all objects within the group.
Resizing the Group
To increase the size of the group, left-click on it. This will display circular handles at the corners and in the middle of the group’s edges. Hover your cursor over these handles, and you will see arrows indicating that you can left-click and drag outward to increase the group’s size. To decrease the size, simply drag inward.
.jpg)
Moving the Group
To move the group, simply hover your cursor over any of its corners until you see a four-directional arrow, then left-click and drag, similar to the drag-and-drop action for other objects in Word. Moving a group is analogous to moving an image or a drawing object (Shape) in Word.
Modifying Group Attributes
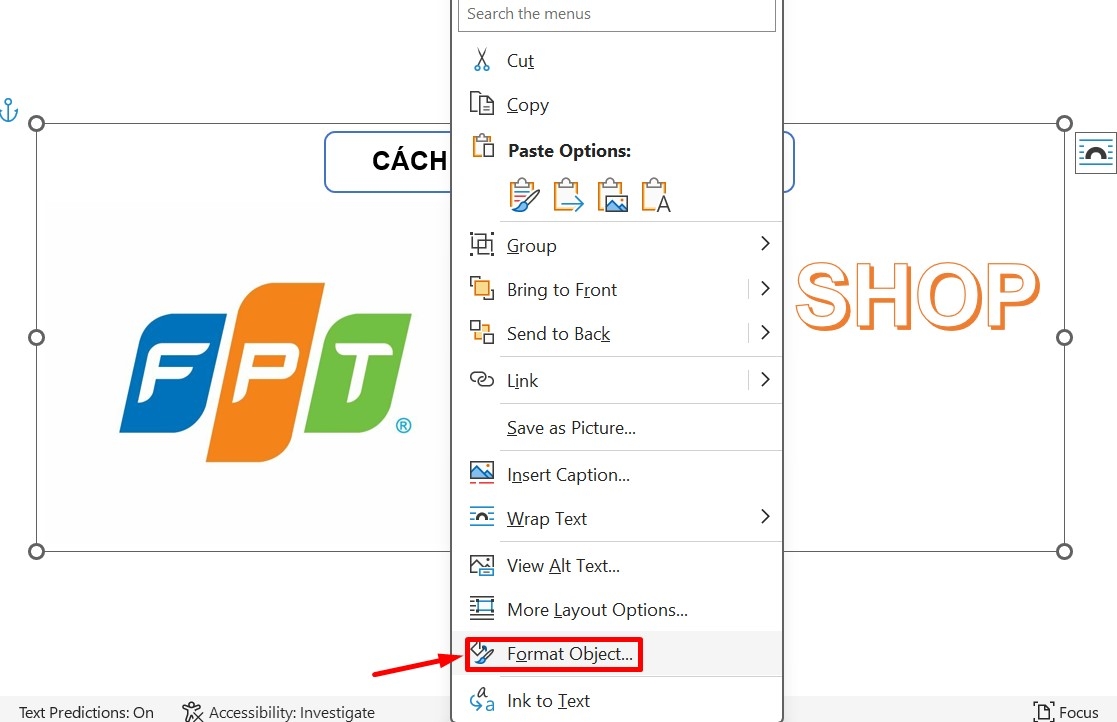
You can also make various attribute adjustments to the group by right-clicking on it and selecting Format Object. This will open a window where you can adjust margins, borders, colors, and other settings for the entire group.
Editing Individual Objects within the Group
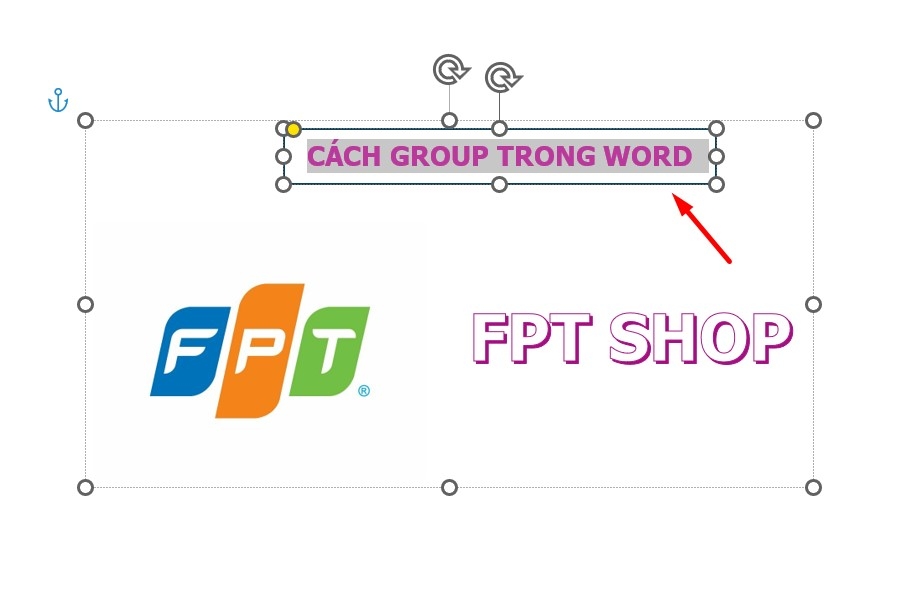
Even after grouping, you can still edit a single object within the group by left-clicking on it and making the desired changes directly.
How to Ungroup in Word
Although you can adjust individual objects within a group as mentioned above, there may be times when you need to ungroup them to make more intricate adjustments, especially when altering their positions or distances relative to each other. Here’s how to do it:
Step 1: Select the group you want to ungroup.
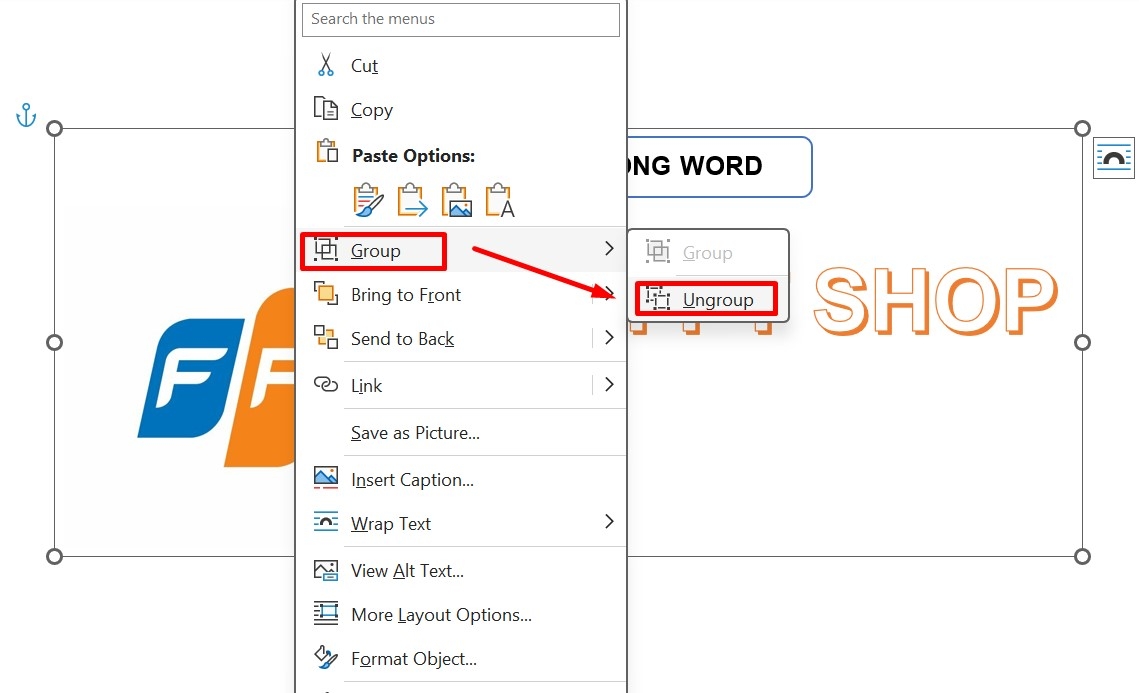
Step 2: Right-click on the group and choose Group > Ungroup.
In Conclusion
Learning how to group in Word is a fundamental and useful skill for anyone who regularly works with documents, presentations, or reports. In this article, FPT Shop has provided a comprehensive guide on grouping in Word, including editing and ungrouping techniques. These instructions are based on Word 2019, but the process is similar in other versions. Feel free to apply these tips to your own work!
Frequently asked questions


