


Shrimp is not only delicious but also packed with vitamins, minerals, and protein. Regularly including this seafood in your diet offers numerous health benefits, such as aiding weight loss, supporting bone and joint health, improving brain function, and promoting cardiovascular health.
With shrimp as your main ingredient, you can create a variety of mouth-watering dishes to treat your family, such as grilled shrimp in sate sauce, salted shrimp, Thai-style shrimp in lemon sauce, or pepper-braised shrimp. In addition, you can also make dried shrimp in the microwave with this recipe.
You can create a variety of dishes with dried shrimp, such as dried shrimp stew and papaya salad.
1. Ingredients for making dried shrimp in the microwave
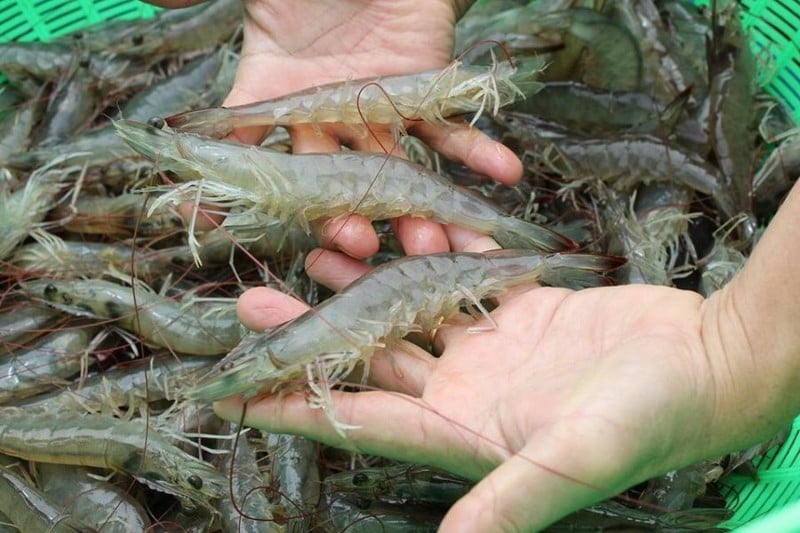
– Fresh shrimp (preferably use either river shrimp or whiteleg shrimp): 1 kg
– Salt: 200 grams
– Clean water: 500 ml
2. How to make dried shrimp in the microwave
Step 1: Prepare the shrimp
– Cut off the hard whiskers from the fresh shrimp after purchasing.
– Next, use a knife, scissors, or a small toothpick to remove the black thread along the shrimp’s back.
– Rinse the shrimp a few times in cold water to clean it thoroughly, and then let it air dry.
It is recommended to use fresh shrimp to make dried shrimp in the microwave.
Step 2: Boil the shrimp
– Place a pot on the stove, add 500ml of water and 200gr of salt, and bring it to a boil.
– Once the water is boiling, add the shrimp and cook until they turn red, which indicates they are cooked. Turn off the heat and remove the shrimp with a slotted spoon, placing them in a separate bowl to cool completely.
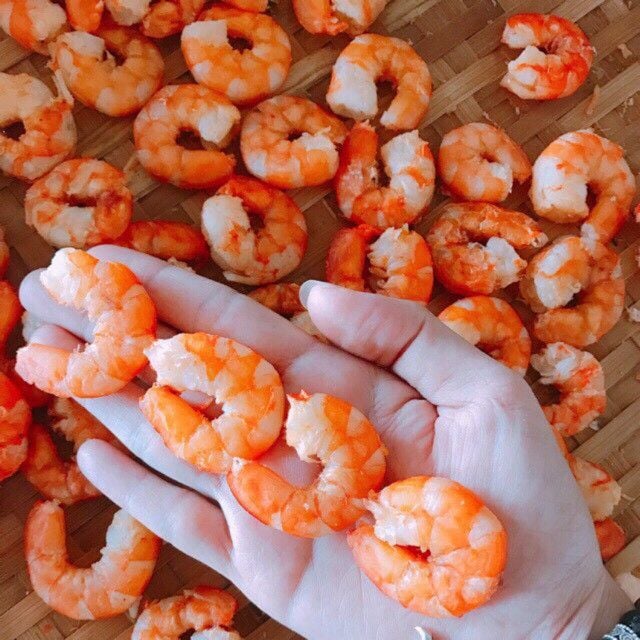
Step 3: Peel the shrimp
– Once the shrimp have cooled down, cut off the heads and tails and peel off the shells.
– Rinse the peeled shrimp in warm water and let them air dry.
Step 4: Dry the shrimp
– Spread the cleaned, shelled shrimp evenly on a flat plate and place them in the microwave to dry for about 30 minutes at medium heat.
– If the shrimp are not completely dry, continue drying and adjust the time as needed until they are fully dehydrated. Then, remove them from the microwave and let them cool down.
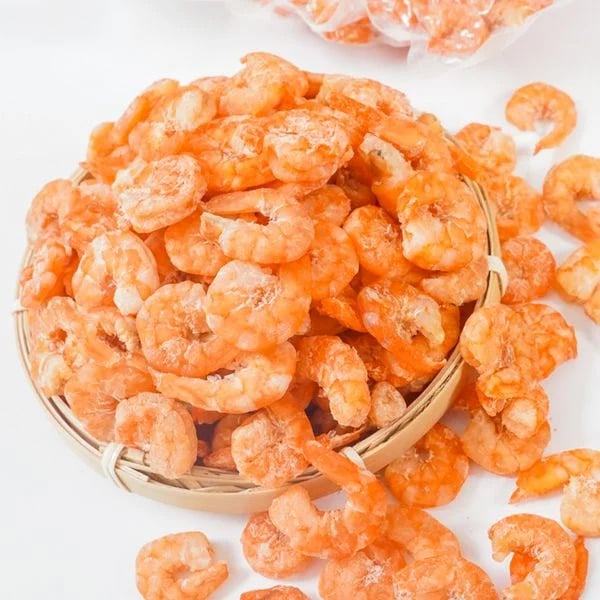
After drying the shrimp in the microwave, you will have a colorful, tasty, and naturally sweet and chewy shrimp treat. The dried shrimp should feel dry to the touch, neither sticky nor too hard.
Store the dried shrimp in airtight glass containers to keep them fresh.
3. Notes on making dried shrimp in the microwave
– To ensure the best quality and longevity of your dried shrimp, choose fresh, live shrimp and avoid mixing them with any spoiled ones. Select shrimp of similar size with bright coloring and no strange odors.
– Do not over-dry the shrimp, as it may make them too hard and compromise their taste.
– For long-term storage, transfer the dried shrimp to airtight glass containers and keep them in the refrigerator. If you wish to store them for an extended period, you can freeze them.
– Dried shrimp are incredibly versatile and can be used in various dishes according to your family’s preferences, such as dried shrimp stew, papaya salad with dried shrimp, tomato sauce with dried shrimp, or winter melon soup with dried shrimp.
The Amazing Benefits of Ripe Papaya

While papaya is widely regarded as a nutritious and safe fruit, its benefits extend far beyond. This tropical delight is brimming with vitamin C and antioxidants, fortifying your body’s defenses, warding off ailments, and bestowing a radiant, youthful glow upon its devotees.
“Trim That Tummy Fat with Turmeric: A Powerful Natural Remedy”

Introducing a natural way to tackle stubborn belly fat – say no to weight loss pills and gel creams, and hello to the power of turmeric starch. Imagine a simple, effective solution to your belly fat concerns, a natural remedy that works wonders without the need for harsh chemicals. With its potent properties, a little goes a long way, helping to melt away that unwanted fat and reveal a transformed you.
The Secret to Perfectly Tender and Non-Sticky Stir-Fried Glass Noodles

With a grasp of the basics, you can unleash your creativity and experiment with a myriad of ingredients to create delectable glass noodle stir-fries that will tantalize your taste buds and impress your family and friends.
The Ultimate Guide to Vietnamese Edible and Poisonous Snails and Slugs

“Snails are a seafood delicacy, especially in the coastal regions of Vietnam. They are a favorite dish for many, and with good reason. Join us as we explore the diverse and delicious world of Vietnamese snails, and discover why they are so beloved by locals and visitors alike.”
“Get Fit, Stay Healthy: Choosing the Right Sport for You”

“Walking and running are both incredibly beneficial forms of exercise, offering a host of health benefits and accessible to people of all ages and fitness levels. However, despite their apparent similarities, walking and running are distinct disciplines, each catering to different needs and goals.”


