When to delete or archive a group on Facebook?
If you have personal reasons for not wanting a Facebook group that you created to be active anymore, you have the option to either delete or archive the group:
- Group deletion: This option permanently deletes the group from Facebook.
- Group archives: This option temporarily stops the group from appearing in search results for non-members and prevents the addition of new members.

Here’s a guide to help you delete or archive groups on Facebook using different devices:
1. How to delete a Facebook group
How to delete a Facebook group on an Android phone
Step 1: Log in to your Facebook account on your Android phone. Tap on the three horizontal lines icon in the top right corner and select “Groups.” Choose the group you want to delete.

Step 2: Tap on “Settings and administrative tools,” then select “Members.”
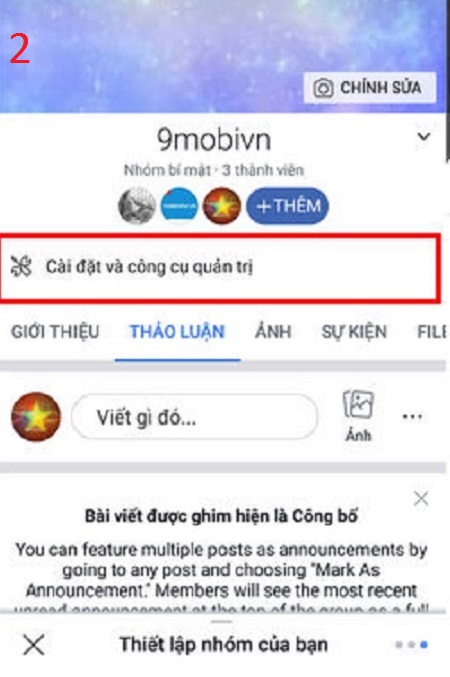
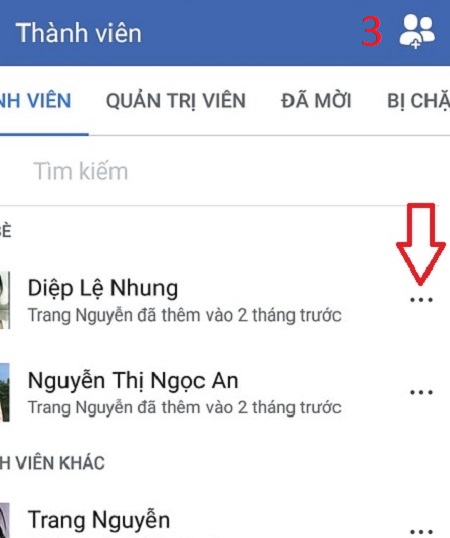
Step 3: Tap on the three-dot icon next to each member’s name and select “Remove from group.”
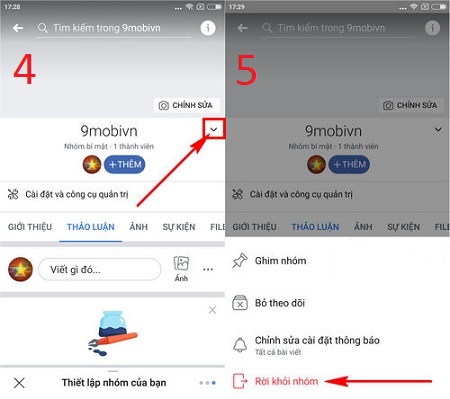
Step 4: After removing all the members, go back to the main screen of the group and tap on the arrow below (as shown in the picture), then select “Leave the group.”
Step 5: Finally, click “confirm” to leave the group.
How to delete a Facebook group on a phone/iPad
The process of deleting a Facebook group on an iPhone/iPad is similar to that on an Android phone. Follow these steps:
- Step 1: Log in to your Facebook account on your device. Tap the three horizontal lines icon, then tap “Groups” and select your group name.
- Step 2: Tap on “More” below the cover photo, then tap “View group information”.
- Step 3: Tap on “Group Archive,” then click “Confirm”.
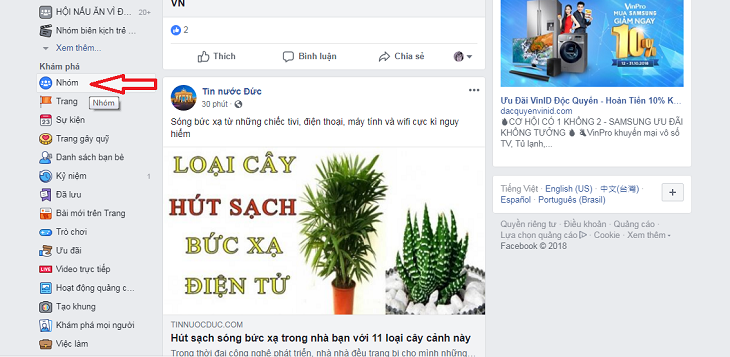
Step 2: Click on the “Members” section below the cover photo.
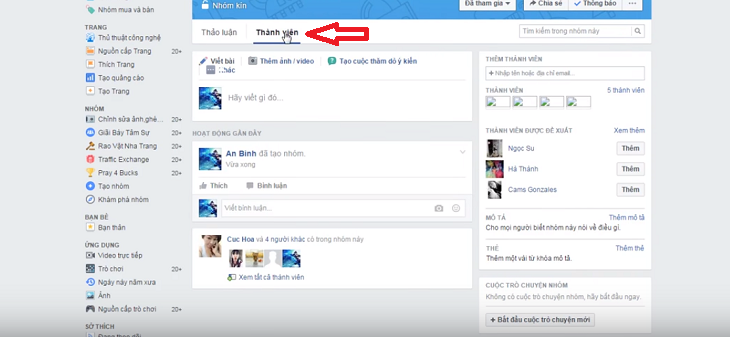
Step 3: Click on the “-” icon next to each member’s name and select “Remove from group”.
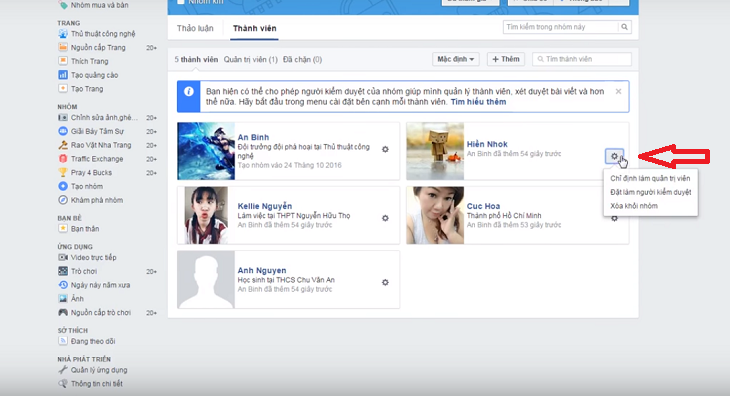
Step 4: After removing all the members (as done in step 3), click on the “-” icon next to your name and select “Leave group”.
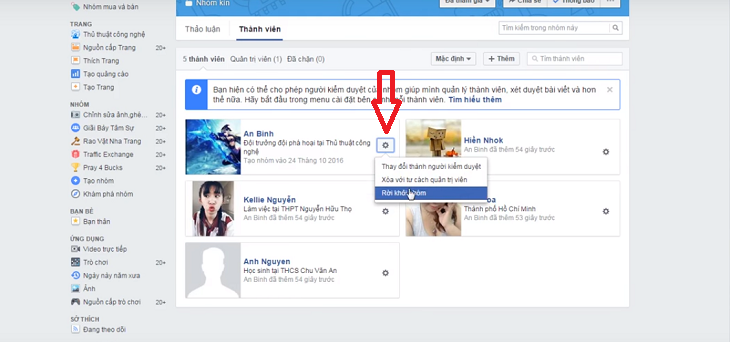
2. How to archive a Facebook group
How to archive a Facebook group on an Android phone
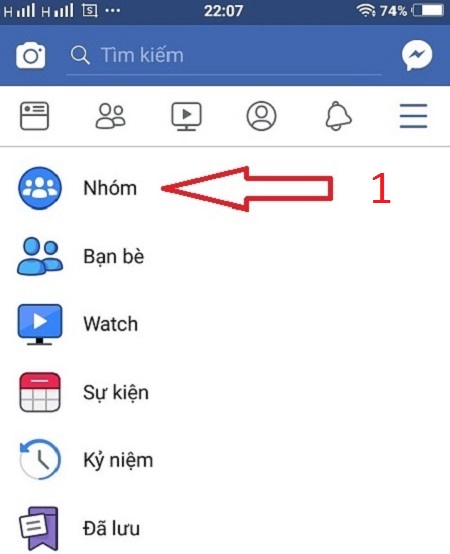
Step 1: Tap on the three horizontal lines icon and select the group name you want to archive.
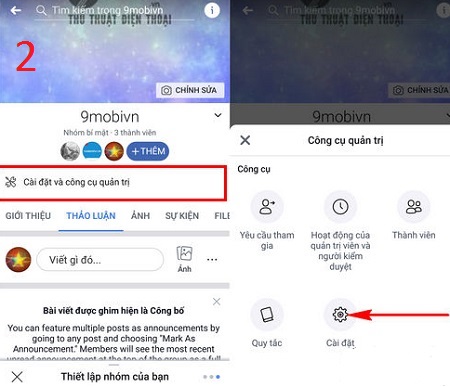
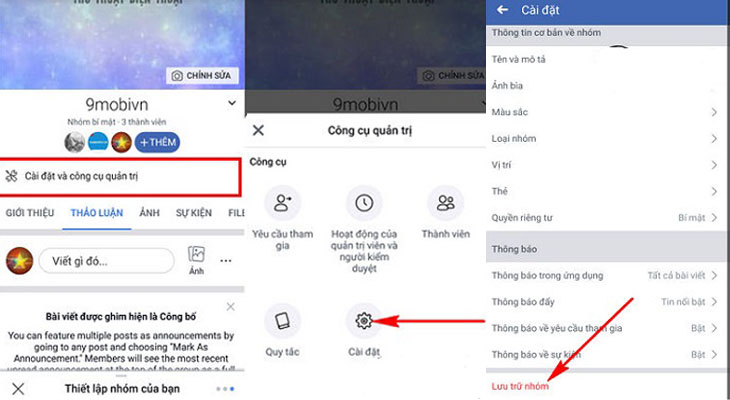
Step 2: Once you’re in the group, tap on the “Settings” button and select “Settings.”
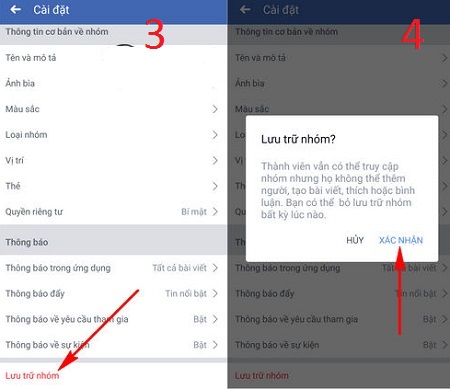
Step 3: Scroll down and tap on “Group Storage.”
Step 4: Click “Confirm”.
How to archive a Facebook group on a phone/iPad
The process of archiving a Facebook group on an iPhone/iPad is similar to that on an Android phone. Follow these steps:
- Step 1: Tap on the three horizontal lines icon, then tap “Groups” and select your group name.
- Step 2: Tap on “More” below the cover photo, then tap “View group information”.
- Step 3: Tap on “Group Archive” and then click “Confirm”.
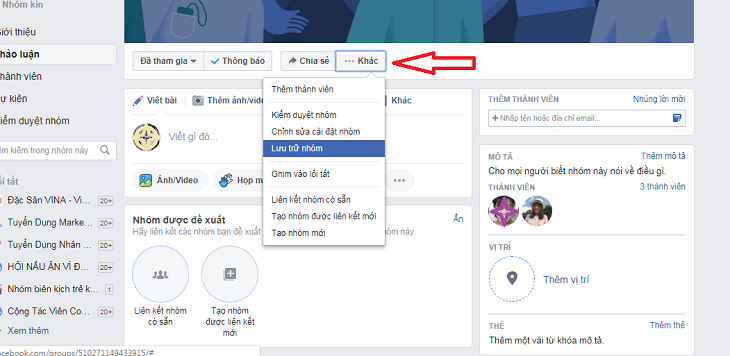
How to archive a Facebook group on a computer/laptop
Step 1: On your News Feed, click “Groups” in the left menu and then select the group name you want to archive.

Step 2: Click on the “…More” item below the cover photo.
Step 3: Select “Group Archive”.
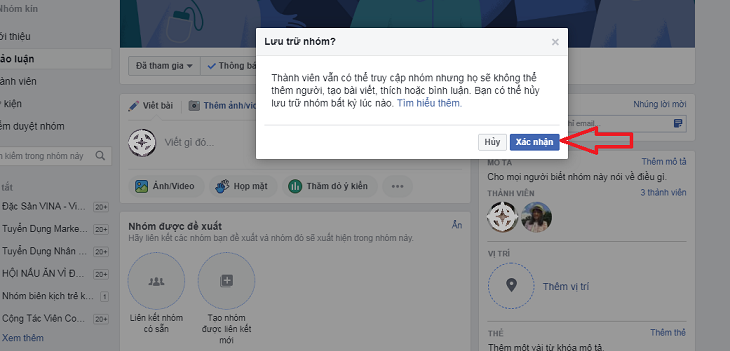
Step 4: Click “Confirm”.
Hopefully, these instructions will help you quickly delete or archive Facebook groups.


