Cleaning your evaporative cooler is extremely important, not only to keep it clean but also to improve its efficiency and prolong its lifespan. Today, we’ll show you a simple step-by-step guide on how to clean your evaporative cooler at home, ensuring anyone can do it!
1 When to Clean Your Evaporative Cooler?
Why does your evaporative cooler need cleaning?
- Evaporative coolers that are not regularly cleaned can accumulate dust and bacteria, affecting the health of your entire family.
- Dust buildup can impact the performance and durability of the cooler, reducing its efficiency and increasing electricity consumption.
When should you clean your evaporative cooler?
It is recommended to clean your evaporative cooler every 2 to 3 weeks or depending on your household’s usage. If you notice excessive dust buildup or a decrease in performance, it’s time to give your cooler a good cleaning!
2 Preparing to Clean Your Evaporative Cooler
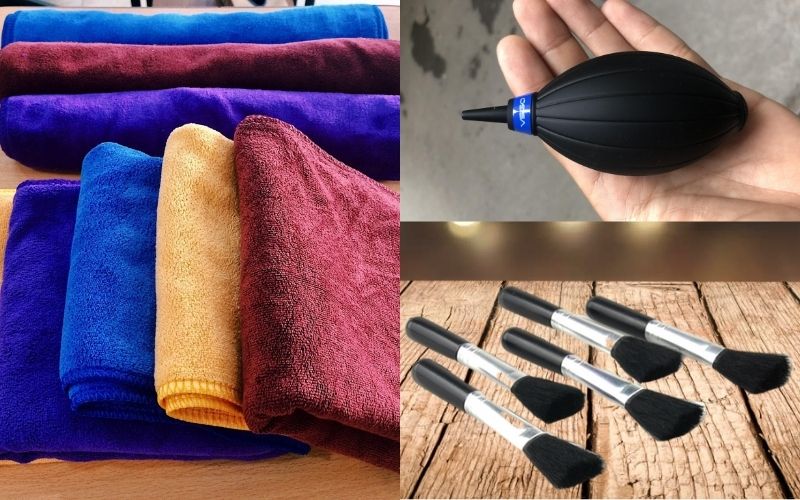 Gather the necessary tools
- 1 clean cloth
- 1 soft-bristled brush
- 1 air blower or compressed air can
3 Step-by-Step Guide to Cleaning Your Evaporative Cooler
Step 1 Check the Operation of Your Evaporative Cooler
Before cleaning, inspect your evaporative cooler for any signs of malfunction. If you notice any issues, take it to a repair center for professional assistance.
Step 2 Disconnect Power and Disassemble the Cooler

Start by disconnecting the plastic tube connected to the mist nozzle from the nozzle itself. Then, remove the front protective grill, followed by the fan knob and fan blades from the evaporative cooler.
Step 3 Clean the Cooler’s Components
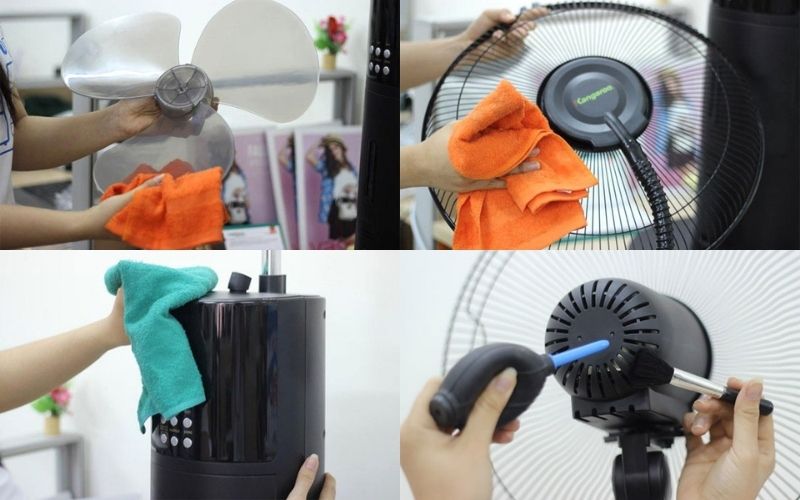 Clean the cooler’s parts
Use the clean cloth to wipe down the disassembled parts of the evaporative cooler, including the fan blades, front and rear protective grills, and the body of the cooler. Then, use the soft brush and air blower to remove dust from the corners and crevices of the cooler.
Step 4 Reassemble the Cooler
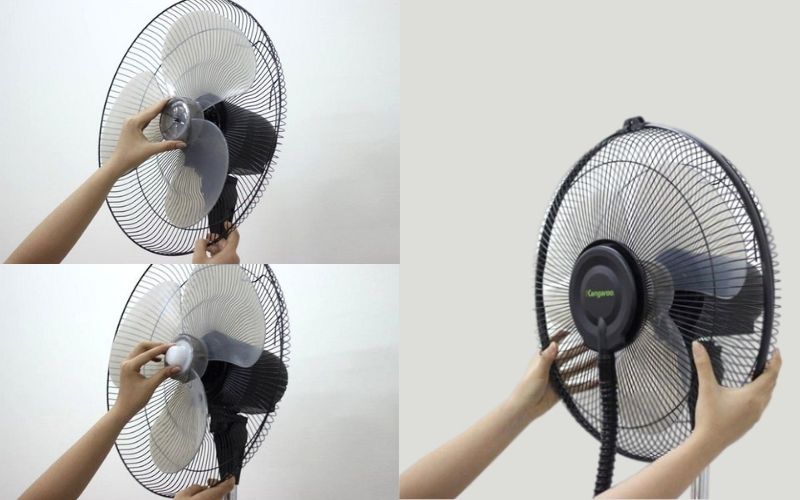 Put the cooler back together
Once all the parts are clean, reassemble the evaporative cooler by first attaching the fan blades, then tightening the fan knob, and finally, installing the front protective grill.
Step 5 Check and Refill the Water Tank
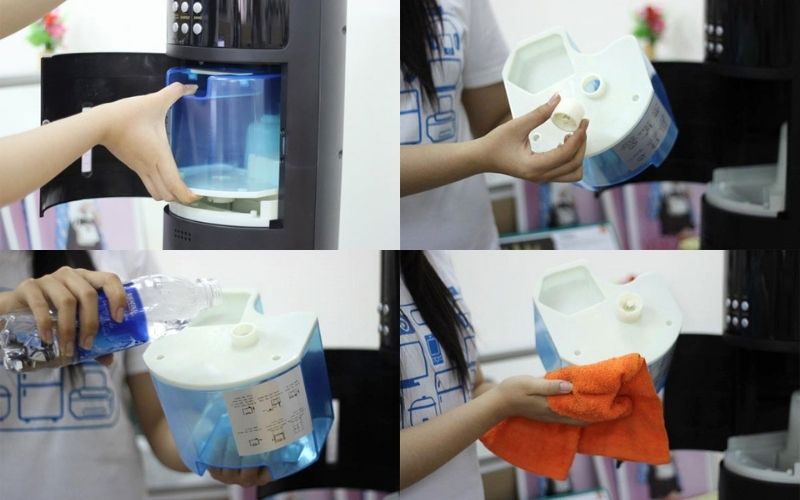 Check and refill the water tank
Gently pull the protective cover of the water compartment at the front of the cooler and remove the water tank to check the water level.
If the water level is low, turn the tank upside down, unlock the cap, and refill it with water. Then, wipe the tank dry and place it back into the water compartment of the cooler.
3 Tips for Efficient and Energy-Saving Use of Your Evaporative Cooler
- Place the evaporative cooler about 15-20 cm away from the wall.
- Only use clean water in the water tank and fill it to the recommended level.
- Clean your evaporative cooler regularly, about once every 2-3 weeks.
4 Important Notes When Cleaning Your Evaporative Cooler
How to Add Water to Your Evaporative Cooler
Fill the water tank only halfway or up to two-thirds full. Do not overfill the tank. Avoid adding perfume or any other chemicals to the water, as this can cause blockages in the cooling pads or water tubes.
Cleaning the Evaporative Cooler’s Air Filter
Remove the air filter from the cooler and gently wash it with water. Allow it to dry completely before reinstalling it.
Power Source for Evaporative Coolers
– Always disconnect the power source before cleaning your evaporative cooler.
– Do not place any objects inside the water compartment, and avoid putting metallic or chemical substances into the water tank, as they may corrode the tank.
These are the simple steps to cleaning your evaporative cooler, which anyone can follow. We hope that with this guide, you’ll be able to keep your evaporative cooler in good working condition and extend its lifespan.
You may also like:
How to Properly Use and Maintain a Blender
In the summer heat, cool smoothies can be quickly prepared with the help of a blender. To ensure it works well and lasts for many years, with good maintenance and regular cleaning, the blender should be well-taken care of.


