From October 1st, Ho Chi Minh City residents no longer need to use travel permits when traveling within the city. Instead, they will use the VNEID app to declare their movement until the PC Covid app is officially launched.
We will guide you through the use of the PC Covid app in our next article once it is finalized. For now, if you haven’t installed and used the VNEID app before, follow the instructions below to get started.
1 How to Install the VNEID App
For those who haven’t installed and registered on the VNEID app, here’s what you need to do:
Step 1 Download the VNEID App
First, download the VNEID app from the App Store or Google Play to your phone.
 Download the VNEID App
Step 2 Register an Account
Open the VNEID app after installation. Choose the option “You don’t have an account? Register”.
Enter your phone number and CCCD/ID card number in the respective fields. Tap “Register”. You will then receive an OTP code via text message. Enter the OTP code as requested.
Once your account is registered, the VNEID system will send you a password to log in to the VNEID app via the phone number you provided during registration.
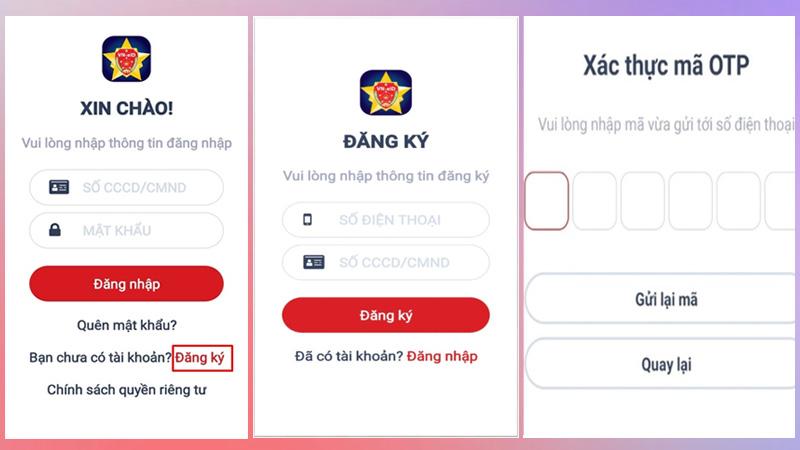 Register an Account
Step 3 Log In
After registering, log in to the VNEID app using your CCCD/ID card number and the password provided by the system.
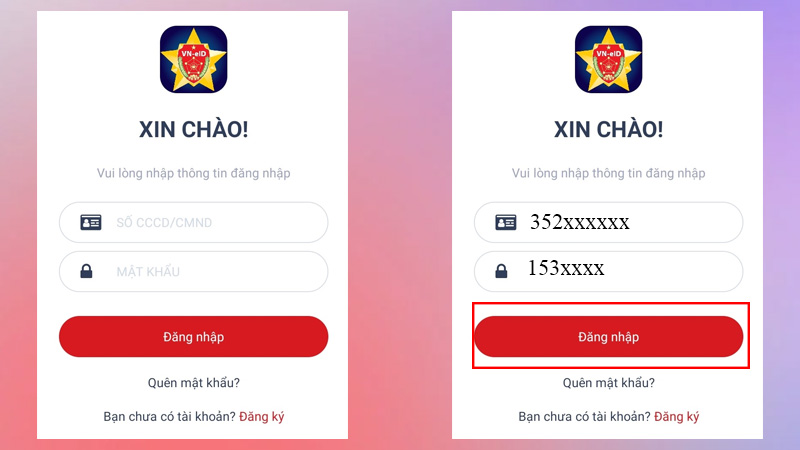 Log In
2 How to Declare Domestic Travel and Health Status
Once you have installed and registered on the VNEID app, you can declare your domestic travel and health status on the app by following these steps:
Step 1 Open the App
First, open the installed and registered VNEID app. Then, select the option “Declare Domestic Travel”.
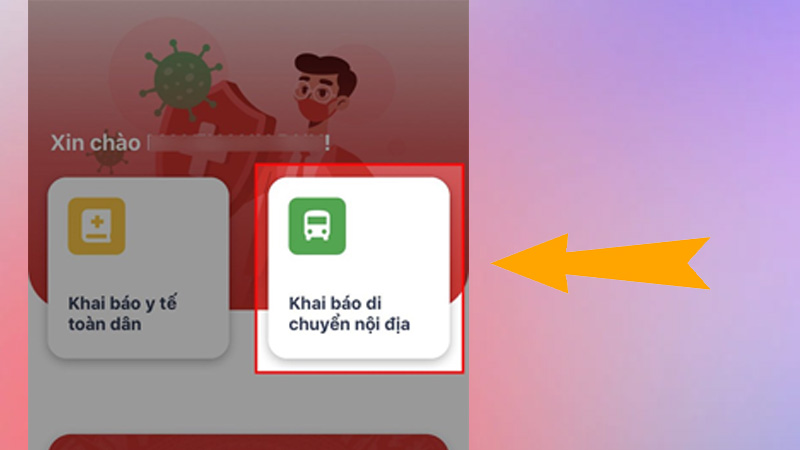 Declare Domestic Travel
Step 2 Declare Domestic Travel and Health Status
Next, start declaring your domestic travel and health status. If you want to declare on behalf of someone else, tap the tick box next to “Declare on Behalf”.
Fill in the “Place of Departure” details, including province, district, ward, house number, street, and neighborhood/village/team where you currently reside.
If the address is the same as your permanent residence, simply tick the box next to “Same as Permanent Residence”.
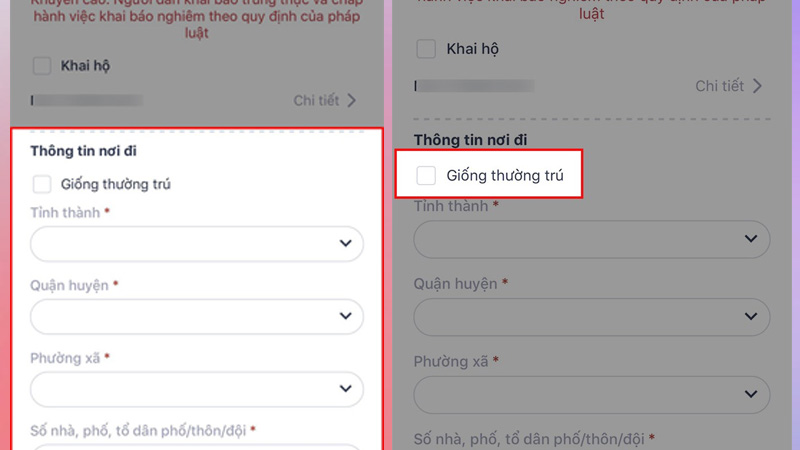
Step 3 Fill in the Destination Information
Next, fill in the “Destination Information” section, including province, district, ward, house number, street, and neighborhood/village/team of your destination.
If the destination address is the same as your permanent residence, tick the box next to “Same as Permanent Residence”.
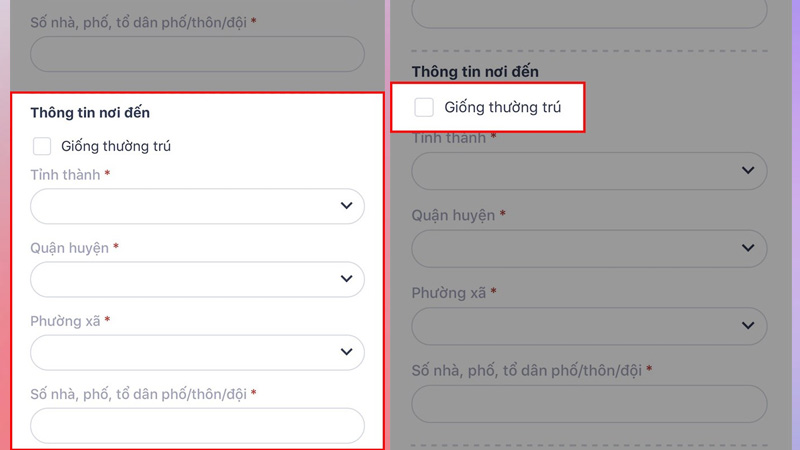 Destination Information
Step 4 Provide Vehicle, Departure Date, and Travel Purpose Details
In the “Vehicle License Plate” section, select the type of vehicle by tapping the arrow icon. Choose the type of vehicle you will be using, such as airplane, train, bus, boat, etc.
Enter the license plate number of the vehicle and select the departure date.
 Vehicle and Departure Details
In the “Travel Purpose” section, select the purpose of your trip by tapping the arrow icon. Choose the appropriate option, such as traveling to your permanent address, buying essential goods, etc.
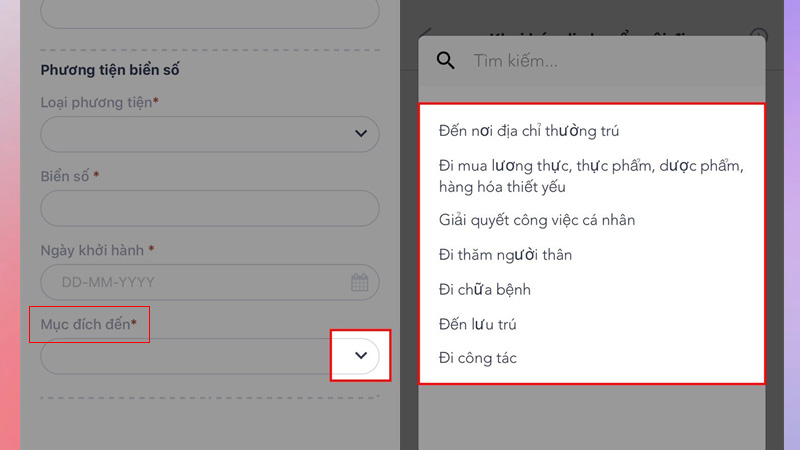 Travel Purpose
Step 5 Provide Additional Information
Next, provide the following additional information:
-
In the past 14 days, have you been to any other countries or territories? Answer by tapping “Yes” or “No”
-
In the past 14 days, have you experienced any of the following symptoms: fever, cough, shortness of breath, pneumonia, sore throat, or fatigue? Answer by tapping “Yes” or “No”
-
In the past 14 days, have you been in close contact with anyone who has tested positive for COVID-19 or is a suspected case? Answer by tapping “Yes” or “No”
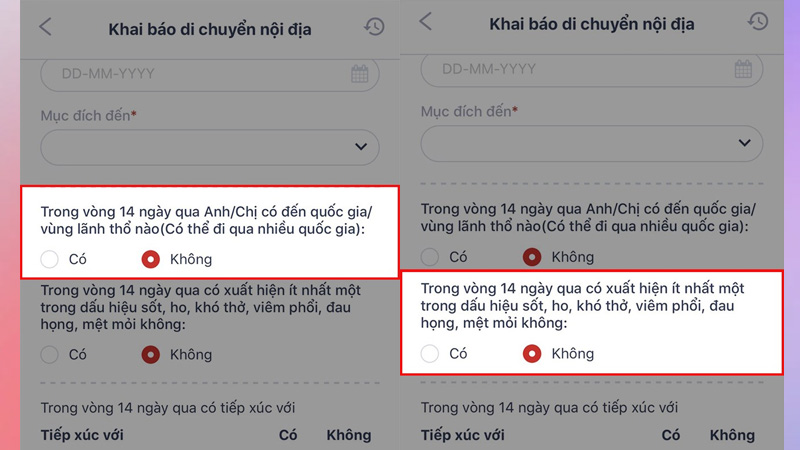 Additional Information
Step 6 Make a Commitment and Submit the Declaration
After completing the above steps, tick the box to confirm that all the information provided is true and accurate. Tap “Submit Declaration”.
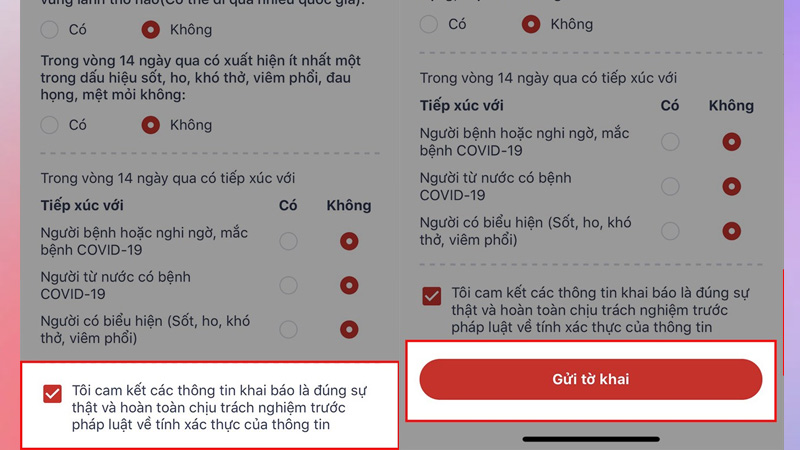 Commit and Submit
After submitting, you will receive a QR code to present at checkpoints, along with the validity period of the code displayed below the QR code. You can choose to save the QR code image to your device.
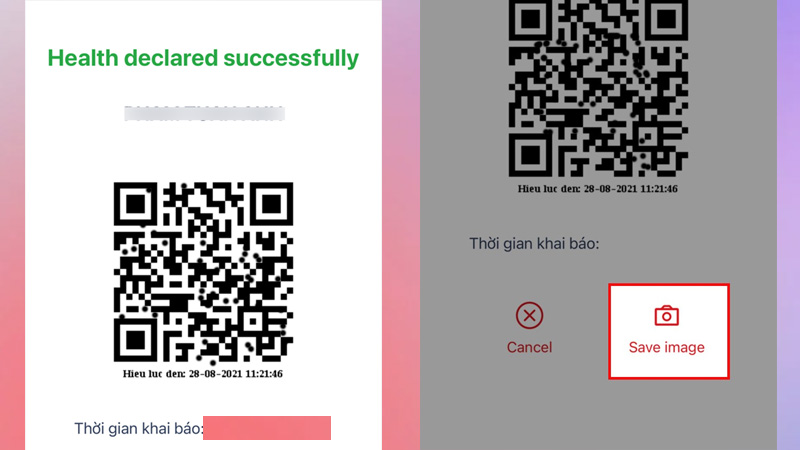 Save the QR Code
3 How to Scan the QR Code at Checkpoints
When you arrive at a checkpoint and are asked to present your QR code, simply open the VNEID app. The main interface of the app will display the QR code you generated during the declaration process. Show the QR code to the checkpoint staff for scanning.
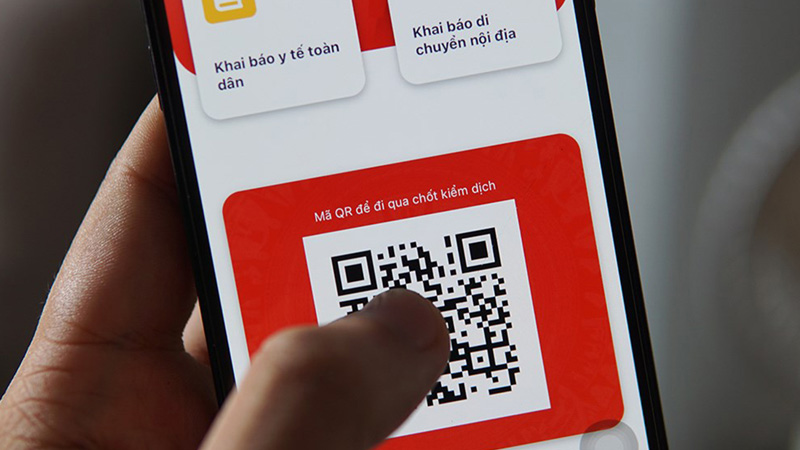 Scan the QR Code at Checkpoints
Additionally, whenever you need to go out, remember to wear a mask, sanitize your hands, and maintain social distancing to protect yourself and others!
This guide on using the VNEID app for health declarations and travel within the city is intended to provide helpful information. We hope you found it useful.
Ho Chi Minh City Imposes Travel Restrictions Amid Social Distancing
In order to defeat the COVID-19 pandemic, Ho Chi Minh City has enacted the implementation of Directive 16 and has adopted various safety protocols. These latest measures now include guidelines on approved travel within the city. Let’s learn more about who is allowed to travel in Ho Chi Minh City during this time.


