Creating a Cover Frame in Word 2007, 2010, 2013, and 2016
To create cover pages in Word 2016, please follow the steps below:
1. Open Microsoft Word 2016.
2. Click on the “Insert” tab at the top of the page.
3. In the “Pages” section, click on the “Cover Page” button.
4. A drop-down menu will appear with various cover page templates to choose from.
5. Select the desired template by clicking on it.
6. The cover page will be inserted at the beginning of your document.
7. Customize the cover page by adding your own text, images, or formatting.
8. To change the cover page template, simply repeat steps 2-5.
9. Save your document to keep the changes.
By following these steps, you can easily create professional and visually appealing cover pages in Word 2016.
How to Create a Cover Page Using Microsoft Word Templates
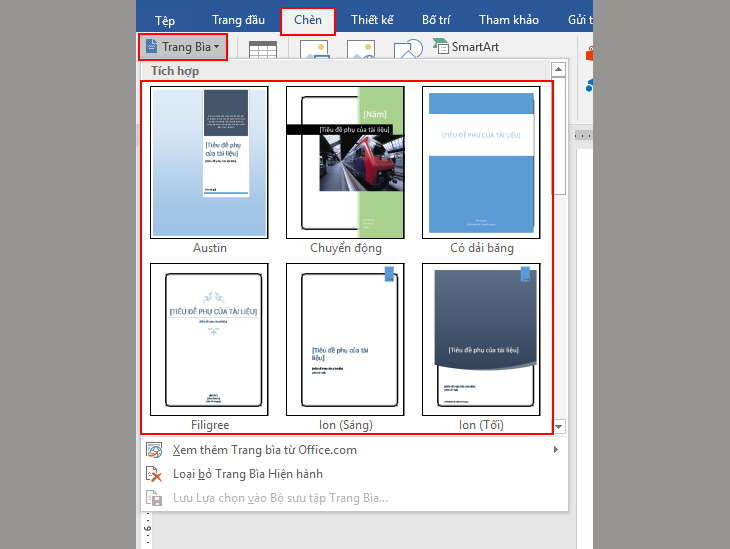
Microsoft offers a range of stunning and distinctive cover templates in Word 2007, 2010, 2013, and 2016 versions. These templates provide a wealth of options to suit your individual preferences and needs.
Step 1: Access Microsoft Word 2016 and navigate to the toolbar. From there, select the Insert tab >> Cover Page >> Choose the suitable cover template.
To insert cover templates at alternative locations, simply right-click on the chosen cover template.
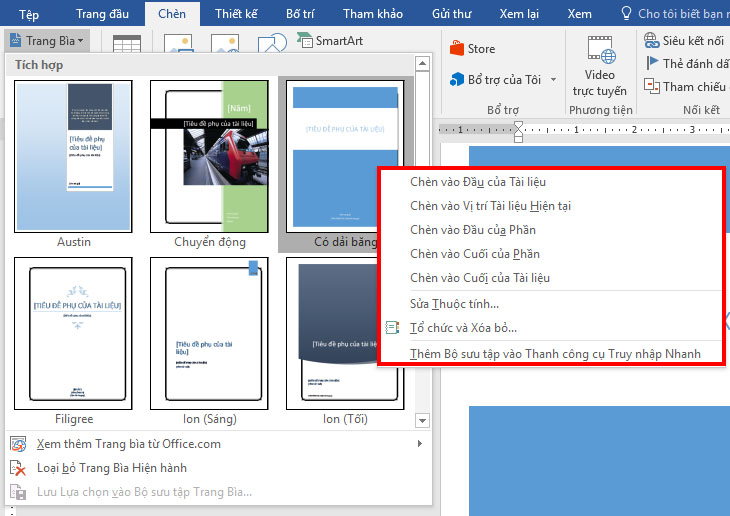
- Insert at the beginning of the document (Insert at Beginning of Document)
- Insert at the current position of the document (Insert at Current Document Position)
- Please insert the following content at the beginning of the section:
Insert at the beginning of the section (Insert at Beginning of Section).
- Insert at End of Section.
- Insert at the end of the document (Insert at End of Document).
Step 2:
You simply need to modify the content of your cover template to suit your requirements in order to finish.

How to Make a Word Cover Page with Page Borders
Step 1: Align the A4 page according to the standard text presentation.
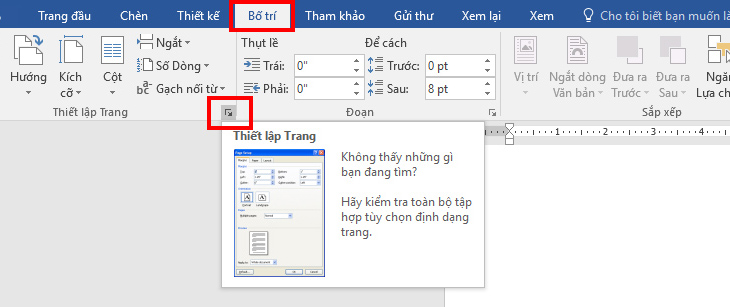
To access the toolbar, navigate to Page Layout and click on the Page Setup icon.
To access the desired settings, navigate to the “Margins” tab and click on “Custom Margins.”
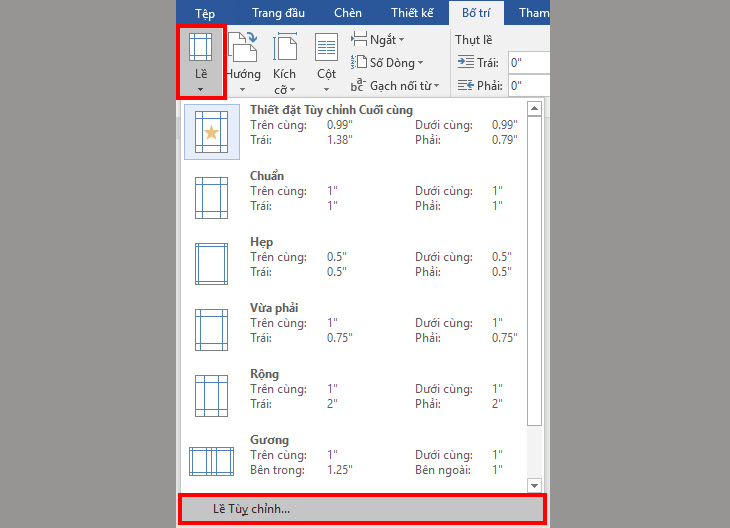
After making the customization, click “OK” to proceed.
Standard alignment parameters:
-
Align top (Top): 2cm – 2.5cm (0.79″ – 0.98″).
- Bottom alignment (Bottom): 2cm – 2.5cm (0.79″ – 0.98″).
-
Alignment: Left
Margin: 3cm – 3.5cm (1.18″ – 1.38″).
-
Align right (Right): 1.5cm – 2cm (0.59″ – 0.79″).
Step 2: Apply the border to the cover page.
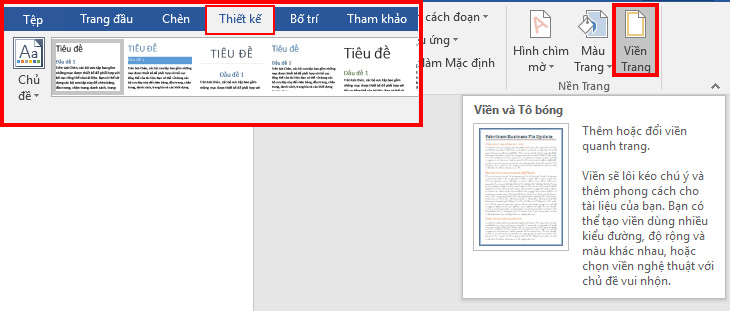
- To access the desired feature, navigate to the “Design” option, then select “Page Borders” from the specified menu.
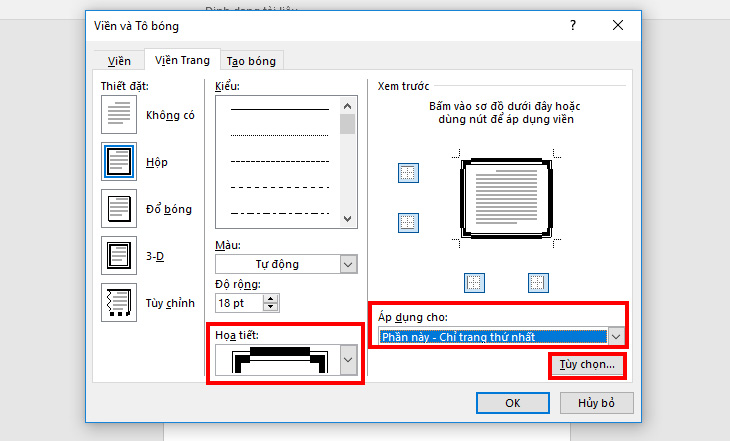
- In the Borders and Shading dialog box.
You have selected Texture (Art) to apply a border.
At Apply to (Apply to), you have the freedom to choose according to your specific needs.
Next, click on the “Options” button.
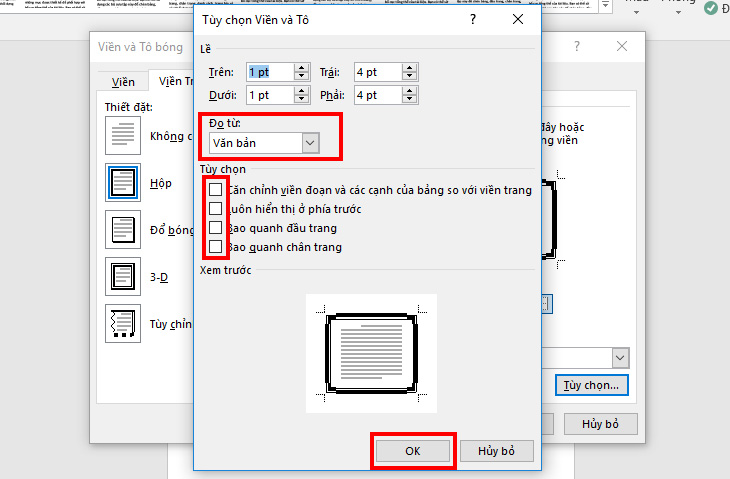
- In the Borders and Shading Options dialog box.
Please select “Text” in the “Measure from” section.
Please remove all bookmarks.
Please click on the “OK” button and then on the “OK” button again.
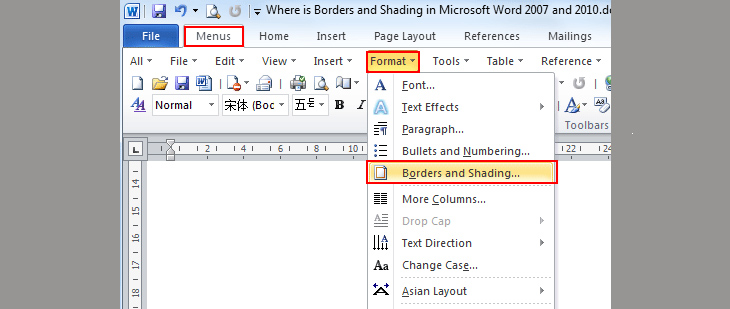
- To apply borders and shading to your document, follow these steps:
1. Click on the “Menus” option.
2. Navigate to the “Format” menu.
3. Select “Borders and Shading” from the menu options.
- Method 2: Follow these steps to navigate to the desired option:
– Go to Home page
– Under the Paragraph group, locate and click on the Border and Shading button
– A drop-down list will appear, select Border and Shading from the options available.
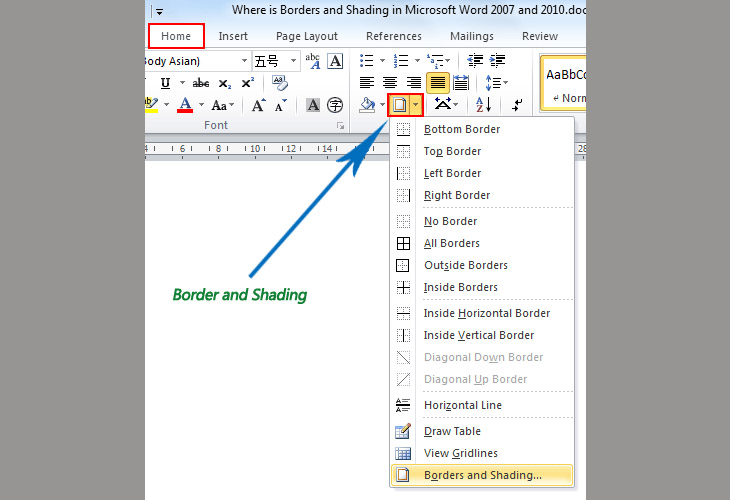
- To change the page borders, follow these steps:
1. Click on the “Page Layout” tab.
2. Navigate to the “Page Background” group.
3. Click on “Page Borders.”
4. The “Borders and Shading” window will open.

Step 3: Provide the necessary details for the creation of the cover page.
- Please add content directly to the text or add a text box. You can align the text accordingly using bold, italic, underline, and other formatting options.
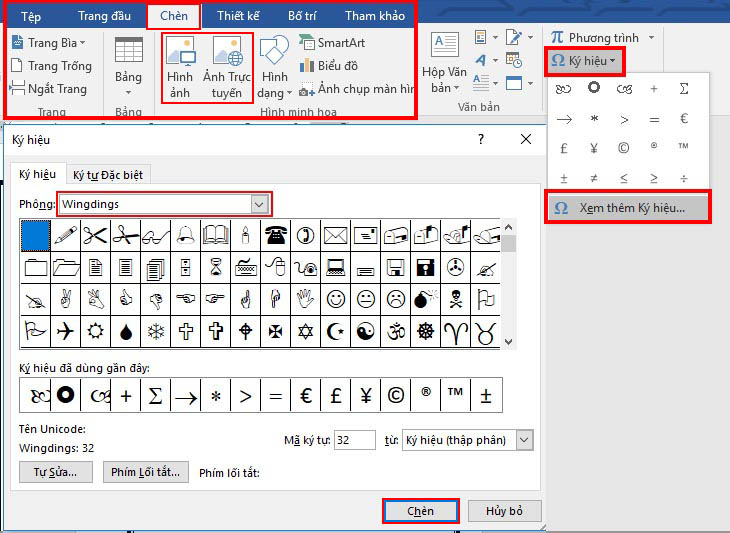
- To insert images into your document, follow these steps:
1. Click on the “Insert” tab.
2. Select either “Pictures” or “Online pictures” from the drop-down menu.
3. Choose the desired images you want to insert. - In the “Insert” section, select “Symbols” and then choose “View more symbols”. From there, select the “Wingdings Fonts” option.
Welcome
We are thrilled to have you here on our website.

Making a Unique Cover Page with Word: Utilizing Shapes for Design
Step 1: Add a border to the cover page.
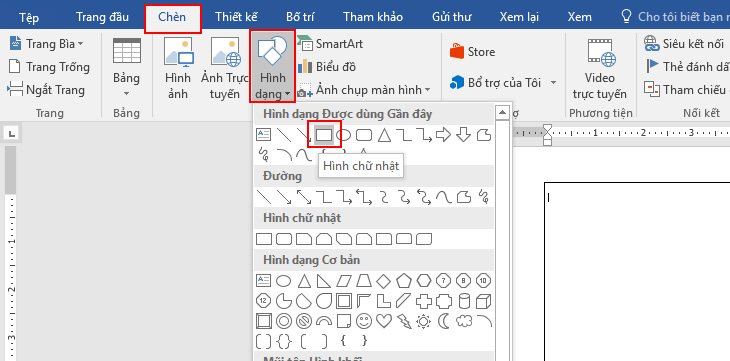
- To insert a shape on the cover page, follow these steps:
1. Go to the “Insert” tab.
2. Select “Shapes” from the menu.
3. Choose the rectangle shape.
4. Adjust the dimensions of the shape to ensure it fits perfectly on the cover page.
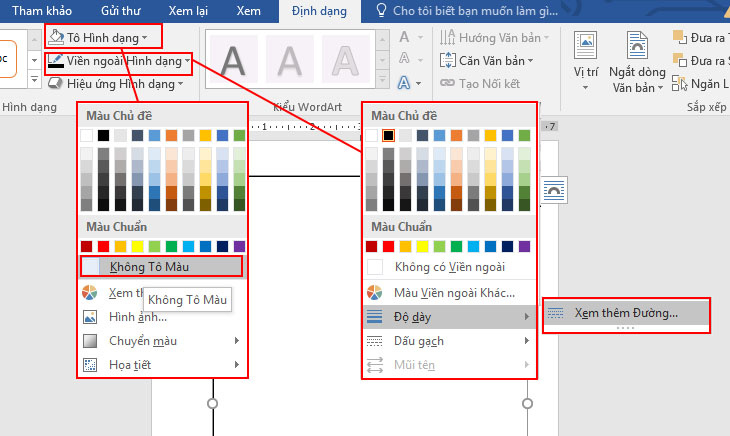
- On the toolbar, under the Format section.
In the “Shape Fill” section, choose “No fill (No fill).”
To customize the shape’s outline in the following steps:
1. Select “Shape Outline.”
2. Choose “Thickness (Weight).”
3. Click on “View more lines (More lines)” for additional options.
- The “Format Shape” dialog box will appear, offering the following options:
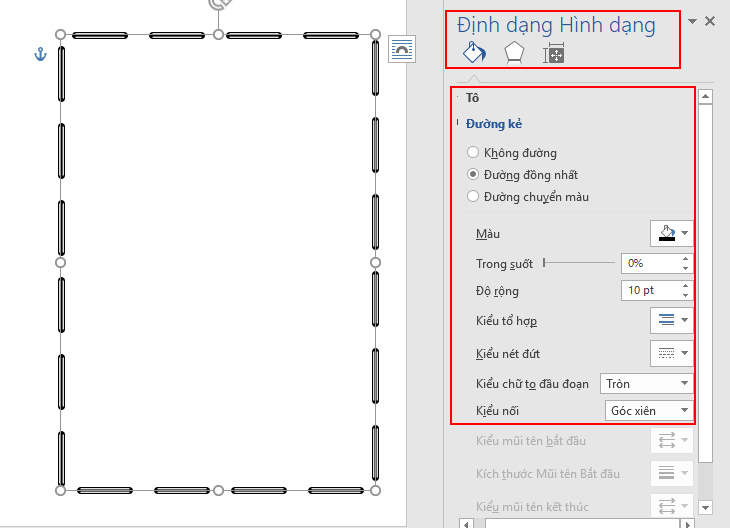
Transparency: This attribute determines the degree of opacity for the border element.
Width: The width refers to the thickness of the contour line.
Type of combination: Stroke types.
Dotted Line Style: Various types of contour cracks.
Large font at the beginning of the paragraph: The option is displayed when you choose the Dashed style.
Connection Type: Please adjust the four roots of the border.
Step 2: Including Page Information, Inserting Images, and Symbols
Please refer to Step 3 through Step 4 of Method 2: Create a Word cover page using Page Borders.
Create Beautiful Border Frames for Microsoft Word
Introducing Beautiful Frames for Word: A collection of stunning and exclusive cover frames, designed to enhance your documents effortlessly. With this convenient tool, you can create beautiful frames in no time, adding a touch of style to your work.

You can download the “Beautiful Frames for Word” by clicking here.
We hope you find our tutorial on how to create a cover frame in Word 2007, 2010, 2013, 2016, and 2019 helpful and that it meets your expectations. Additionally, we have provided some aesthetically pleasing frame options for your convenience.


