Starting a design project in AutoCAD requires not only creativity but also precision and in-depth understanding of dimensions and area. In the complex world of CAD, measuring the area of objects is an important part of the design and construction process. Therefore, we will explore how to measure area in CAD, one of the most important tools of this software.
1. Common commands used to measure area in CAD
There are many commands to measure area in CAD, depending on the shape of the object to be measured. Here are some commonly used commands:
- AREA (AA) command: The AREA command is a basic command to measure the area of simple objects such as rectangles, circles, squares, etc.
- LIST (LI) command: The LIST command not only displays information about the object but also includes the area of that object.
- LISP (SS) command: Can be applied to both enclosed and unenclosed objects.
Note that for accurate results, you need to set the correct unit system before using these commands. You can check and set the unit system using the UNITS command.
2. 3 ways to measure area in CAD
2.1. Using the AREA (AR) command
For example, we have a rectangle as shown below.
/fptshop.com.vn/uploads/images/tin-tuc/166588/Originals/do-dien-tich-trong-cad-1.jpg)
Step 1: First, you enter the shortcut command AA, then press Enter or click on AA (AREA).
/fptshop.com.vn/uploads/images/tin-tuc/166588/Originals/do-dien-tich-trong-cad-2.jpg)
Step 2: Enter O (Object).
/fptshop.com.vn/uploads/images/tin-tuc/166588/Originals/do-dien-tich-trong-cad-3.jpg)
Step 3: Click the mouse on the Object whose area you want to measure.
/fptshop.com.vn/uploads/images/tin-tuc/166588/Originals/do-dien-tich-trong-cad-4.jpg)
The area of the rectangle will be displayed below in the Area section.
/fptshop.com.vn/uploads/images/tin-tuc/166588/Originals/do-dien-tich-trong-cad-5.jpg)
2.2. Using the LIST (LI) command
Step 1: Enter the command LI, then press Enter or click on LI (LIST).
/fptshop.com.vn/uploads/images/tin-tuc/166588/Originals/do-dien-tich-trong-cad-6.jpg)
Step 2: Click on the Object whose area you want to measure.
/fptshop.com.vn/uploads/images/tin-tuc/166588/Originals/do-dien-tich-trong-cad-7.jpg)
Step 3: This way, you have completed measuring the area of the shape. The result is displayed in the area section as shown in the figure.
/fptshop.com.vn/uploads/images/tin-tuc/166588/Originals/do-dien-tich-trong-cad-8.jpg)
2.3. Using the LISP (SS) command
Step 1: First, enter the command AP → Press Enter or click on AP (APPLOAD) to upload the LISP to the software.
/fptshop.com.vn/uploads/images/tin-tuc/166588/Originals/do-dien-tich-trong-cad-9.jpg)
Step 2: Select the LISP you want to upload → Click Load.
/fptshop.com.vn/uploads/images/tin-tuc/166588/Originals/do-dien-tich-trong-cad-10.jpg)
Download the area measuring LISP using the SS command HERE.
Step 3: After successfully uploading the LISP, return to the main screen interface. Enter the command SS → Press Enter.
/fptshop.com.vn/uploads/images/tin-tuc/166588/Originals/do-dien-tich-trong-cad-11.jpg)
Step 4: Read the requirements of the command line above. If you do not want to change the scale, enter K → Press Enter.
/fptshop.com.vn/uploads/images/tin-tuc/166588/Originals/do-dien-tich-trong-cad-12.jpg)
Step 5: If you do not want to change the decimal places of the area, enter K → Press Enter.
/fptshop.com.vn/uploads/images/tin-tuc/166588/Originals/do-dien-tich-trong-cad-13.jpg)
Step 6: Next, click the mouse pointer on the Area to measure.
/fptshop.com.vn/uploads/images/tin-tuc/166588/Originals/do-dien-tich-trong-cad-14.jpg)
Step 7: The LISP will automatically add HATCH to the selected region and convert it into a closed region.
/fptshop.com.vn/uploads/images/tin-tuc/166588/Originals/do-dien-tich-trong-cad-15.jpg)
Step 8: Finally, select any Text displayed on the interface → The area value will replace that text object.
/fptshop.com.vn/uploads/images/tin-tuc/166588/Originals/do-dien-tich-trong-cad-16.jpg)
So, the area of the shape you need to measure has been easily displayed.
/fptshop.com.vn/uploads/images/tin-tuc/166588/Originals/do-dien-tich-trong-cad-17.jpg)
3. Conclusion
In conclusion, the process of measuring area in CAD is not only an important part of the design and construction process but also a factor determining the accuracy and effectiveness of the project. By using the AREA, LIST, LISP commands, and related tools in AutoCAD, users can easily measure the area of objects and areas quickly and accurately. Understanding how to measure area not only helps optimize the working process but also ensures that the design results meet the requirements and technical standards.
This article has just guided you on 3 ways to measure area in CAD quickly and accurately. If you find it helpful, you can share this article with your loved ones and friends so that they can know it too! Good luck with your implementation!
- Reveal 14 essential dimension measurement commands in CAD
- Guidelines for using the Hatch command in AutoCAD in detail, most understandable
If you are interested in choosing a laptop to meet the needs of using AutoCAD. FPT Shop not only provides a range of quality laptops but also focuses on meeting the special requirements of professional users in the design and creativity field.
CAD, Enhancing Flexibility and Professionalism in Drawing’>The Easy Way to Turn off Grid in CAD, Enhancing Flexibility and Professionalism in Drawing
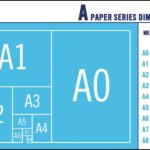
What is the size of A0 paper? Learn how to choose and print A0 size on AutoCAD.
Not everyone knows about the A0 paper size, just like not everyone knows how to choose and print A0 paper on AutoCAD. Despite being widely used in printing in our daily lives, A0 paper still remains a mystery to many. So let’s dive into this article to learn more about the dimensions of this paper size.


