Dashboard cameras have become an essential device for car trips. In this article, FPT Shop will guide you on the simplest and most convenient ways to review your dashboard camera.
Viewing directly from the dashboard camera
You can view the recorded videos directly on the screen of the dashboard camera, where the images are stored in the memory card of the device. This is the most convenient and quick way to check the captured images. To view directly, just follow these two simple steps:
- Step 1: Turn on the dashboard camera and press the OK button to pause recording while in recording mode.
- Step 2: Press the MODE button to switch mode and navigate to the playback mode, then press OK to start viewing the captured images and videos.
/fptshop.com.vn/uploads/images/tin-tuc/171097/Originals/cach-xem-lai-camera-hanh-trinh-1.jpg)
However, this method has the limitation of being inflexible in terms of viewing location. You need to view directly in the car and it will become inconvenient if you want to review the images elsewhere or share them with others.
Reviewing indirectly using other devices
In addition to direct viewing, you can also review the dashboard camera images indirectly through some simple and effective methods. Here are detailed instructions on how to review the dashboard camera on a phone, computer, TV, and some important notes to know.
Reviewing using a memory card
- Step 1: Prepare a memory card reader compatible with the dashboard camera memory card and can be connected to your phone.
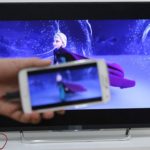
- Step 2: Remove the memory card from the dashboard camera and insert it into the card reader. Then, connect the card reader to your phone. You will be able to access and review videos and images on the file management app or video player of your phone.
/fptshop.com.vn/uploads/images/tin-tuc/171097/Originals/cach-xem-lai-camera-hanh-trinh-2.jpg)
Note: Before proceeding, make sure the card reader you choose is compatible with both the camera memory card and your phone. Check the product information and technical support to avoid any issues during the data reviewing process.
Reviewing on computer, TV
For a computer, you can use a memory card reader or directly connect the camera via the USB port (if supported) to access and review the data from the camera.
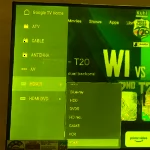
For LCD or LED TVs, the common method is to use an HDMI port. Most modern dashboard cameras have an HDMI output port that allows you to directly transmit images and videos from the camera to the large screen of the TV. Connect your camera to the TV through an HDMI cable, switch to the corresponding channel on the TV, and start reviewing the captured images or videos.
/fptshop.com.vn/uploads/images/tin-tuc/171097/Originals/cach-xem-lai-camera-hanh-trinh-3.jpg)
Note: Before proceeding, carefully check the connection ports and features of the dashboard camera as well as your TV or computer to ensure they are compatible and can be connected without any issues. Read the user manual or search online for specific steps for your specific devices.
Reviewing using camera apps
Nowadays, reviewing dashboard cameras has become easier than ever thanks to camera management apps. Here are the steps to follow:
Step 1: Download and install the appropriate dashboard camera management app for your phone. Some popular apps like GPlayer or CarAssits can be downloaded from Google Play or the App Store.
/fptshop.com.vn/uploads/images/tin-tuc/171097/Originals/cach-xem-lai-camera-hanh-trinh-4.jpg)
Step 2: Activate the WiFi function on the dashboard camera and connect your phone to the camera’s WiFi network.
/fptshop.com.vn/uploads/images/tin-tuc/171097/Originals/cach-xem-lai-camera-hanh-trinh-5.jpg)
Step 3: Open the app and navigate to the DVR section.
/fptshop.com.vn/uploads/images/tin-tuc/171097/Originals/cach-xem-lai-camera-hanh-trinh-6.jpg)
Step 4: Select Phone File, then navigate to Capture File. Here, you can select and review videos or press and hold to download to your phone.
/fptshop.com.vn/uploads/images/tin-tuc/171097/Originals/cach-xem-lai-camera-hanh-trinh-7.jpg)
- Download GPlayer for Android here.
- Download GPlayer for iOS here.
- Download CarAssits for Android here.
- Download CarAssits for iOS here.
Note: Ensure that the app you choose is compatible with your dashboard camera and the operating system of your phone. Check and monitor updates from the camera manufacturer to ensure you have the best experience.
How to Resolve the Issue of HDMI Connections Causing a Black Screen
Having difficulty connecting your computer to its external display via HDMI? Connectivity issues such as the external display turning black are a common issue, but don’t fret – there are solutions to help get your device working again.


