


After knowing which version you are using, choose the correct version of the Outlook mail installation guide below.
Before installing email, you need to prepare the following content:
- Domain name – Example: abc.com
- Outlook software installed on the computer
- A normal working email address – [email protected]
- Password for that email
- POP3/IMAP and SMTP information from the email service provider.
If you already have a domain and an existing email, it means you already have the first 4 elements. However, to install email on Microsoft Outlook, you also need incoming (IMAP/POP3) and outgoing (SMTP) server information.
You can watch the video direct guide to installing email on outlook exporess here
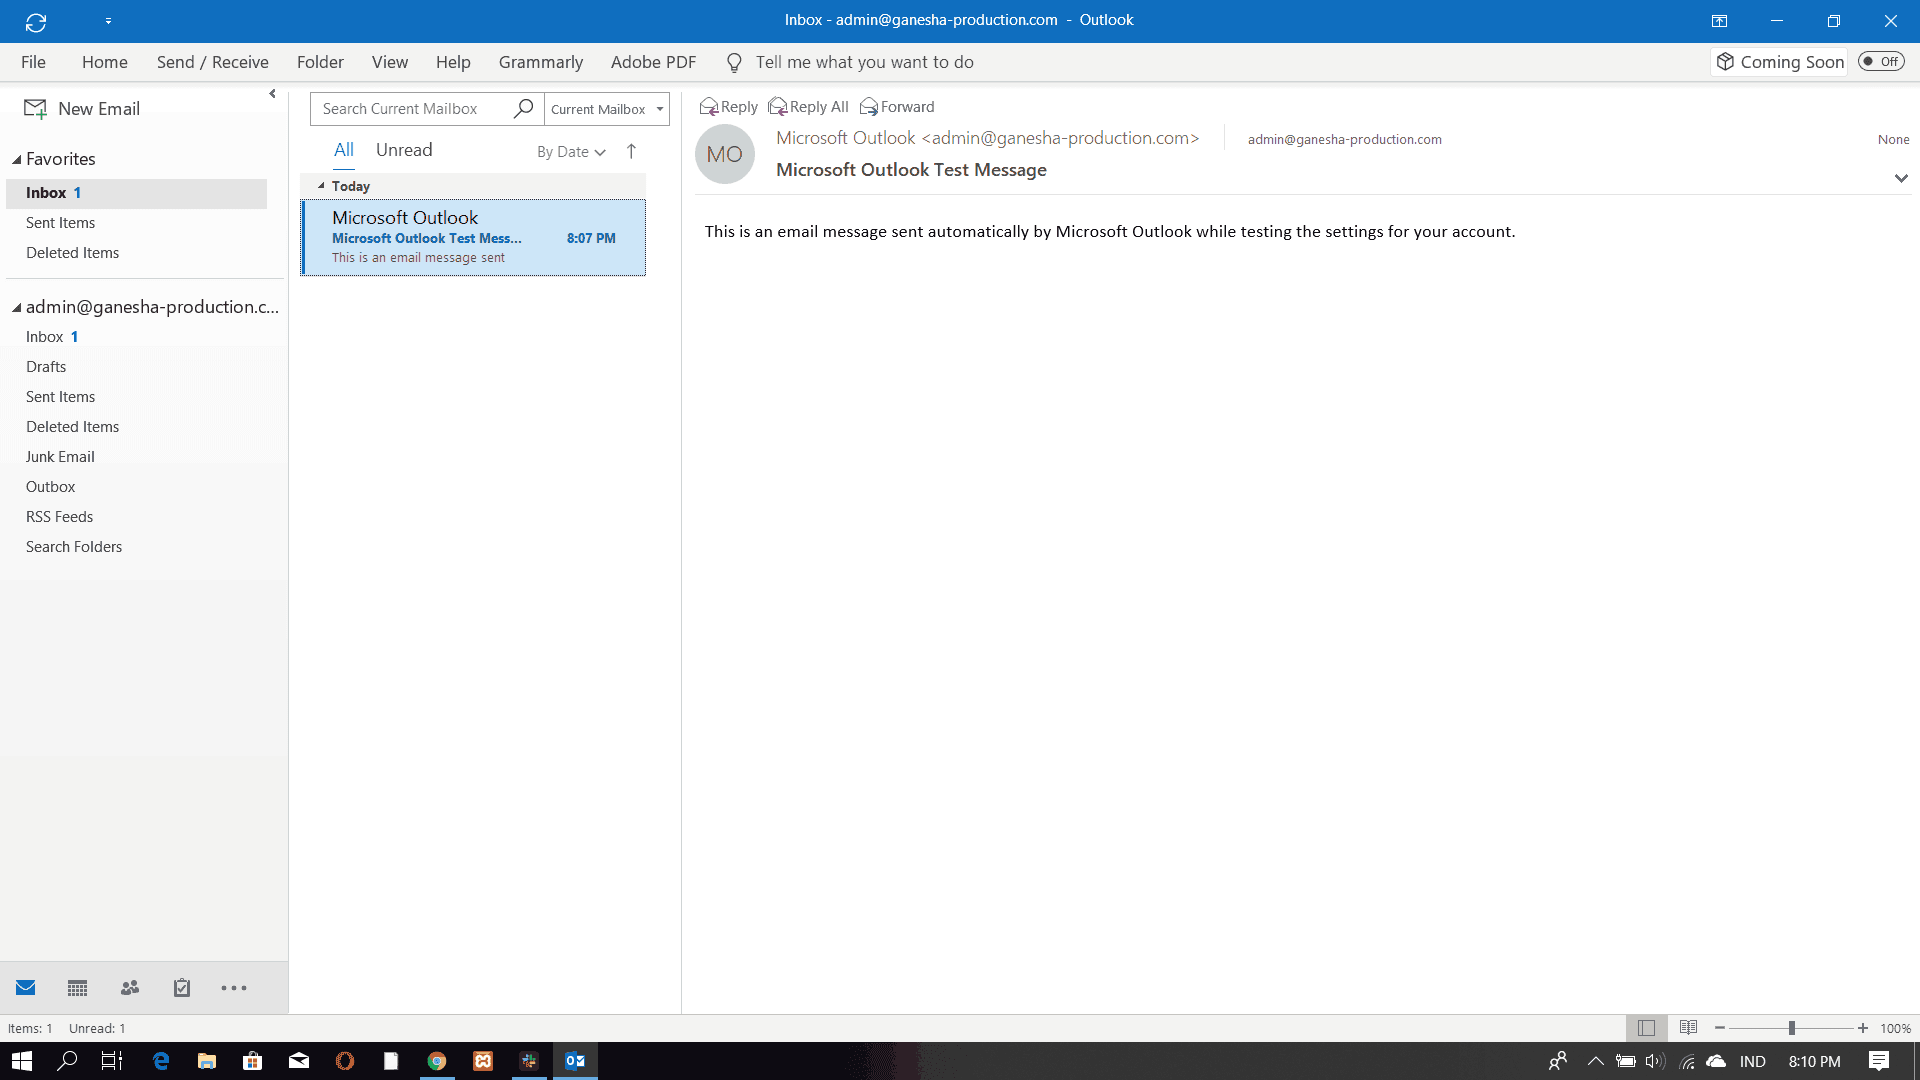
Guide to setting up email on Outlook 2019
In this section, we will guide you on how to set up email for Outlook (2019 version)
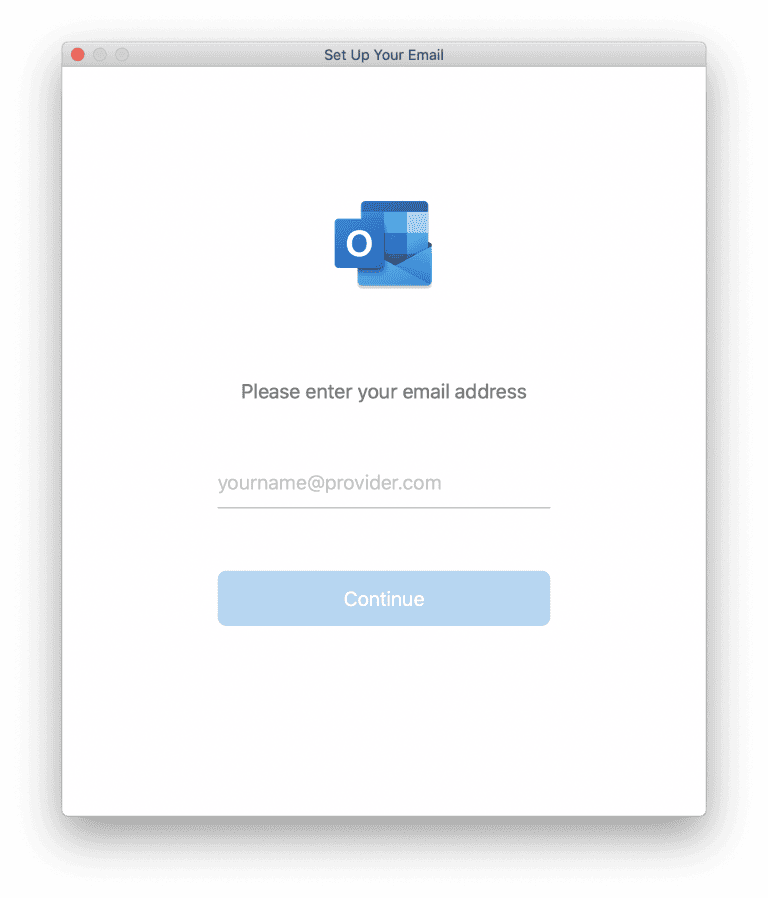
1. Open Microsoft Outlook 2019
When the Outlook Mail window opens, click the Continue button.
2. Choose IMAP/POP
Choose IMAP/POP when you see the mail service provider selection screen.

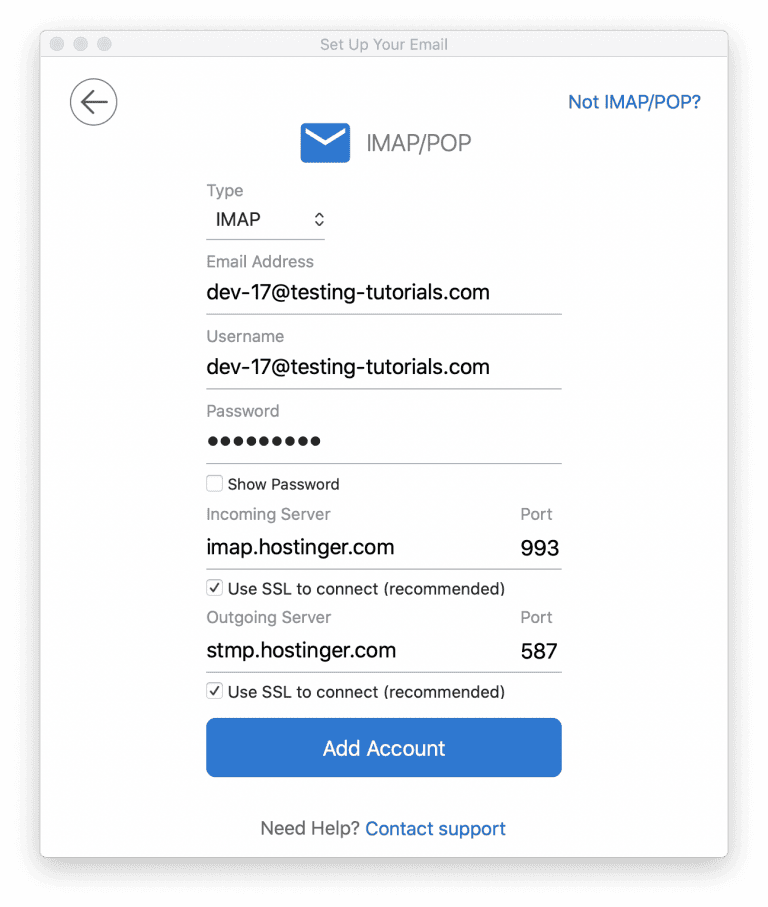
3. Configure IMAP/POP
Choose either POP or IMAP and fill in the corresponding information. Then click the Add Account button to proceed.
4. Complete the installation
Enter the password, click the Connect button, and wait for this process to complete. If successful, you will see the screen below.
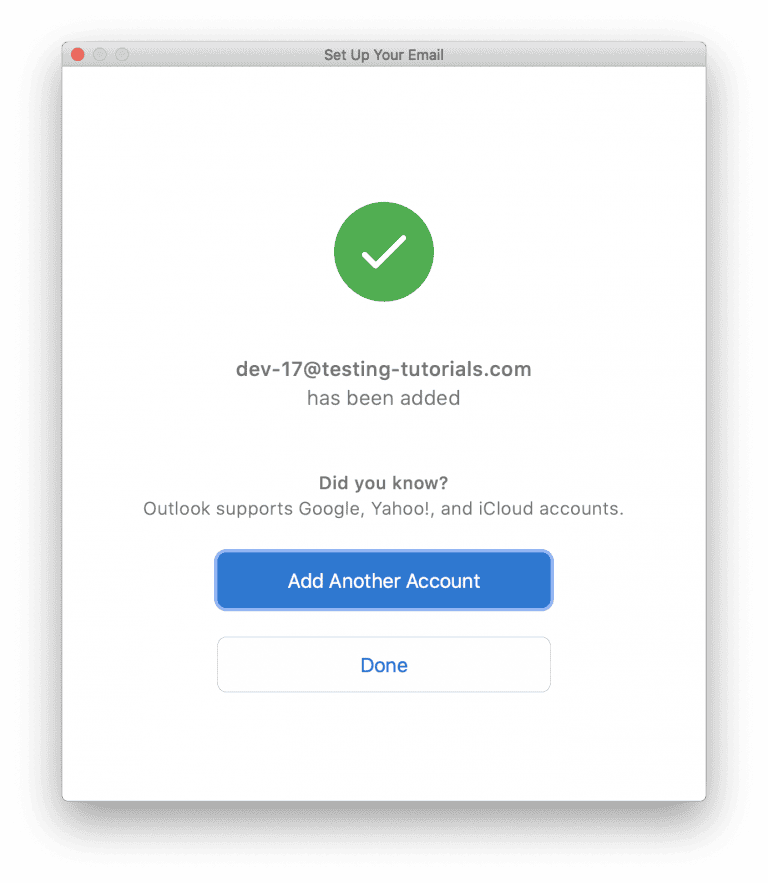
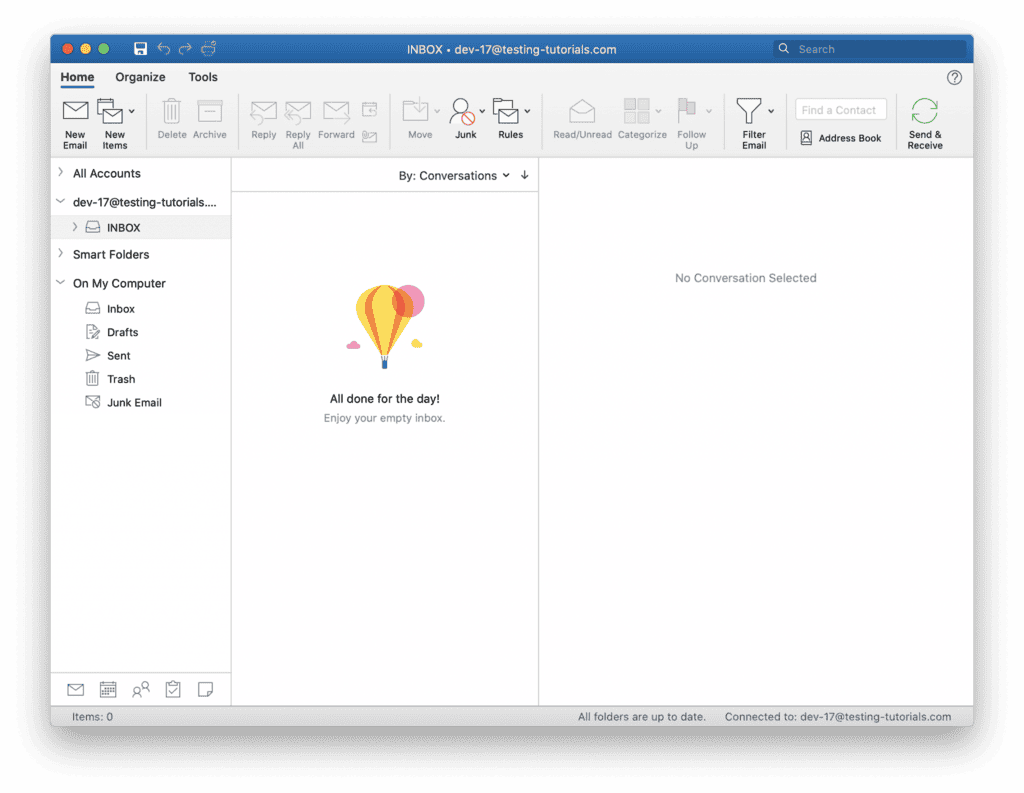
That’s it, now you just need to click the OK button to start Outlook immediately.
Guide to setting up email on Outlook 2016
In this section, you will learn how to set up email in Outlook (2016 version)
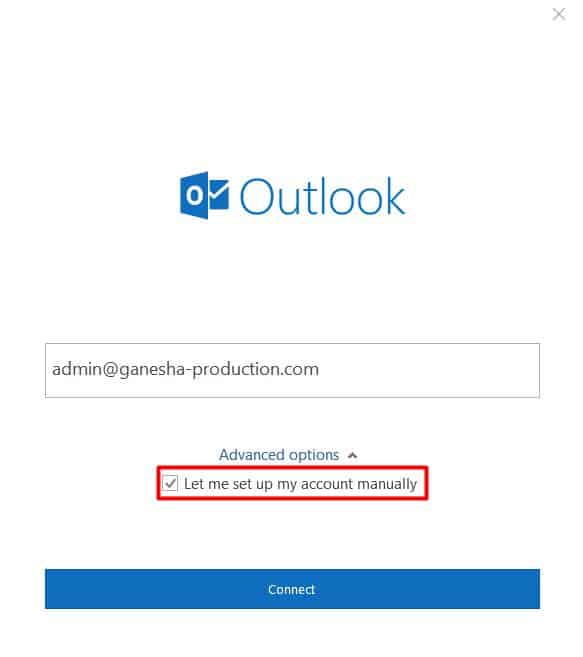
1. Open Microsoft Outlook 2016
If you open this Outlook Mail Client for the first time, the setup screen will appear for you to enter your email, select Let me set up my account manually, and then click the Connect button.
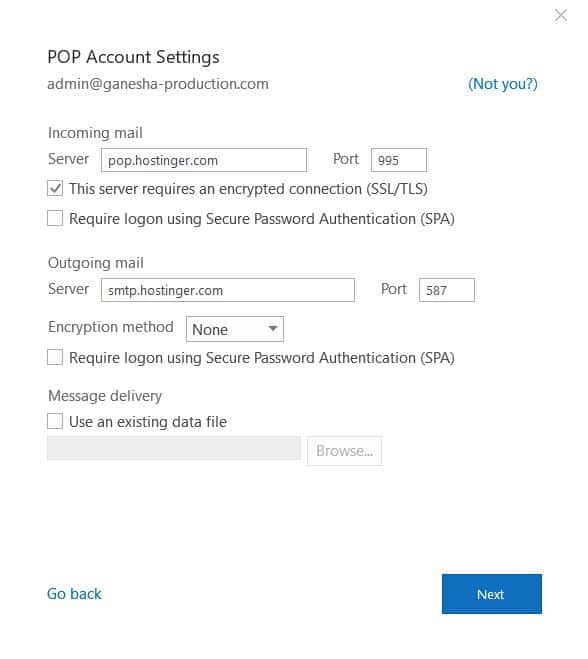
2. Configure POP/IMAP and SMTP servers
The next screen will appear and you can choose between POP and IMAP.
Enter the information you obtained from the preparation step and click the Next button to proceed. Then enter the password and click the Connect button.
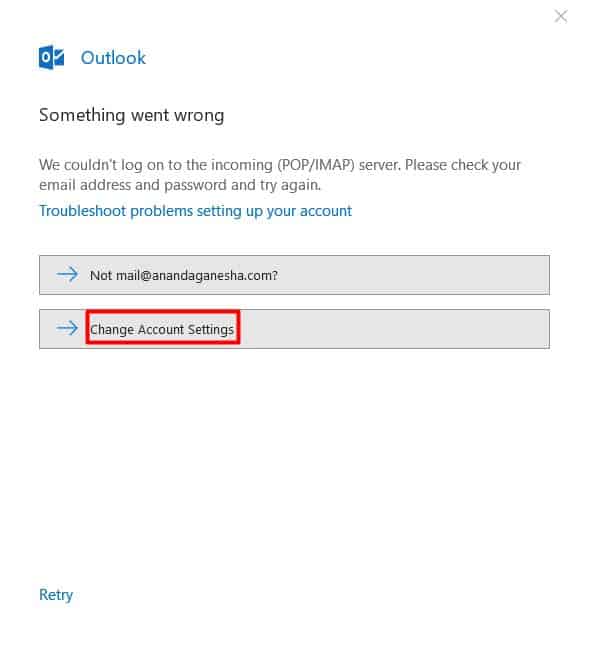
3. Complete the email setup
If an error screen appears, you need to adjust the settings by clicking the Change Account Settings button to check if the information is correct.
If successful, the result screen will be as follows.
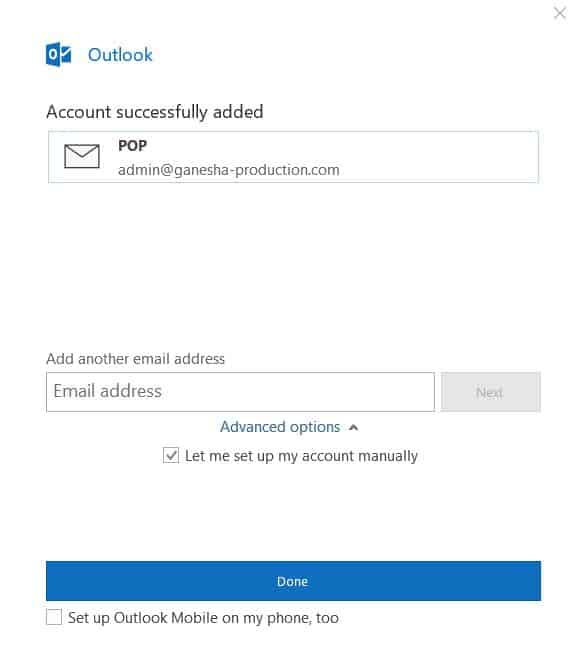
Depending on your choice of POP or IMAP. Next, click the Done button to switch to the Microsoft Outlook 2016 Outlook Mail interface.
Guide to setting up email on Outlook 2013
In this example, we are using Outlook 2013, the steps to set up email on Outlook Mail are as follows:
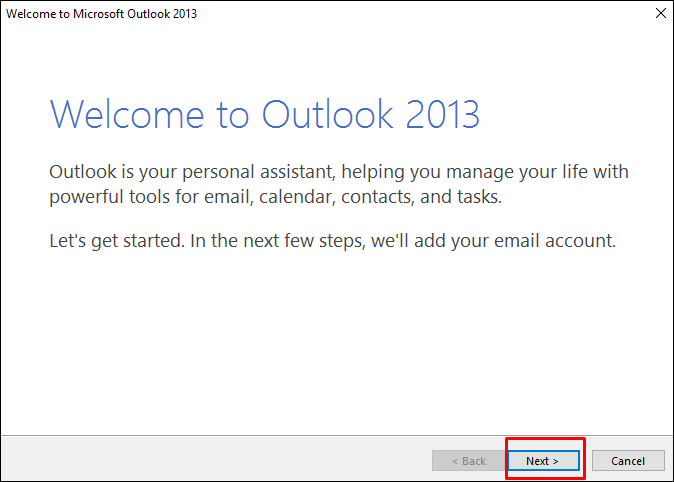
1. Open Microsoft Outlook 2013 and add an email account
If you open Outlook for the first time, you may see a Welcome notification. Click Next.
You will see a window Do you want to set up Outlook to connect to an email account?. Choose Yes and click Next.

(Optional) If this is not the first time you have opened the Outlook mail client, you can add a new account in the File button in the upper left corner of the screen.

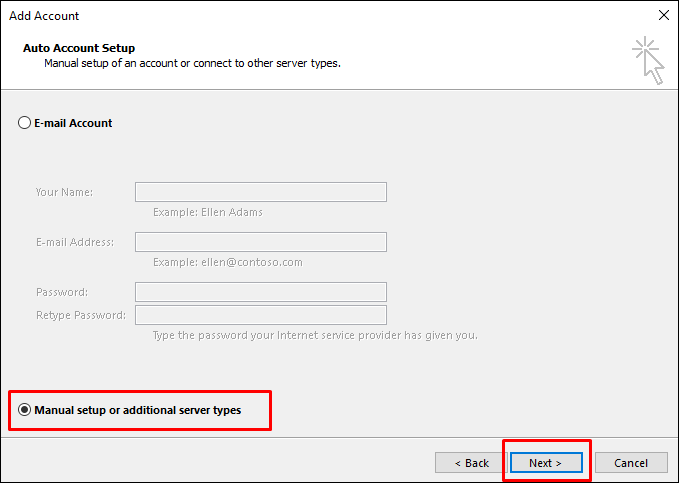
2. Configure email account
In the next page, you will see 2 options to choose from. In this guide, we choose Manual setup or additional server types.
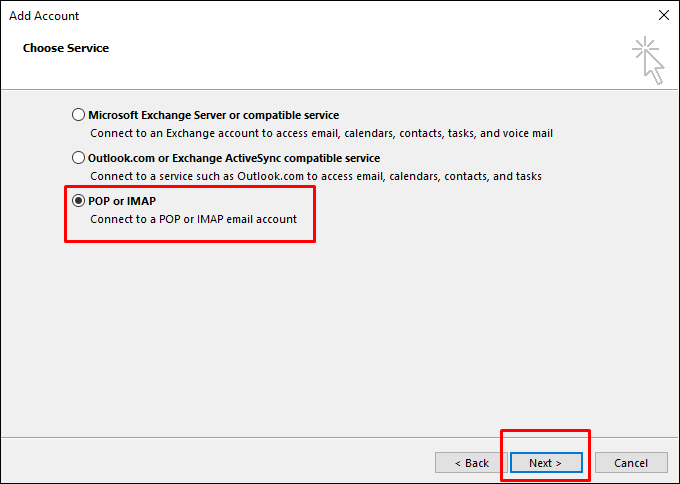
After clicking Next, you will see the following screen to select POP or IMAP and click Next.
In this step, you need to enter the detailed information (obtained from Step 1):
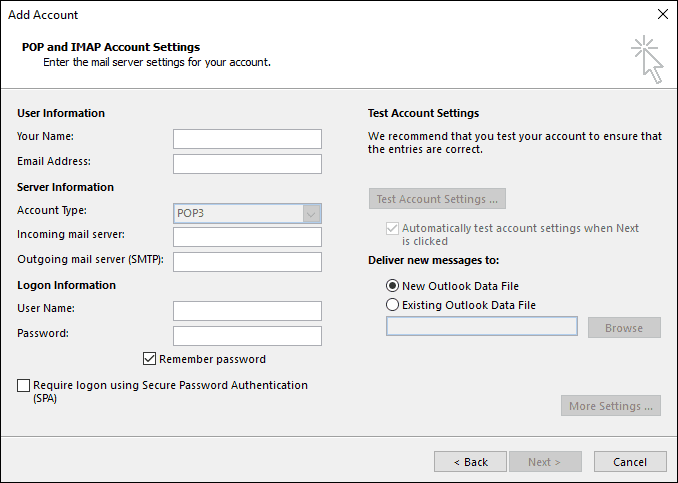
Your Name – Display name when sending email, you can enter your name
Email Address – Enter the email address you want to set up
Account Type – This option depends on you. Most mail service providers support POP3 and IMAP and each has its advantages.
Continue entering the corresponding information for the incoming mail server and outgoing mail server with the information you see in the control panel of mail hosting, enter the full email address in the username section and password.
Don’t forget to check Remember password so you don’t have to enter your password again each time you log in.
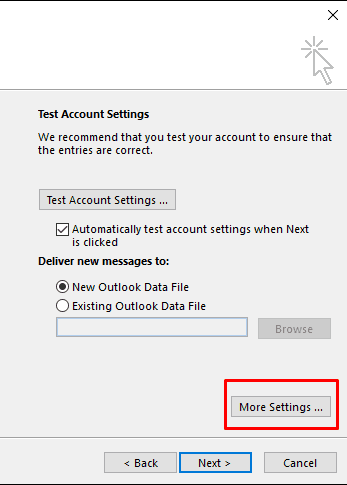
Then click the More Settings button.
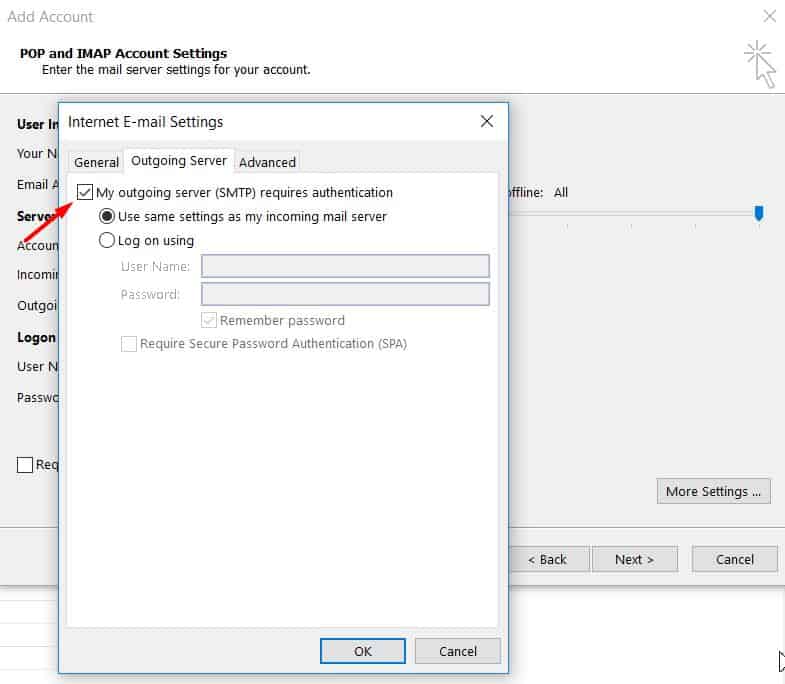
Select Outgoing Server in the new window. Here you need to checkmark My outgoing server (SMTP) requires authentication. This is necessary if the email provider/hosting requires SMTP authentication.
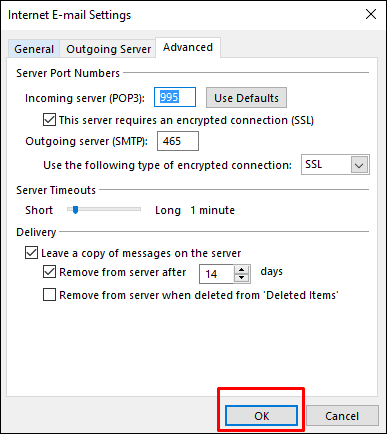
Then select Advanced to enter the port numbers and encryption settings as shown below:
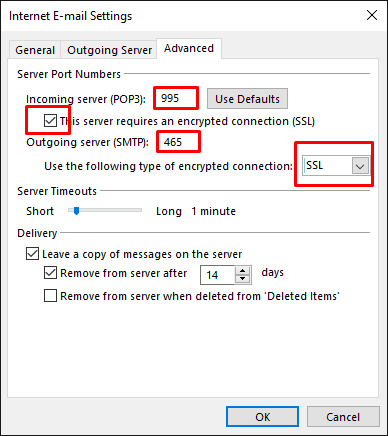
Once everything is filled in, click OK.
You will be redirected to the previous page. Click Next. Outlook Mail will automatically check the sending and receiving of emails using a sample email. If successful, you will see:
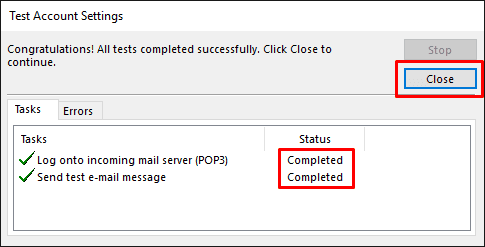
If an error message appears, check the entire configuration information and make sure you have entered it correctly with the parameters provided by the provider, and you can contact the provider for further instructions. Click Close if the check is successful.
After successful, you will see the following in Outlook:
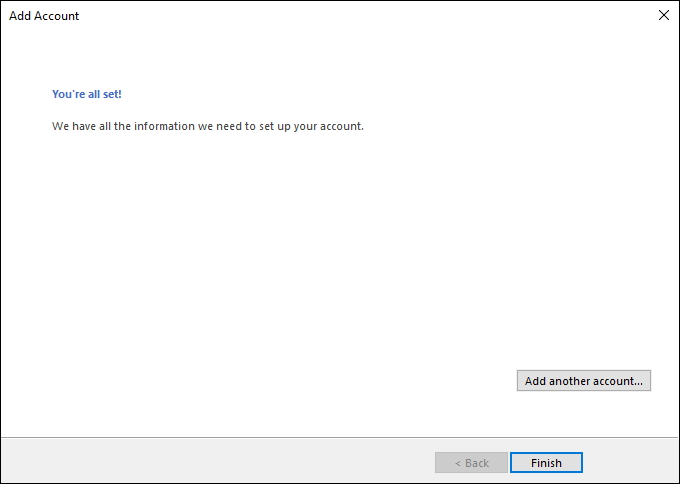
Click Finish and use email on Outlook Mail.
Differences between IMAP and POP
So what is the difference between IMAP and POP?
IMAP (Internet Message Access Protocol) helps synchronize in real-time between server and mail client.
For example, if you mark an unread mail on Outlook, the actual email on the server is also marked as unread. This option is chosen by many multi-device users.
POP (Post Office Protocol) downloads, stores emails locally, and deletes them on the server. In addition, changes to emails on Outlook will not be applied to the server. For example, newly created folders in Outlook will not be synchronized or automatically created on other devices.
Of course, you can also set up your Outlook mail account to keep a copy of the email on the server instead of deleting it. However, even though they have the same content, emails between Outlook and the mail server will be considered separate from each other, and changing the status of an email will not synchronize to the remaining emails. The advantage of POP is that if you have multiple emails and you only want the email to be stored on one device so that even without an internet connection, you can still see the complete email.
Retrieve POP3/IMAP and SMTP information
First, from the email service provider, you need to have detailed information about the POP3/IMAP and SMTP of the email you want to install on Outlook Mail Client. When registering an email according to the domain name, you will be provided with this information or the provider will send you configuration information. In this section, we will show you how to get POP/IMAP and SMTP configuration information from 2 places: email hosting bundled with hosting packages and business email of Hostinger. If you are using an email service provider, you can contact them to get POP/IMAP and SMTP configuration information.
How to get POP3/IMAP and SMTP configuration information from Hostinger’s free email:
- Log in to Hostinger’s control panel and access the Email Accounts section.

- In the email section, scroll down to see all the email account configuration information under the Email Details section.
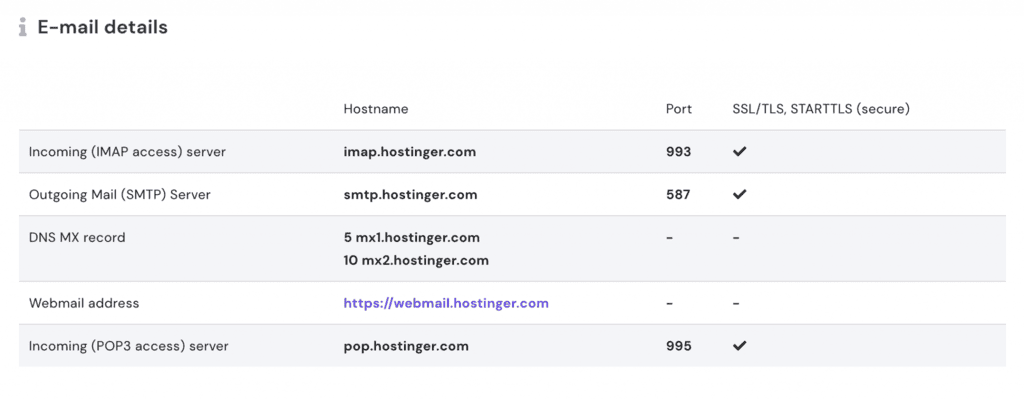
Save this information. You need it to set up Outlook mail.
How to get POP3/IMAP and SMTP configuration information from business email:
If you are using Hostinger’s business email, you can use the following IMAP/POP and SMTP configuration information:
For IMAP (incoming emails)
imap.flockmail.com
Port 993 SSL/TLS
For POP (incoming emails)
pop.flockmail.com
Port 995 SSL/TLS
For SMTP (outgoing emails)
smtp.flockmail.com
Port 587 STARTTLS
Above are instructions for setting up email on Outlook for the 2019, 2016, and 2013 versions. If you encounter any problems during the installation, please review the operations in this guide and still cannot, please comment below this article for our support.
Good luck!
What is the Symbol in Excel 2010, 2013, 2016? Easy Steps to Write and Use

Having a strong grasp of how to use formulas in Excel can be incredibly beneficial for office workers and students alike. By utilizing formulas, you can easily verify the accuracy of data. If you’re unsure about how to use formulas, take the time to delve deeper into this topic in our comprehensive article.


