**Tips for Choosing and Cleaning Clams**
Clams with sandy flesh or “full shells” are a common issue for many homemakers when preparing seafood. To avoid this, keep in mind the following tips for selecting and cleaning clams to ensure you end up with fresh and sand-free clams.
Tips for Choosing and Cleaning Clams
How to Choose Fresh Clams
When buying clams, select those with intact shells that are round and plump, and feel heavy for their size. Avoid clams with cracked or broken shells, those that feel light, or emit a foul odor, as these are likely to be old, have been stored for too long, or are dead. Such clams will not only taste bad but may also affect the quality of your dish.
Pay close attention to clams that are slightly open. They may be dead or past their prime. To ensure you’re choosing live clams, gently pry the shell open. If the clam quickly closes its shell, it’s a sign of a healthy clam. If there’s no reaction, the clam may be dead or too weak.
Tips for Cleaning Sand from Clams
Clams typically live in brackish water with a salinity of about 5%, so soaking them in regular tap water to get them to expel sand is usually ineffective. They will clamp shut and may die if soaked for too long in freshwater.
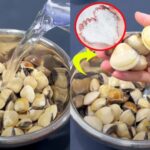
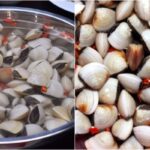
To effectively clean sand from clams, dissolve 1-2 tablespoons of salt in water, then add the clams. The familiar brackish environment will encourage the clams to open and expel sand. Soak the clams for about 2-3 hours to ensure they release all the sand.
If you want to speed up the cleaning process, you can add a few drops of cooking oil to the soaking water. The oil will float to the top, creating a barrier that prevents air from reaching the water, prompting the clams to open and expel sand more quickly.
Another tip to enhance effectiveness is to add a few slices of chili pepper to the soaking water. After about an hour, place the clams in a container, give them a good shake to “dizzy” them, then soak them again. In no time, they’ll open up and release all the sand.
Additionally, you can soak the clams in warm water at around 50°C. The warm water will stimulate the clams’ natural reflexes, causing them to absorb water as a self-preservation mechanism and simultaneously expel sand.
Another method for cleaning clams is to soak them in rice washing water. Rice washing water has a similar effect to saltwater, helping the clams expel sand efficiently. Soaking the clams in rice washing water for just 1-2 hours will give you clean clams ready for cooking.
With these tips, you’ll easily end up with fresh, crisp, and sweet clams without the sandy texture in every bite.
The Secret to Sand-Free Clams: A Restaurant Chef’s Top Tips.
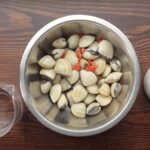 Clams: A Restaurant Chef’s Top Tips.’>
The delectable delights of bivalves no longer need to be a daunting dining experience. With a simple, effective method for purging sand, you can now enjoy these tasty treats with ease.
The Secret to Sand-Free Shellfish: A 2-Hour Guide to Perfection
“Clams and mussels are a delicacy for many, but these shellfish can be a challenge to prepare. The biggest concern is ensuring they are free of sand and grit. A simple overnight soak in water does the trick, but to expedite the process, one can add a touch of salt, rice water, or even a metal object, which encourages the shellfish to expel the unwanted grit swiftly. It’s a nifty trick to ensure a delightful dining experience.”


