


Preparation
2 hours Cooking
1 hour Serves
3 – 4 people
Mooncakes are a must-have for the upcoming Mid-Autumn Festival. If you’re concerned about the quality and hygiene of store-bought mooncakes, why not make your own at home with just a pan?
See also: 5 at home
1 Ingredients for Mooncakes with Mung Beans (No Oven Required)
-
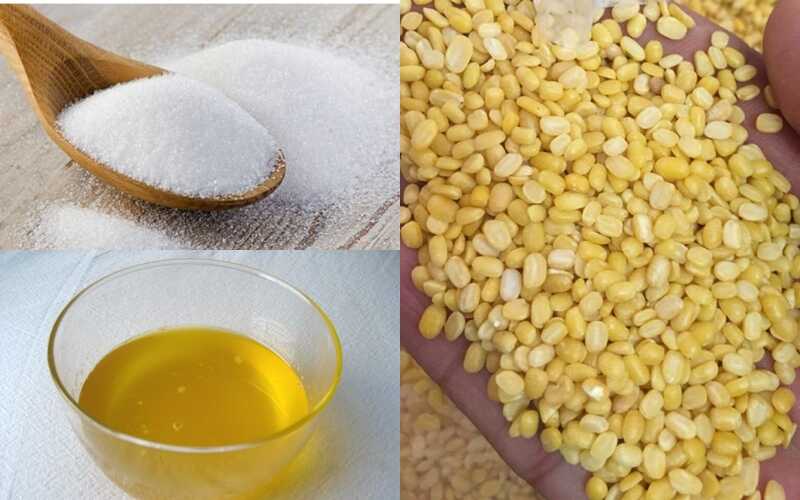
200g mung beans, shelled
-
20g corn oil (or any neutral-flavored oil)
-
50g white sugar
 Ingredients
2 How to Make Mooncakes with Mung Beans (No Oven Required)
Step 1 Prepare the Mung Beans
 Preparing mung beans
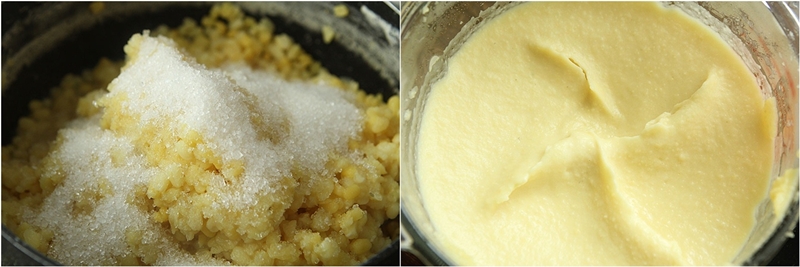
First, soak the shelled mung beans in water for about 1-2 hours until they soften.
Then, cook the beans in a pot. Add water until it’s about half a finger higher than the surface of the beans, and boil them over high heat. Once the beans start to foam, reduce the heat gradually.
Continue cooking until the beans are soft and most of the water has evaporated. Then, remove the beans from the pot and set them aside in a bowl.
Step 2 Blend the Beans
 Blending mung beans
Add 2 teaspoons of white sugar to the bowl of cooked mung beans and mix well until the sugar is dissolved and absorbed by the beans.
Next, transfer the mixture to a blender and blend until you have a smooth paste.
Step 3 Cook and Shape the Mooncakes
 Cooking and shaping mooncakes
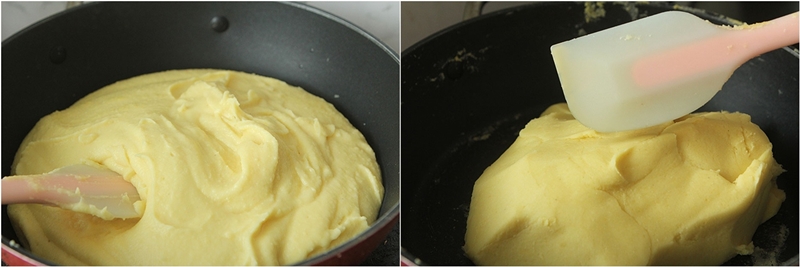
Heat 2 teaspoons of corn oil in a pan over medium heat. Pour the blended mung bean mixture into the pan and stir continuously. If the mixture starts to dry out and stick to the pan, add another teaspoon of oil and continue stirring.
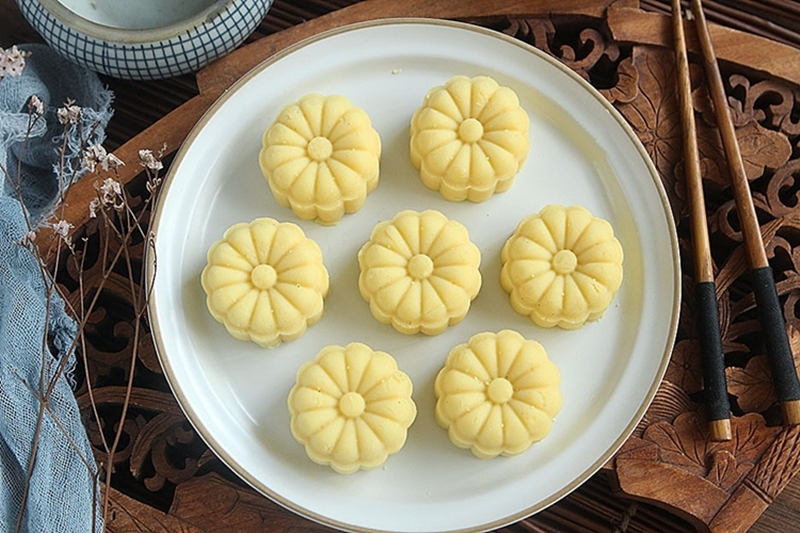
Step 4 Final Product
 Final product
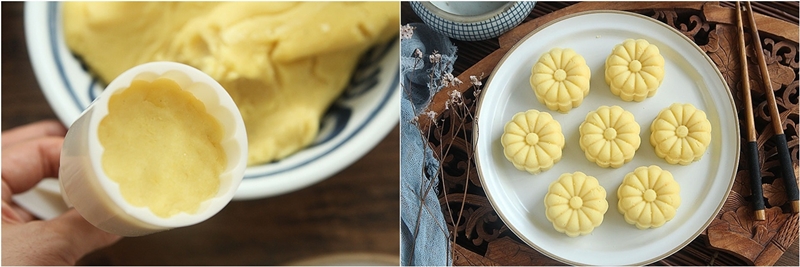
Once the mung bean mixture is evenly cooked, take about 30g of the mixture and place it in a mooncake mold to shape it. Then, gently press the mooncake out of the mold onto a plate.
3 Enjoy Your Homemade Mooncakes
 Enjoying homemade mooncakes
These mung bean mooncakes are a great option for those who want to make their own mooncakes without going through complicated processes. Made with a pan, these mooncakes retain the traditional flavor while offering the sweet and buttery taste of mung beans, making them a safe and delicious treat for the Mid-Autumn Festival.
We’ve shown you how to make mooncakes with mung beans in a simple way, without needing an oven. This recipe is perfect for those who aren’t too crafty, as it doesn’t require much time or complicated tools. Give it a try!
5 Easy Steps to Crafting Beautiful Handmade Lanterns for Kids to Enjoy the Mid-Autumn Festival

Are you looking for ways to bring smiles to your children this Mid-Autumn Festival? Look no further! This article will show you five easy and beautiful handmade lanterns that you can craft with your kids to make this a memorable occasion.
Tips for Pruning and Decorating a Mid-Autumn Festival Fruit Tray for the August Full Moon Festival

A festive Mid-Autumn celebration is incomplete without the traditional tray of pruned fruits, featuring adorable animal creations for kids to enjoy on the night of the full moon.
Crafting a Milk Jug Lamp: A Joyful Activity for the Entire Family

Bring some fun and sparkle to this year’s Mid-Autumn Festival with an eco-friendly tin can lantern! Encourage your children to think outside the box and get creative with a sustainable art project that will set the mood for a magical celebration. Get ready to follow this easy tutorial and make an enchanting toy that is sure to make your little ones smile.
Ideas for a Fun Mid-Autumn Festival Meal to Share with Your Children

Looking to celebrate Mid-Autumn Festival 2021 in a way that honors its traditional Vietnamese customs? Then learn how to prepare a memorable and traditional feast for the occasion!
10 Ideas for Creating a Memorable Mid-Autumn Celebration in the Comfort of Home

The traditional Mid-Autumn Festival celebration has been disrupted this year due to the coronavirus pandemic, leaving families unable to gather to observe the holiday together. To bring a sense of festive cheer into their homes, parents are turning to creative solutions and decorating for the occasion. In this article, we offer ideas and advice on how to craft the perfect Mid-Autumn Festival environment within the home safely and securely. Read on to find out more!


