Causes of the write-protected USB formatting error
The write-protected error occurs when a USB is in a data protection state, preventing users from copying data to or from the USB.
Possible causes of the write-protected USB formatting error include:
- Infection of your computer or laptop with a virus.
- The SD Card or USB is locked and needs to be unlocked.
- The USB or SD Card is formatted in a Read-Only state, allowing only for reading and not writing.
- The USB does not have enough capacity for data storage.
This error can cause inconvenience in various work tasks, such as presenting slides, saving videos, creating files, etc.

How to resolve the write-protected USB formatting error
Check for viruses on the USB
Install a reliable antivirus program on your device, such as Avast, Avira, AVG, Norton, Kaspersky, Microsoft Security Essentials, etc. These programs will protect your computer and peripheral devices from malware and virus attacks.
USB devices are highly susceptible to virus infections if not used carefully. USBs can get infected from computers and vice versa. When using a public computer, viruses can spread to your USB more quickly.
If you click on meaningless files or use the USB carelessly, it is more likely to get infected with a virus. This can lead to your USB drive becoming write-protected. With antivirus software installed, the programs will automatically scan the USB when it is plugged in to prevent infection.
Each antivirus software has its own methods to eliminate viruses. Some software automatically scans when a new device is connected, while others require you to manually select the scanning application.

Check the capacity of the USB
Insufficient capacity of the USB can also cause the write-protected error. To check the capacity of the USB, follow these steps:
- Step 1: Open This PC and right-click on the connected USB.
- Step 2: Select Properties. The capacity used and remaining capacity will be displayed.

Using the DiskPart command-line tool
You can use the DiskPart command-line tool to resolve the write-protected error. Follow these steps:
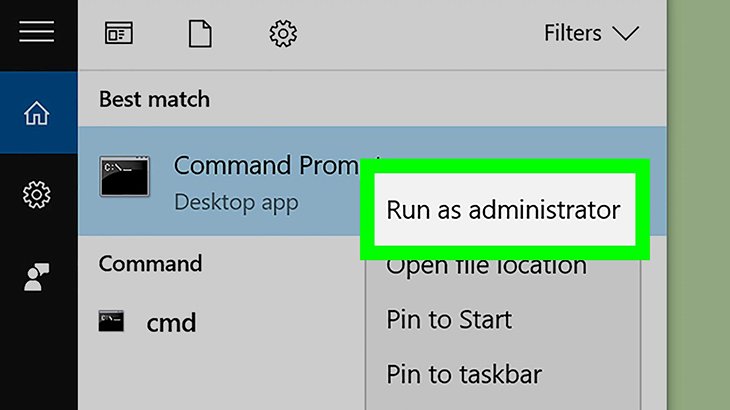
- Step 1: Open Start, enter “cmd” in the search box, and run the command prompt as an administrator.
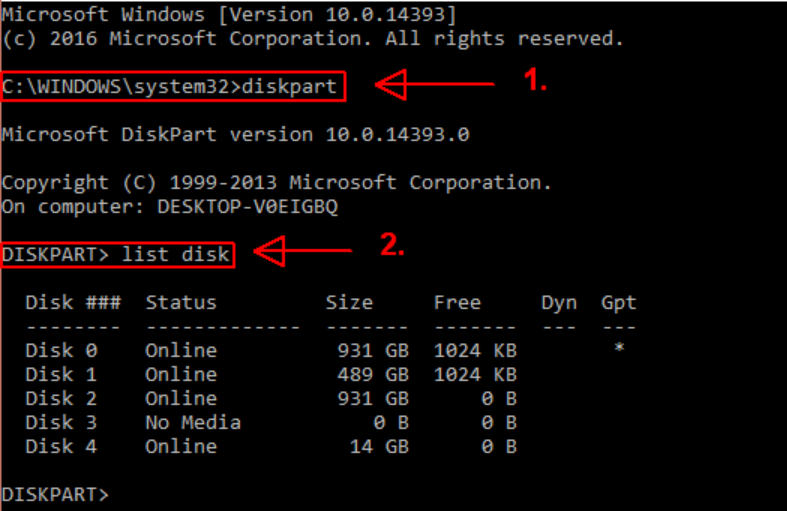
- Step 2: In the command prompt window, enter “diskpart” and press Enter. Then enter “list disk” to display all storage devices on your computer.
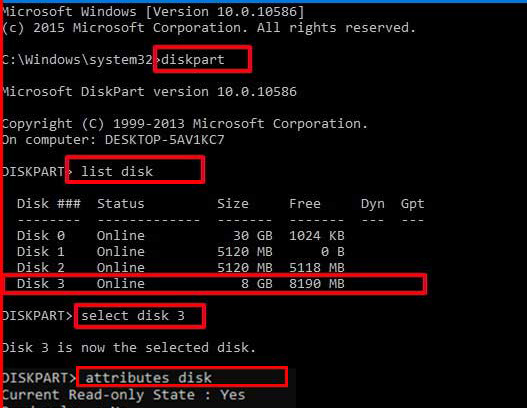
- Step 3: Determine the disk drive number where your USB is located. After determining the drive number, enter the command “select disk [drive number]”. Finally, enter the command “attributes disk clear readonly” and press Enter to remove the write protection.
Intervene with the Registry
This method involves modifying the Registry to disable the protection feature for external storage devices on your computer. Follow these steps:
- Step 1: Open the Run window by pressing the shortcut Windows + R, then enter “Regedit” and press Enter.
- Step 2: In the Registry interface, navigate to the branch “HKEY_LOCAL_MACHINE \ SYSTEM \ CurrentControlSet \ Control \ StorageDevicePolicies”. Find the key named “WriteProtect”.
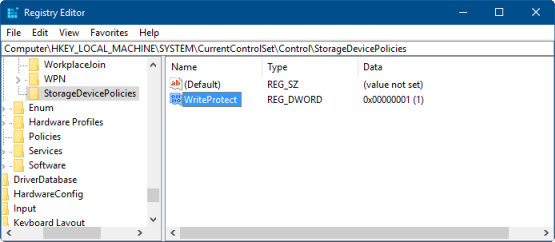
- Step 3: Open the “WriteProtect” folder and change the value of this key from 1 to 0. Select OK to fix the write-protected disk error.

Format the USB
Before formatting the USB, check the file system type (NTFS or FAT32) and format the USB accordingly. Ensure you back up all the documents on the USB to another USB or copy them to the computer before formatting.
Steps:
- Step 1: Press the shortcut Windows + E or open any folder. In the left-hand pane, navigate to This PC (Windows 8/8.1), My PC (Windows 10), Computer (Windows 7 and below).
- Step 2: Select your USB drive, then select Properties to view the file system type.
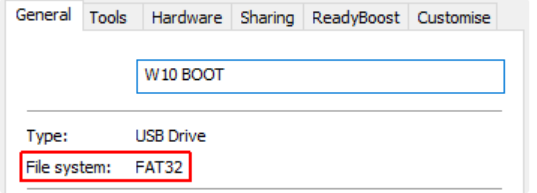
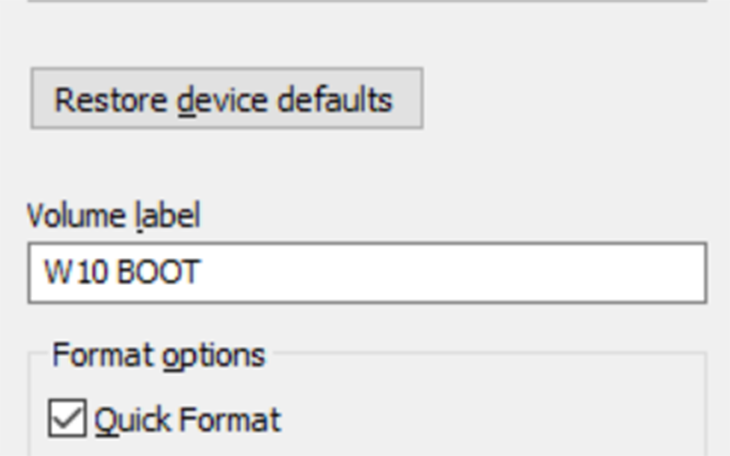
- Step 3: Close the Properties window, right-click on the USB drive, and select Format. Change the Volume label to the desired name.
- Step 4: Select Quick Format. The format speed will depend on the USB’s capacity.
Turn off BitLocker
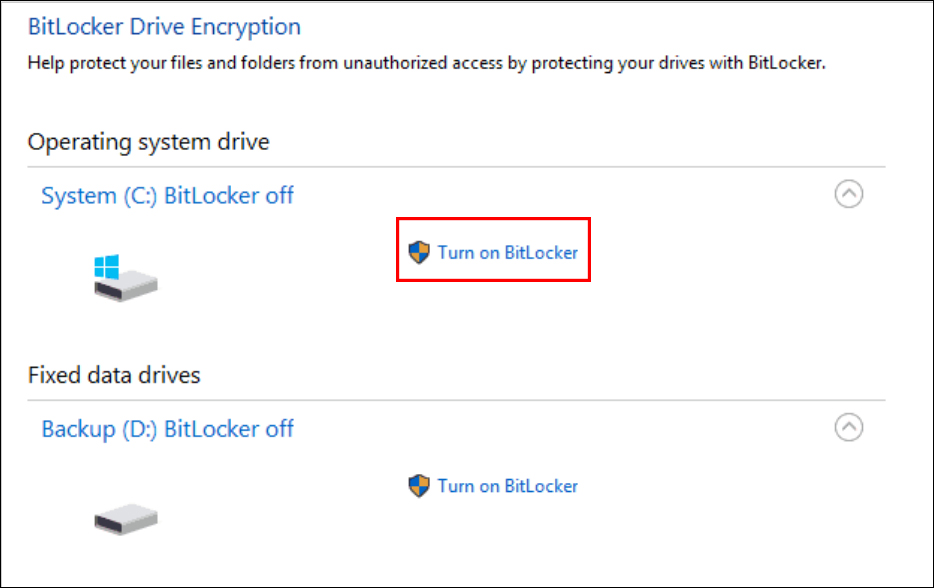
If BitLocker is enabled, it can prevent changes to files on locked partitions or drives and may contribute to the write-protected error. Try turning off BitLocker using the following steps:
- Step 1: Select Start and enter “Manage BitLocker” to search for the program.
- Step 2: In the BitLocker Drive Encryption window, select the locked drive and click “Turn off BitLocker”. BitLocker will start decrypting the drive, allowing you to edit and save files without encountering the error message.
Above are the instructions for formatting a write-protected USB. If you have any questions or need further assistance, please leave a comment below.


