


Creating DIY air conditioners to cool down the house is not a strange idea during hot summer days. With just a few plastic bottles, ice, foam box, plastic tubes… you can easily create mini air conditioners that help reduce the temperature inside the house surprisingly.
However, if attaching plastic bottles with ice to a fan or creating an air conditioner using a foam box with plastic tubes require an electric fan and are not durable, the air conditioner made from dozens of plastic bottles below does not require electricity but still helps reduce the temperature by more than 5°C, which will surprise you.
The idea of creating air conditioners like this came from the people in the suburbs of Bangladesh, who had to live in hot tin shelters with temperatures reaching up to 45°C. By simply utilizing a lot of used 1.5-liter plastic bottles and a large sheet of hardboard, glue, you can complete the air conditioner in no time.
First, drill straight rows of holes on the hardboard, with each hole spaced about 12-15cm apart, the size of the hole should be slightly larger than the mouth of the plastic bottle (about 2mm). Next, use a knife to cut the round bottom of the bottle cap, leaving the cylindrical part. Cut the bottom of the bottle separately so that the cut part is 2/3 or 1/3 of the plastic bottle body.
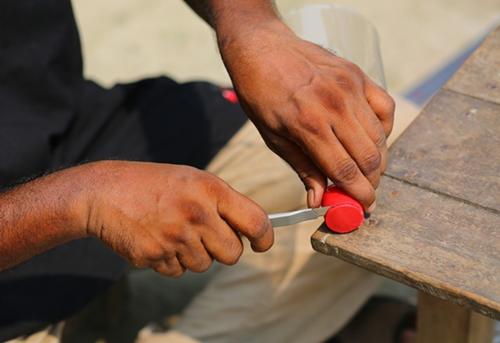 Use a knife to cut the round bottom of the bottle cap.
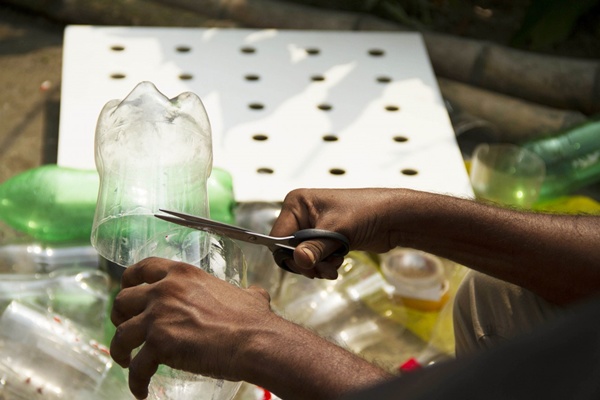 Cut the bottom of the bottle separately so that the cut part is 2/3 or 1/3 of the plastic bottle body.
Remove the bottle cap ring that was just cut out and insert the mouth of the bottle into the small holes just drilled on the hardboard, then twist the bottle cap ring back tightly, or you can also add glue to the mouth of the bottle to stick it firmly to the hardboard.
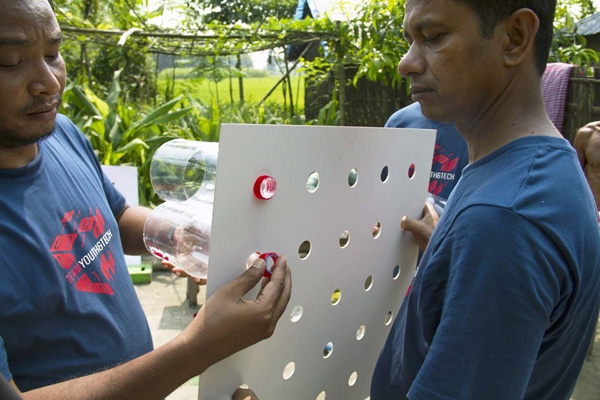
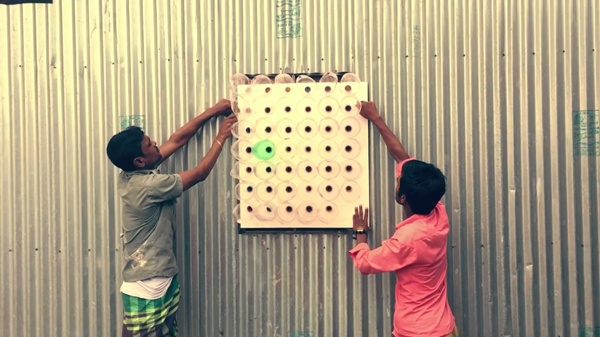
Attach the bottle shell board to the window.
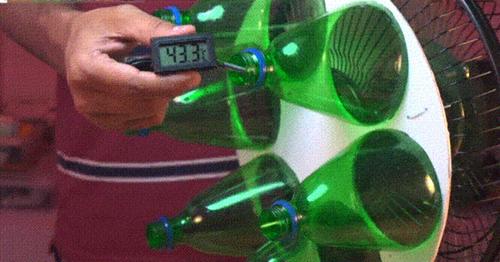
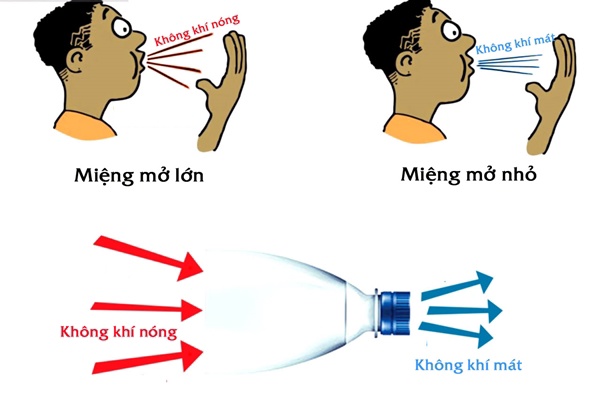
Finally, you just need to attach this bottle shell board to the window so that the mouth of the bottle faces inside the house, wait for the wind to blow through and enjoy. The wind, no matter how hot, will still become cool and the temperature will be reduced by more than 5°C after passing through the plastic bottles. You can apply the principle of blowing air – steam to understand more about the cooling mechanism of this DIY air conditioner.
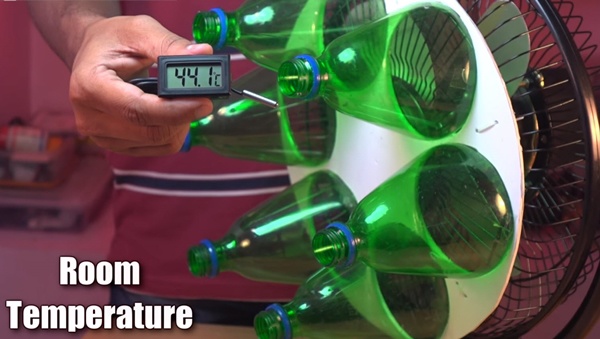
Room temperature from 44.1°C…
Source: Thoidaiplus.giadinh.net.vn
Growing Green Onions at Home: 2 Easy Methods for Clean & Beautiful Veggies

Growing green onions at home can be both a beautiful and practical solution. Easily grown in water with onion roots (hydroponically) or from bulbs with soil in plastic bottles, you can enjoy having clean vegetables and make a stylistic statement.
Should You Discard the First Batch of Ice From a Newly Bought Refrigerator?

Samsung customers are being cautioned to get rid of the first three ice cubes manufactured by the company’s devices before consuming them.
Exploring the Surprising Advantages of Ice Water: Guidance from Experts

Are you aware of all the ways ice can make your life easier, other than keeping your drinks cold? Learn about the variety of alternative applications for ice and how they can benefit you.
How to Cool Down Quickly with Delicious Homemade Draft Beer this Summer

Come one, come all! XANH Electronics is here to show us how to enjoy the sweet taste of sake at the comfort of our own homes. From its uniqueness to its delightful flavor, sake is quickly becoming a trend. Let’s join XANH Electronics in the kitchen and whip up some delicious sake concoctions right away!
“How to Make Fresh and Safe Homemade Bean Sprouts in 5 Easy Steps”

Are you looking for a delicious and healthy way to enjoy beans while avoiding the hassle of grocery store shopping and potential quality issues? Look no further – XANH Electronics has the solution! We’ll be introducing you to 5 simple and nutritious recipes for making homemade beans that will be sure to please your taste buds as well as your wallet!


