


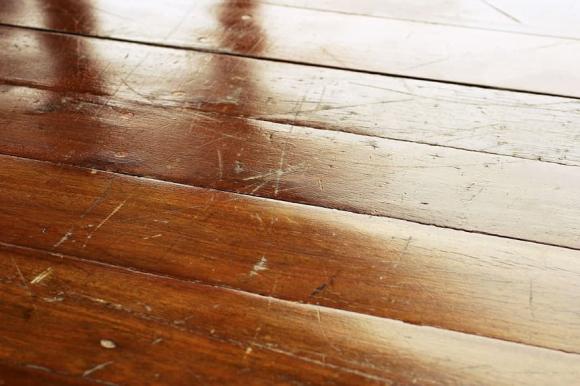
Hardwood floors are a popular choice for many homes, but they can be prone to scratches. Surface scratches may be caused by dragging or moving heavy objects across the floor, creating unsightly marks. Alternatively, scratches may be caused by falling sharp objects, pet claws, or children playing with pens or sharp objects, resulting in aesthetic damage to your floor.
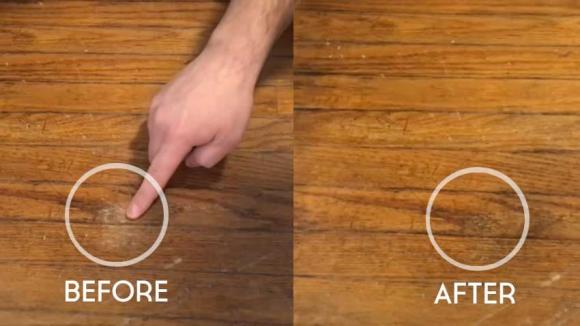 Simple Tips to Fix Scratched Hardwood Floors (Illustration)
When faced with this issue, it’s important to assess the severity of the scratches. If the scratches are minor and only affect the surface, you can easily fix them with some simple tips without compromising the beauty of your floor.
Before attempting to repair scratches on your hardwood floor, ensure that the floor and the scratched area are clean. Remove as much debris as possible using a soft-bristled broom and a dust cloth. Then, use an appropriate cleaning product for hardwood floors. If your floor is extremely dirty, opt for an oxygenated floor cleaner for a quicker deep clean.
Avoid using harsh cleaning agents, and instead, opt for wax, putty, or polish to protect, shine, and buff your hardwood floor. Once the floor is clean, you can proceed with the following steps to address minor or deeper scratches on your hardwood floor.
Addressing Minor Scratches on Hardwood Floors
For thin, shallow scratches that are less than 0.3 cm deep, use a resin-based color filler or a stain marker that matches your hardwood floor. You can also use a wax pencil specifically designed for furniture repair.

If there are multiple scratches and the surrounding floor finish is still intact, try rubbing the scratches with a soft cloth and quickly wiping them clean. The stain will only penetrate the raw wood.
Using a Stain Marker and Color Filler
Choose a stain marker or a touch-up pen that closely matches the color of your floor. Test the color filler in an inconspicuous area to find the closest match. If necessary, mix different colors to achieve the perfect shade.
For lighter-colored hardwood floors, try rubbing a raw walnut into the scratches. The natural oils in the walnut will fill and disguise the scratches.
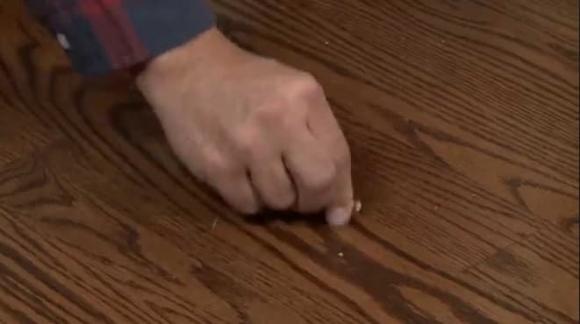
Applying the Color Filler
Gently apply the color filler to a small area of the scratch. If it blends well, continue filling in the rest of the scratch.
Buffing the Hardwood Floor
Once the color filler is dry, use a super-fine (#0000) steel wool pad to gently buff the scratched area. This will help remove any residual debris and create a smooth finish.
According to Congly & Xa Hoi
The Secret to Saving Your Over-Salted Dish: A Simple Ingredient to Bring Balance and Flavor

If you’ve accidentally over-seasoned a dish with too much salt, don’t panic! There are a few simple tricks you can use to rescue your meal and have it tasting delicious in no time.
The Hazards of Latex Paint: 5 Reasons to Avoid it When Renovating Your Home

“As an avid enthusiast of home improvement and a discerning consumer, I found that traditional latex paint has inherent drawbacks that became increasingly apparent during my usage. My experience revealed limitations that made it challenging for me to accept this product over time.”
The Ultimate Guide: Mending a Torn Áo Dài Like a Pro

The ao dai is an iconic Vietnamese garment, renowned for its elegant silhouette and ability to capture the beauty and spirit of Vietnamese women. If you’re an ao dai enthusiast, we’ve got you covered with our expert tips on how to masterfully mend any unfortunate rips or tears. Trust us, your beloved ao dai will be as good as new!
The Benefits of Plastic Wrap

“The versatile nature of plastic wrap knows no bounds. Aside from its primary use in food preservation, this handy household tool can be creatively utilized to seal wine bottles, prevent clothing from falling, and even act as a protective barrier against dust and scratches for your precious furniture. Unleash your imagination and discover the endless possibilities that plastic wrap has to offer in your daily life.”
The Ultimate Guide to Cleaning Different Floor Types: Tips for a Sparkling Home

Introducing the Ultimate Guide to Mopping: Master the Art of Cleaning Your Floors Like a Pro!
We all know that mopping is a familiar chore, but did you know that different floor types require unique mopping techniques? It’s time to unlock the secrets to achieving spotlessly clean floors by mastering the art of mopping for each unique surface. Prepare to transform your home into a gleaming sanctuary with our expert tips and tricks!


