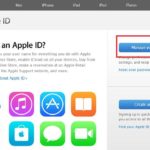
For further information, please click here:
1. Backup data to iCloud
- Begin by opening the iOS device.
Step 2:
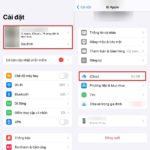
Select Settings > iCloud > Storage & Backup.
Please click on the “Back Up Now” button to initiate an active backup process.
2. Backup Data to iTunes
iTunes offers the ability to back up iOS data to a different computer, providing an alternative option to iCloud data backup.
Step 2: Synchronize all iOS data with iTunes.
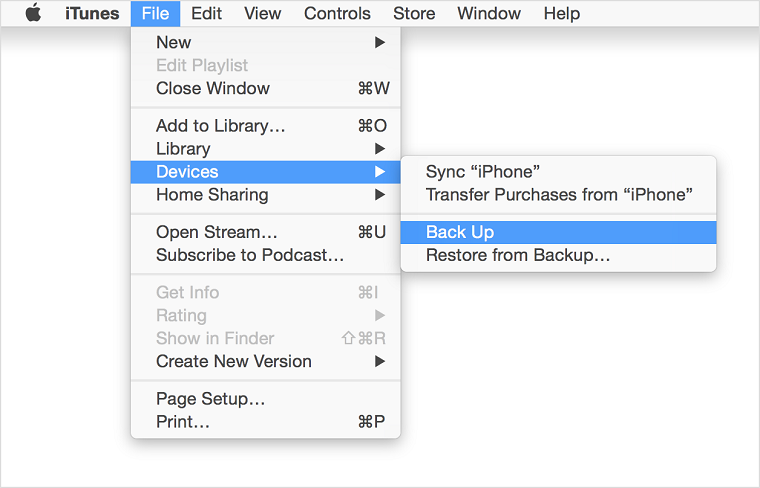
To proceed, follow these steps:
1. Select Devices on your screen.
2. Locate your iOS device and right-click on it.
3. From the options presented, choose the Back up option.
4. Let iTunes commence the process of backing up all important data.
3. Recover data from iCloud
Step 1: Once a new device is activated, choose the option Slide to set up.
Step 2: Choose the language and country. On the settings screen, navigate to the language settings and select Vietnamese (or English if the user prefers the English interface) > then choose Vietnam as the country and territory.
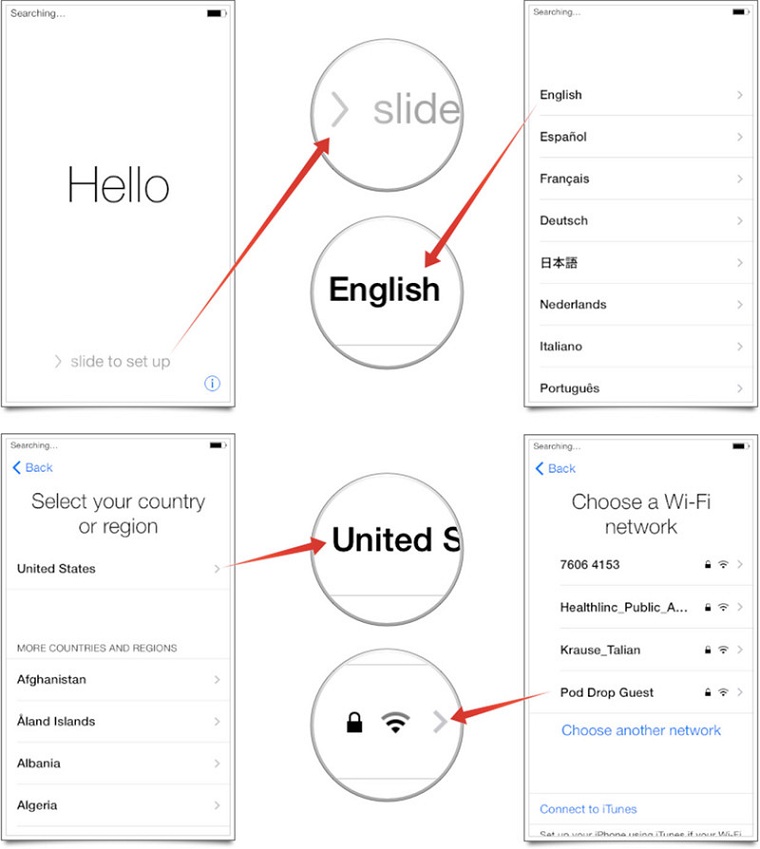
Step 3: Connect to the Wi-Fi network. Users also have the option to use mobile data (cellular connection) if Wi-Fi is inaccessible.
There are some large files on iCloud that cannot be recovered and some features cannot be activated without a Wi-Fi connection. Therefore, it is recommended for users to use a stable Wi-Fi network when performing data restore.
Step 4: Choose a display method (‘enabled’ or ‘disabled’) on the Location Services screen. Please note that certain applications like Maps require Location Services to be enabled in order to function properly.
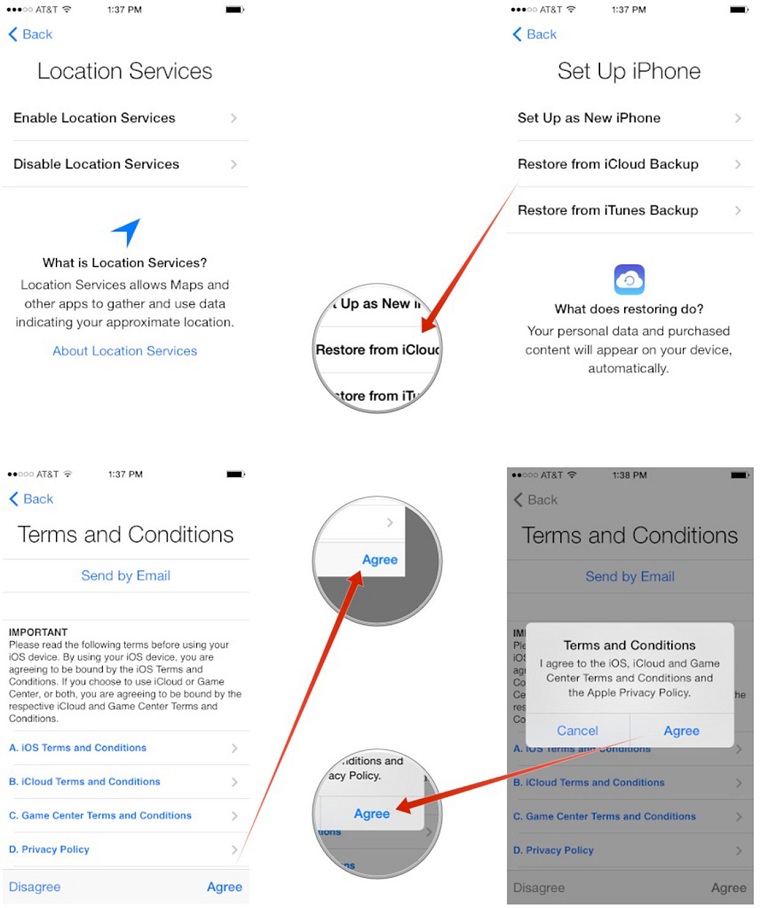
Step 5: Select the option "Restore from iCloud Backup" on the following screen. Enter the necessary information when prompted.
Step 6: Ensure to review and understand the terms and conditions before proceeding. Users are required to confirm their agreement to the aforementioned conditions once again.
Step 7: Choose the specific iCloud backup that the user wishes to download, if there are multiple backups available in the iCloud storage.
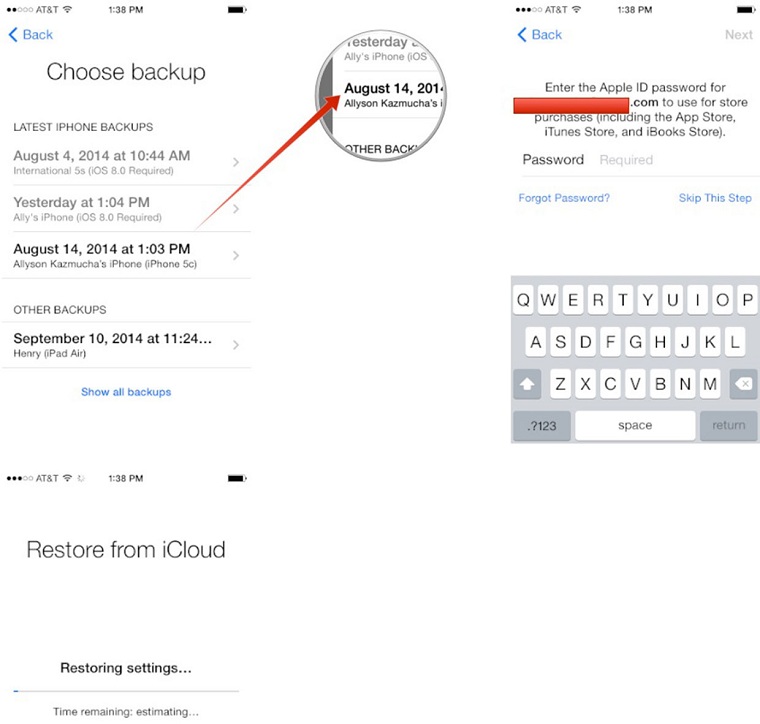
Currently, users have the ability to utilize normal applications while awaiting the restoration of their data through iCloud.
When restoring and recovering data, it is important to note that the duration of the process is dependent on the amount of data in the user’s backup. Furthermore, if the user disables their Wi-Fi or Cellular connection, the data recovery process will pause until the connection is reestablished. iCloud will automatically resume the restoration process once the connection is restored.
4. Recover Data from iTunes Backup
- First, connect your phone to the computer.
- Step 2: Open iTunes and select the menu bar.
Step 3: To access the sidebar, go to the View menu and select Sidebar.
Step 4: Choose the device name from the Device section in the Library menu.
Step 5: Choose the “Restore” option from the backup options menu.
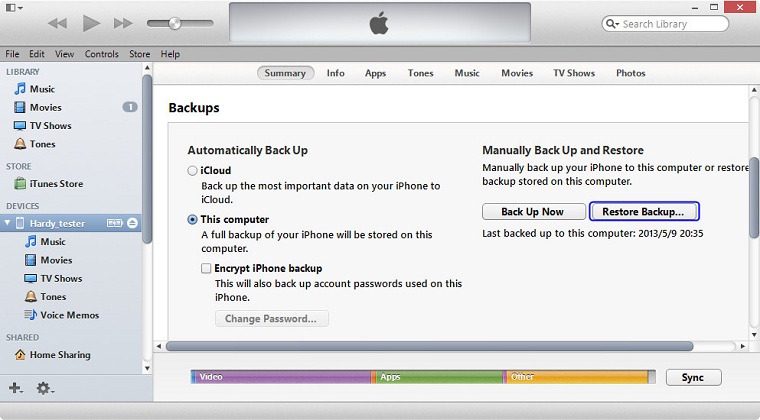
If your iPhone is running iOS 7 or a newer version, you must first disable the Find My iPhone feature before following the steps mentioned above. To do this, go to Settings > iCloud > Find My iPhone and turn off the feature by entering your Apple ID. Once you have completed this step, you can proceed with the instructions provided.
We wish you the best of luck with your data backup and recovery endeavors!


