


3 Key Points to Remember When Fermenting Sticky Rice Wine
Choose the right type of rice
The rice used for making sticky rice wine is different from regular rice. You should choose ground rice, which means rice that has been ground only once to remove the husk.
Although the color of these rice grains may not be attractive, they are very rich in vitamin B, which is good for your health. In addition, this type of rice helps ensure a successful fermentation process for sticky rice wine.
When buying, pay attention to choosing rice grains that are round and uniform in size. Check if the grains are intact or broken to ensure that the cooked rice will look appealing.

Buy the yeast starter
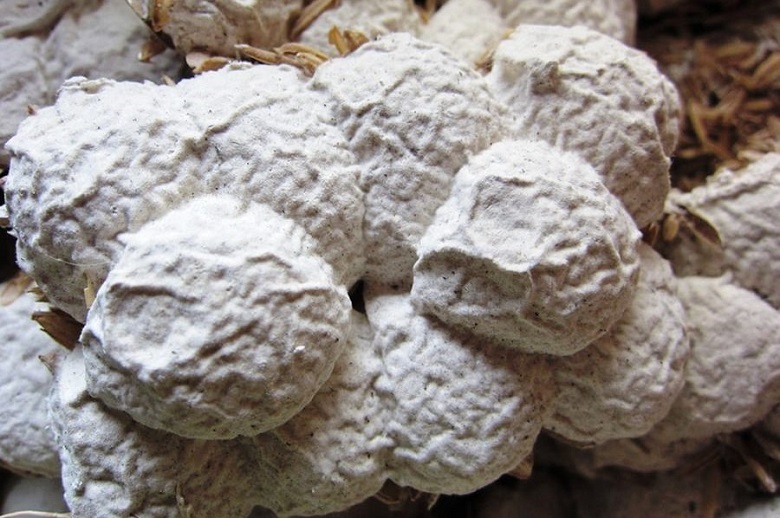
The yeast starter used for making sticky rice wine is usually Bacillus starter. They are packaged in round pellets with a very fragrant smell. When fermenting sticky rice wine with Bacillus starter, the rice is usually delicious and not sour. It will have a smooth texture and will not cause headaches.
When buying Bacillus starter, choose pellets that are bright in color and smell lightly fragrant when you bring them to your nose. This is a sign that the starter is fresh and has not been damp or moldy, which will make the fermented sticky rice wine taste better.
Timing
Timing is an important factor when fermenting sticky rice wine. Depending on the temperature and weather, the fermentation time can be shortened or lengthened. In hot summer weather, it takes about 3-5 days for the sticky rice wine to be ready. But in winter, when the temperature is low, the fermentation time will be longer.
How to Make 100% Successful Sticky Rice Wine
Ingredients
– Ground sticky rice: 1.5kg
– Banana leaves: 2 boats
– Bacillus starter: 3 pellets

Instructions
– Wash the ground sticky rice and soak it in water for about 2 hours until the rice grains are round and plump.
– Put the sticky rice in an electric rice cooker and add an equal amount of water to the rice level. Be careful not to add too much water, otherwise the cooked rice will become mushy and sticky. Press the “Cook” button to start cooking. When the cooker switches to the “Warm” mode, wait for 3 minutes and then press “Cook” again.
– Transfer the cooked sticky rice to a plate or large tray and let it cool.
– Crush the Bacillus starter until it becomes fine powder, and then sift it to remove any husks that may be present.
– Sprinkle the Bacillus starter over the cooled sticky rice and mix it thoroughly with your hands so that the rice grains are evenly coated with the starter.
– Line the bottom of a basket with banana leaves and then layer the sticky rice mixture on top. Fold the edges of the banana leaves to fully cover the rice. Don’t forget to place a clean dry cloth on top and keep it in a sealed and windy place.
During the fermentation process, the sticky rice will release water, so it is recommended to use a basket with an outer container.
– After about 3 days, the sticky rice wine will have successfully fermented. At this point, use a clean spoon to scoop the sticky rice wine into small bowls and enjoy. The rice grains will be plump and chewy, and you will taste the sweetness with a slight crunch in your mouth, which is very delicious.
The fully fermented sticky rice wine is sweet and fragrant, without being too spicy, sour, or bitter. If you can’t finish it, you can store it in the refrigerator to slow down the fermentation process.
Tips for Preparing and Storing Rice During Hot Weather

It’s no secret that in warmer months the proper storage of food, especially cold rice, can be a nightmare. However, with a few simple tips, we can help you cook the perfect batch of rice and keep it from going rancid. Read on to learn all the essential steps and how to preserve the rice!
Highlighting Five Varieties of Rice for Perfect Tet Meals

As T?t approaches, the focus for many is finding the right ingredients to have a joyful, memorable celebration. On the list of necessities is the staple of the Vietnamese diet – rice – which is a major shopping priority for the holiday.
DIY: Cook Up Delectable Crispy Xá B?u (Pickled Radish) at Home
 at Home")
Wondering what xá b?u is all about? Check out our newest article to get the full scoop on this delectable Vietnamese dish and learn to create your own crispy xá b?u! Read on for all the details.
7 Steps to Prolong the Life of Your Electric Rice Cooker

Are you looking to extend the life of your electric rice cooker? Check out our 7 essential tips to ensure that your appliance remains in top working condition and lasts for years.
DIY Natural Skin Lightening and Brightening Using One Serving of Rice

Are you curious about the great skincare benefits that rice can offer? From providing a healthier, more luminous complexion, to acting as a powerful antioxidant, there are many advantages to using this natural ingredient. Let’s delve into the remarkable properties that rice has to offer.


