


 – 5 Must-Visit Attractions for an Unforgettable Experience")

: Top 5 Must-Visit Spots")
1How to make Mooncake syrup
Mooncake syrup is not just a simple mixture of sugar and water, it also needs to be fragrant and cooked for hours to have a beautiful color. In addition, the syrup should have a moderate thickness and consistency. If it is too thick, the mooncake will be dry, and if it is too thin, the mooncake will be soggy.
Normally, mooncake syrup is a combination of white sugar and lye water, which gives the mooncake a beautiful and standard color. Whether it is baked mooncakes, snow skin mooncakes, or others, preparing the syrup is equally important to make the mooncake delicious and beautiful!
-800x500-14.jpg)
2Types of flour for Mooncake
Depending on the different types of mooncakes, you need to choose the right flour to make the mooncake delicious and flavorful.
For baked mooncakes
- Cake flour: Cake flour, also known as number 8 flour, is suitable for making soft and fluffy mooncakes due to its low gluten content. When using this type of flour to make the crust of baked mooncakes, the mooncakes will be quite firm and it takes about 3-4 days after baking for the crust to become soft.
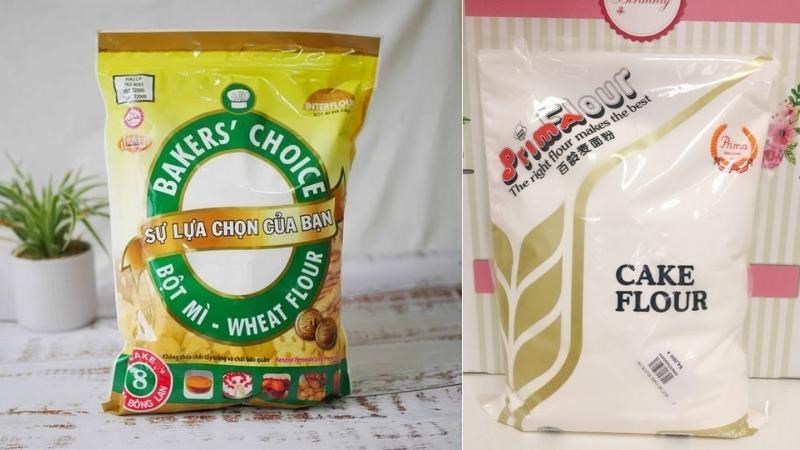
- All-purpose flour (number 11 flour): With a protein content of 10.5% – 11.5%, this is a versatile flour suitable for all types of mooncakes. The crust made from number 11 flour will also be slightly firm. After being left at room temperature for 2 days, the crust will become soft, fluffy, and more fragrant.
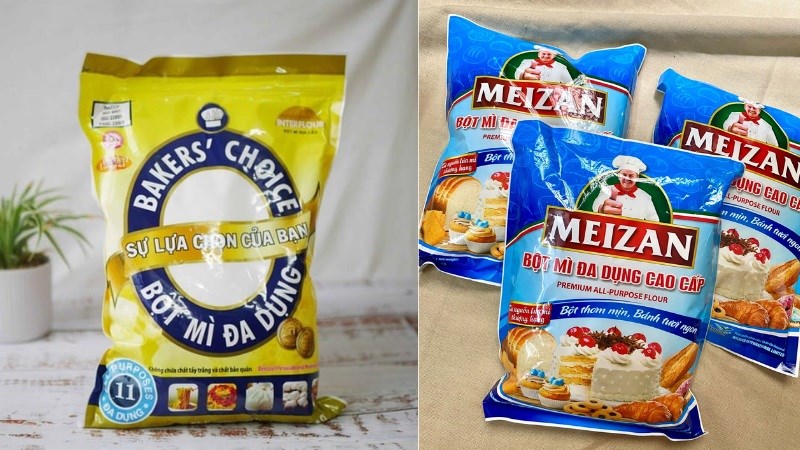
- Pre-mixed mooncake flour: If you don’t have much time, this is the most convenient flour for making mooncakes, especially for first-timers. Just follow the instructions and you will have a quick and standard mooncake filling.

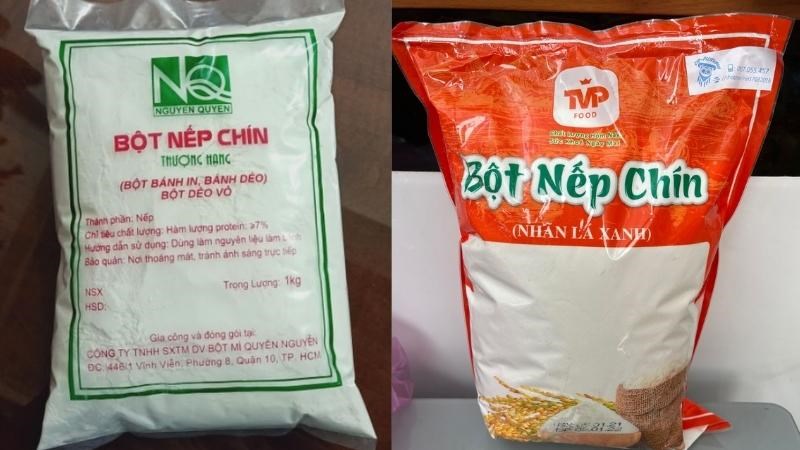
For snow skin mooncakes
Snow skin mooncakes are made from cooked glutinous rice flour, so they can be enjoyed immediately after shaping without the need for steaming or baking. Nowadays, there are many convenient pre-mixed flours available on the market. However, for the most delicious and authentic taste, traditional glutinous rice flour is still the top choice:
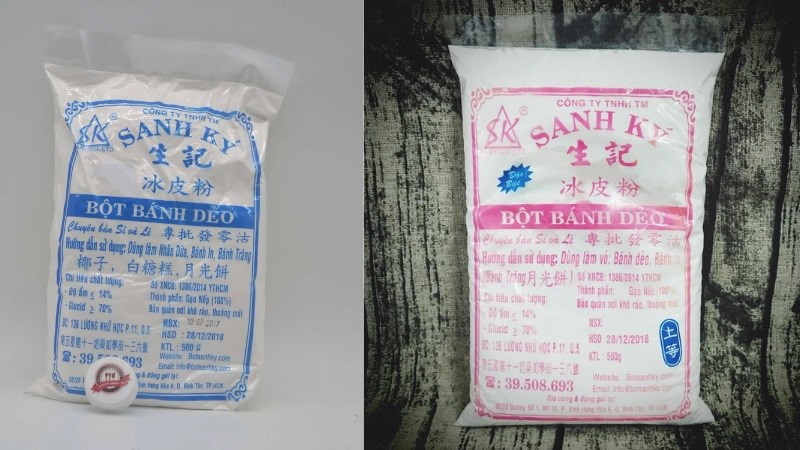
- Traditional glutinous rice flour (northern region): This is a traditional type of flour with a unique aroma of roasted glutinous rice, white and slightly fragrant. You can easily buy traditional glutinous rice flour at grocery stores or baking ingredient stores.
3Tips for making delicious mooncake fillings
For sweet fillings
When you are making sweet fillings such as lotus seed paste, mung bean paste, red bean paste, etc., make sure the beans or seeds are boiled or steamed until they are soft and not hard when eaten. Before boiling the beans, some types of beans need to be soaked in filtered water or boiling water with 500g of sugar for 2-3 hours to make the beans sweet.
You should stir the ingredients evenly in a pan over low heat, so that the filling does not separate and does not get burnt. The ideal sweet filling should have a smooth, fragrant, and firm texture, without sticking to your hands and without leaking.
-800x500-17.jpg)
For mixed fillings
You should soak the fat with sugar in a ratio of 2 parts fat to 1 part sugar for about 6 hours to make the fat become creamy and firm. If you have time, you can soak the fat for 1 day to achieve the best quality.
In addition, when cooking the other ingredients, you need to soak them in water to make them soft and tender. You can also boil them with filtered water or syrup to make the beans or seeds sweet, soft, and more delicious.
When the ingredients are completely dry and not watery, you should finely chop the ingredients and absolutely do not grind them. To add sweetness and richness to the filling, you can use syrup or soy sauce instead of sugar or salt.
You need to stir the ingredients evenly in the pan over low heat, and when the filling is thick and fully combined, it means the filling is ready.
-800x500-19.jpg)
4Molding and pressing the mooncakes
Before putting the dough into the mold, you need to prevent it from sticking to the mold by using cooking oil or flour to keep the final product intact.
You should flatten the dough, put the filling inside, and wrap it tightly, avoiding air pockets and preventing the crust and filling from separating. The ideal thickness of the crust is 0.3mm – 0.5mm. If the crust is too thick, it will be hard to bite, and if it is too thin, the crust will crack and the filling will leak out.
To prevent cracks and maintain the shape of the mooncake, you should press the mooncake into the mold immediately after wrapping the filling.
-800x500-15.jpg)
5Time, temperature, and baking methods for mooncakes
Before baking the mooncakes, you should preheat the oven at a temperature of 165 – 175 degrees Celsius for 15 minutes.
For the egg wash mixture, you can mix egg yolks, cooking oil, and a little water. You can also add syrup to make the mooncakes sweeter and have a nicer color. You should brush the egg wash 2-3 times and keep an eye on the temperature to make the mooncakes golden but without cracks on the crust.
When brushing the egg wash, you should brush lightly and thinly so that the mooncakes do not crack. After each baking cycle, you should take the mooncakes out, spray a thin and sufficient amount of water to moisten the surface of the mooncakes, let them cool down, then proceed to brush the egg wash.
The appropriate and recommended baking time for mooncakes:
- First baking cycle: Bake at 180 – 190 degrees Celsius for 5-8 minutes, depending on the size of the mooncakes.
- Second baking cycle: Bake at 190 – 200 degrees Celsius for 5-7 minutes.
- Third baking cycle: Bake the mooncakes at around 160 – 180 degrees Celsius until the mooncakes are cooked.
-800x500-17.jpg)
Tips for Successfully Crafting Delicious Mooncake Syrup

To craft the perfect mooncake, white granulated sugar must be carefully handled. Issues such as darkening, boiling over, hardening, and white deposits can be avoided by combining the sugar with warm water or a small amount of lemon juice. This careful preparation will ensure a perfectly delicious mooncake.


